Vector layer settings#
To edit a layer log in to the Web GIS.
To modify layer settings, open the group containing the layer (see Fig. 254., item 5), find the layer in the list and click on the pencil icon next to it.
It opens the Update resource page. On this page you can edit the settings standard for all types of resources (parent, description, metadata, access permission) and specific for vector layers:
edit fields and their aliases;
enable editing for vector features and annotations on the map;
enable and disable feature versioning.
Versioning allows the layer to be edited directly in QGIS via NextGIS Connect by multiple users at once.
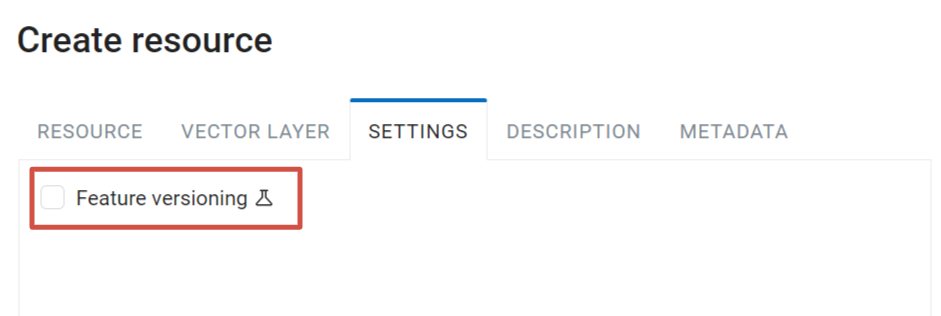
Fig. 430. Vector layer settings#
If you want all vector layers added to your Web GIS not to be versioned by default, it can be set in the Control panel.
Web GIS interface allows to edit geometries on the map and feature attribute values, add description and attachments (photos etc) to features of Vector layers and PostGIS layers.
Edit vector layer attributes table#
“Fields” tab contains a table with vector layer attributes (see Fig. 431.).
On this tab you can:
 Add a new field;
Delete a field by pressing the
 symbol at the end of the row;
Edit a field. Click on a table row to open the properties of the field.
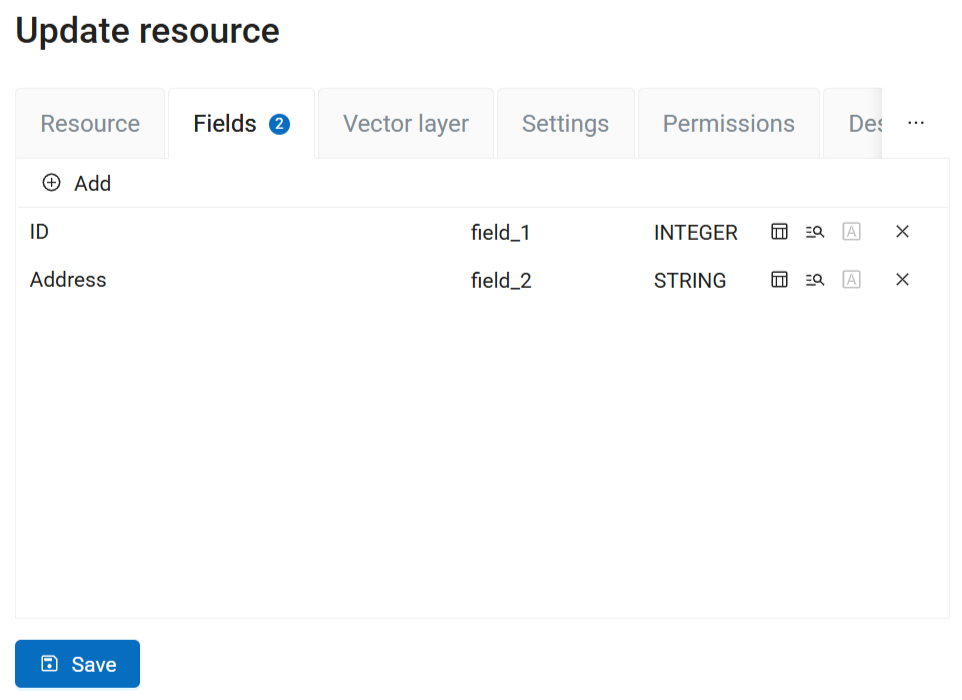
Fig. 431. “Fields” tab#
The table contains the following columns:
Display name that is used in the identification window instead of the keyname;
Keyname - technical name of the attribute, can be comprised only of plain latin symbols;
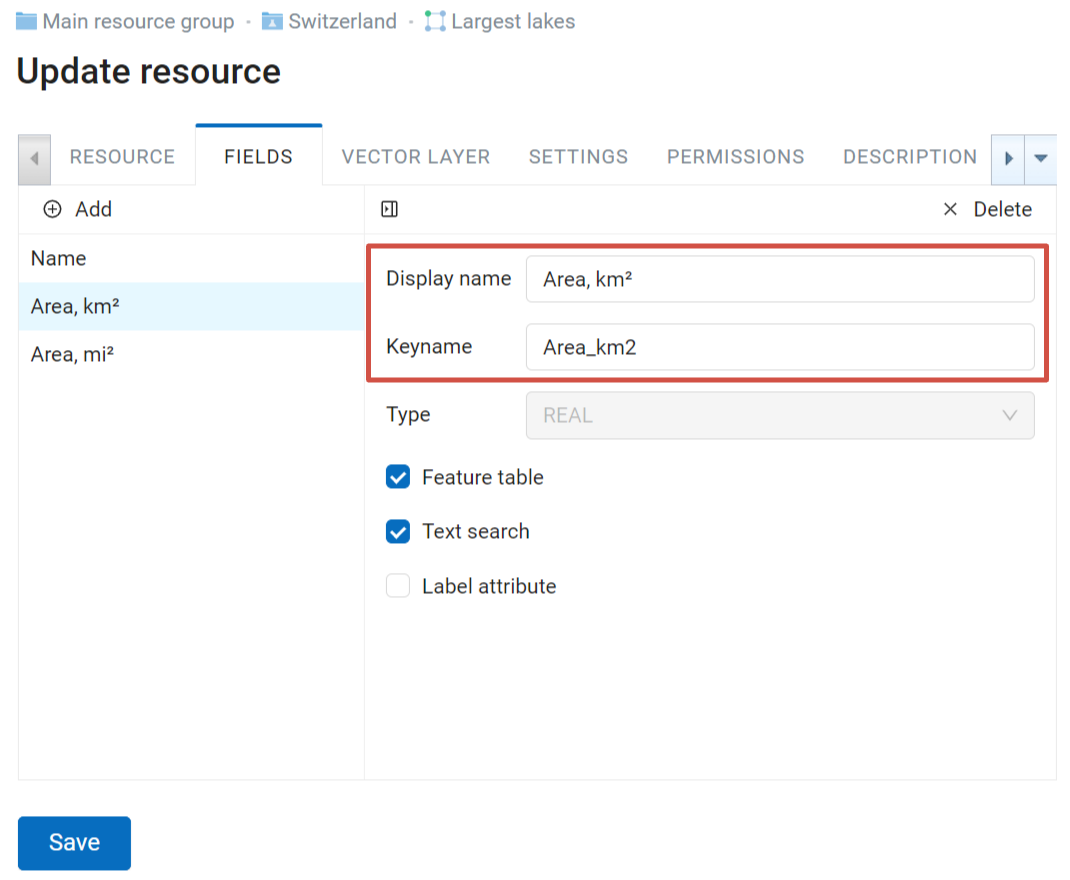
Fig. 432. Display name with superscript symbol and keyname of the field#
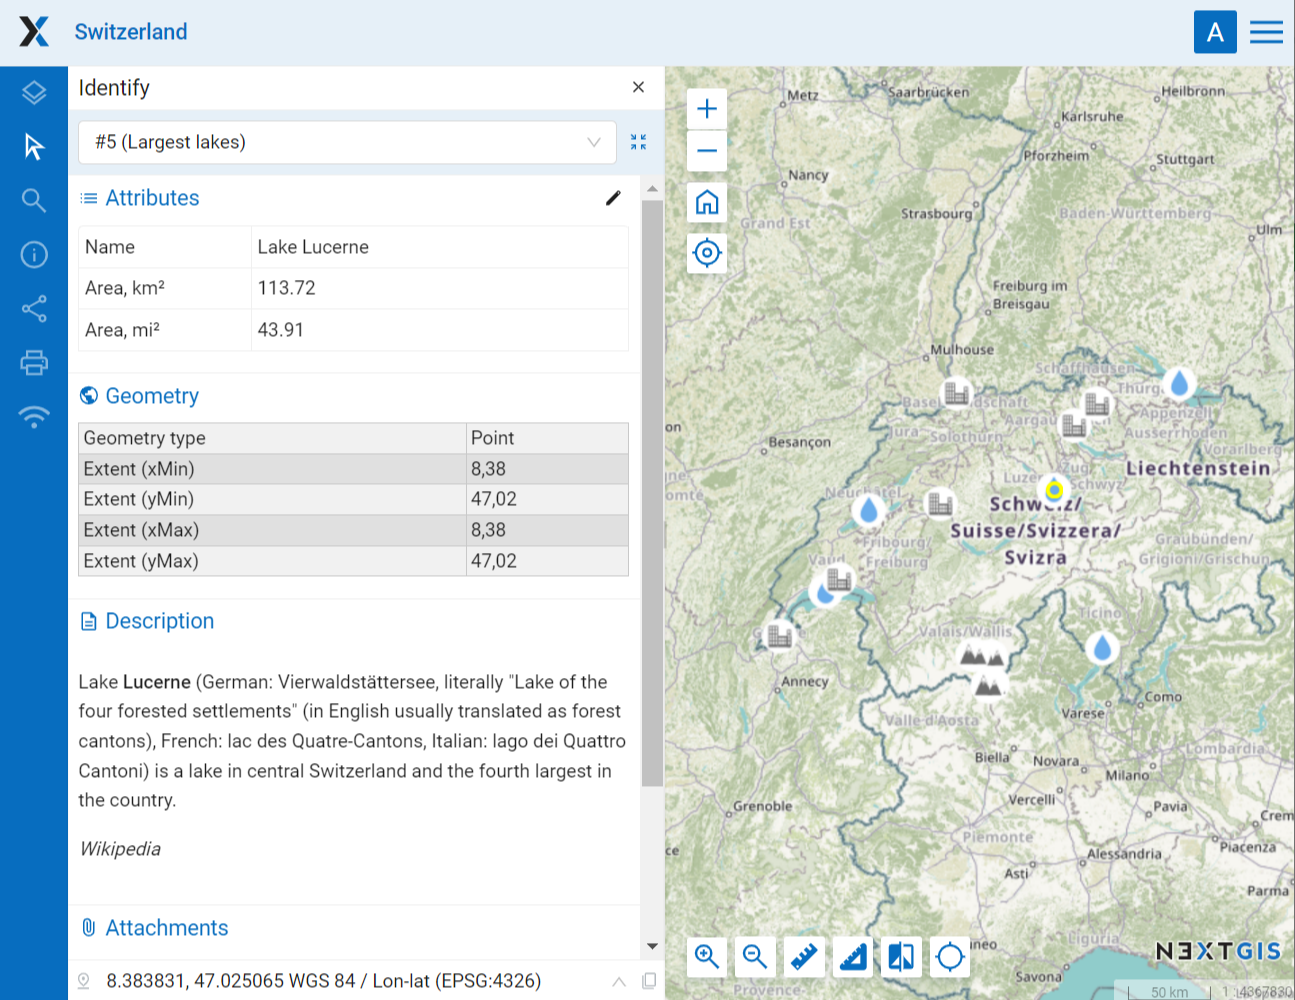
Fig. 433. The identification window. Names of the fields are displayed with superscript symbols#
Type - defines what data can be stored in the fiels:
INTEGER - numbers between -2147483647 and 2147483647, no decimals;
BIGINT - long numbers without decimals, between -9223372036854775807 and 9223372036854775807;
REAL - floating-point numbers, e.g. 44.4444;
STRING - a text of any length;
DATE - date;
TIME - time;
DATETIME - date and time;
BOOLEAN - logical field, possible values are “TRUE” and “FALSE”.
For the next three parameters a dark symbol means “on” and a light symbol means “off”.
 Feature table - the attribute is displayed in the identification window.
 Text search - you can disable text search in the values of the attribute.
 Label attribute - value from this fielsd is used as feature name for search results, identification and bookmarks.
Note
To modify the labels visisble on the map itself, use style settings
You can also add a Lookup table. It allows to select values of the attribute when you add or edit features.
To go back to the table view, click  Hide details in the top row of the form.
After all edits are made, click Save.
Connect lookup table to a field#
First create a Lookup table resource with the desired list of key-value pairs.
To connect a lookup table to the layer, open the Edit dialog and to to the Attributes tab. Select the attribute, then click on the downward arrow in the Lookup table field.
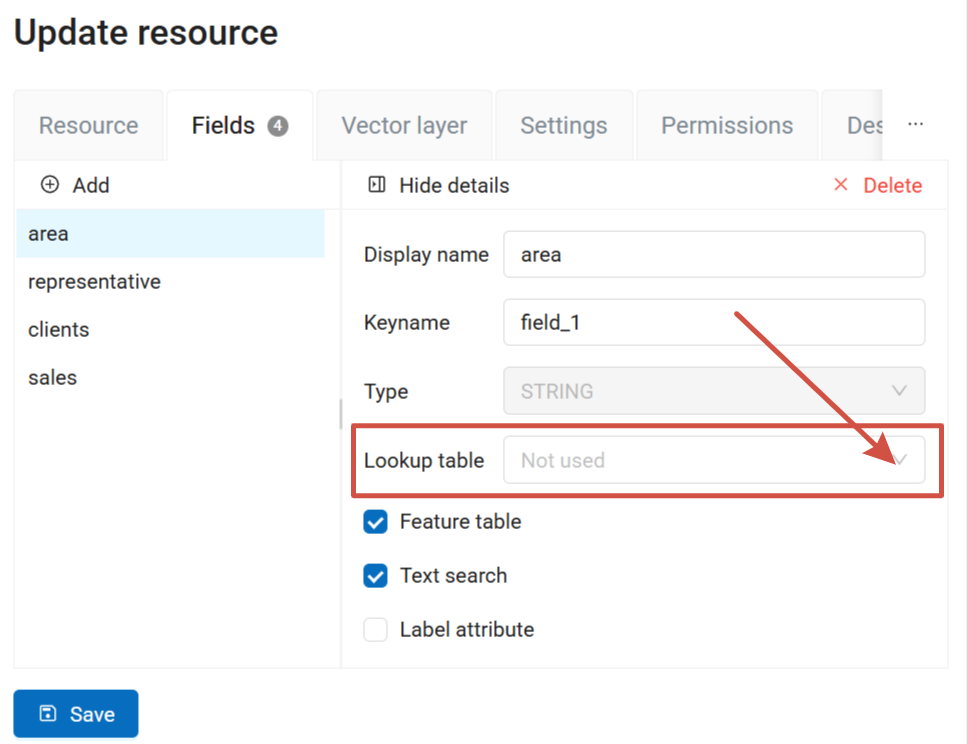
Fig. 434. Connecting lookup table to a field#
Then select the lookup table resource in the pop-up window.
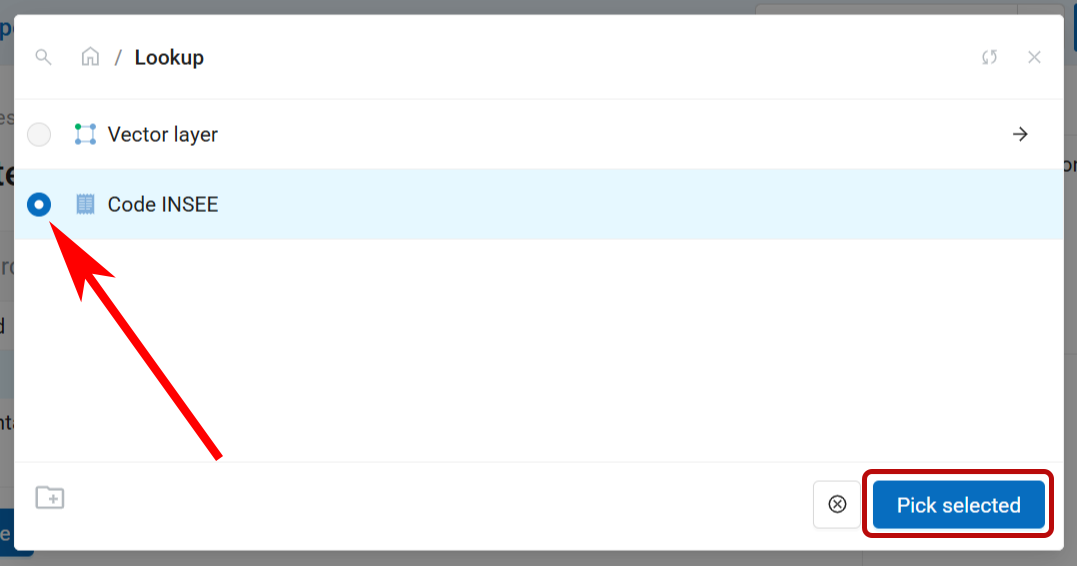
Fig. 435. Adding lookup table to a field#
In the feature table you’ll see the detailed name, while the short key will be stored in the data.
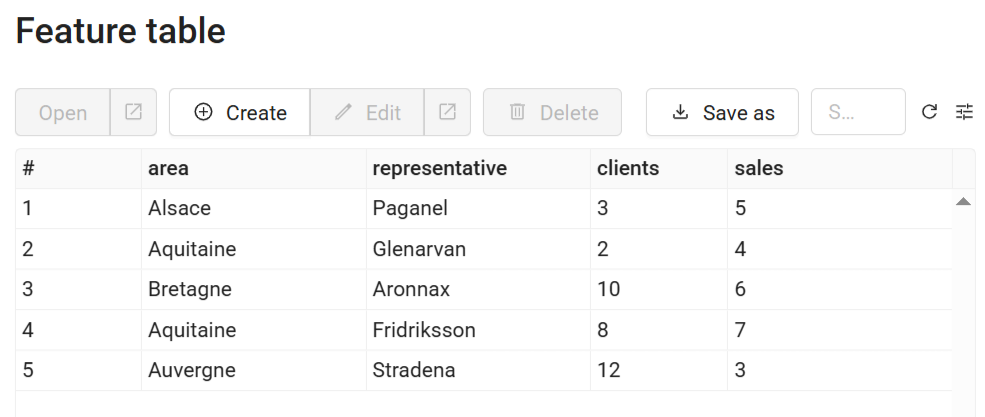
Fig. 436. Feature table with connected Lookup table: names displayed#
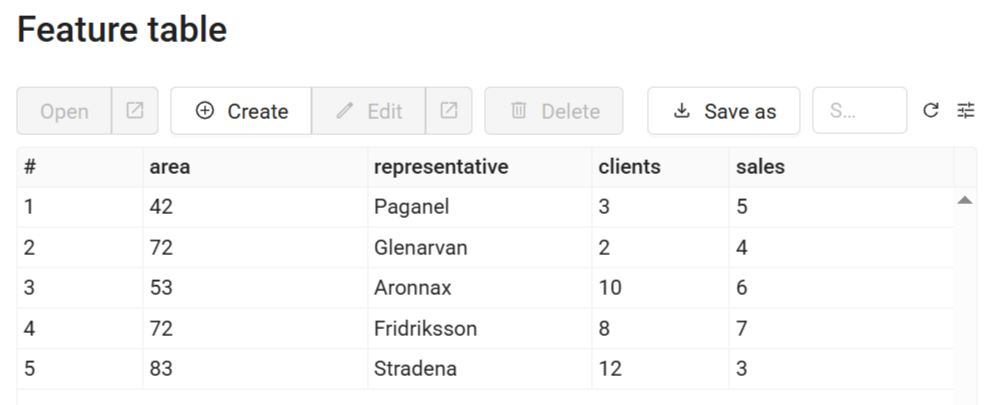
Fig. 437. Feature table without the Lookup table: numeric code displayed#
In the feature preview as well as in the Identify panel on the Web Map you’ll see both parts of the key-value pair: first the key enclosed in square brackets, then the longer value.
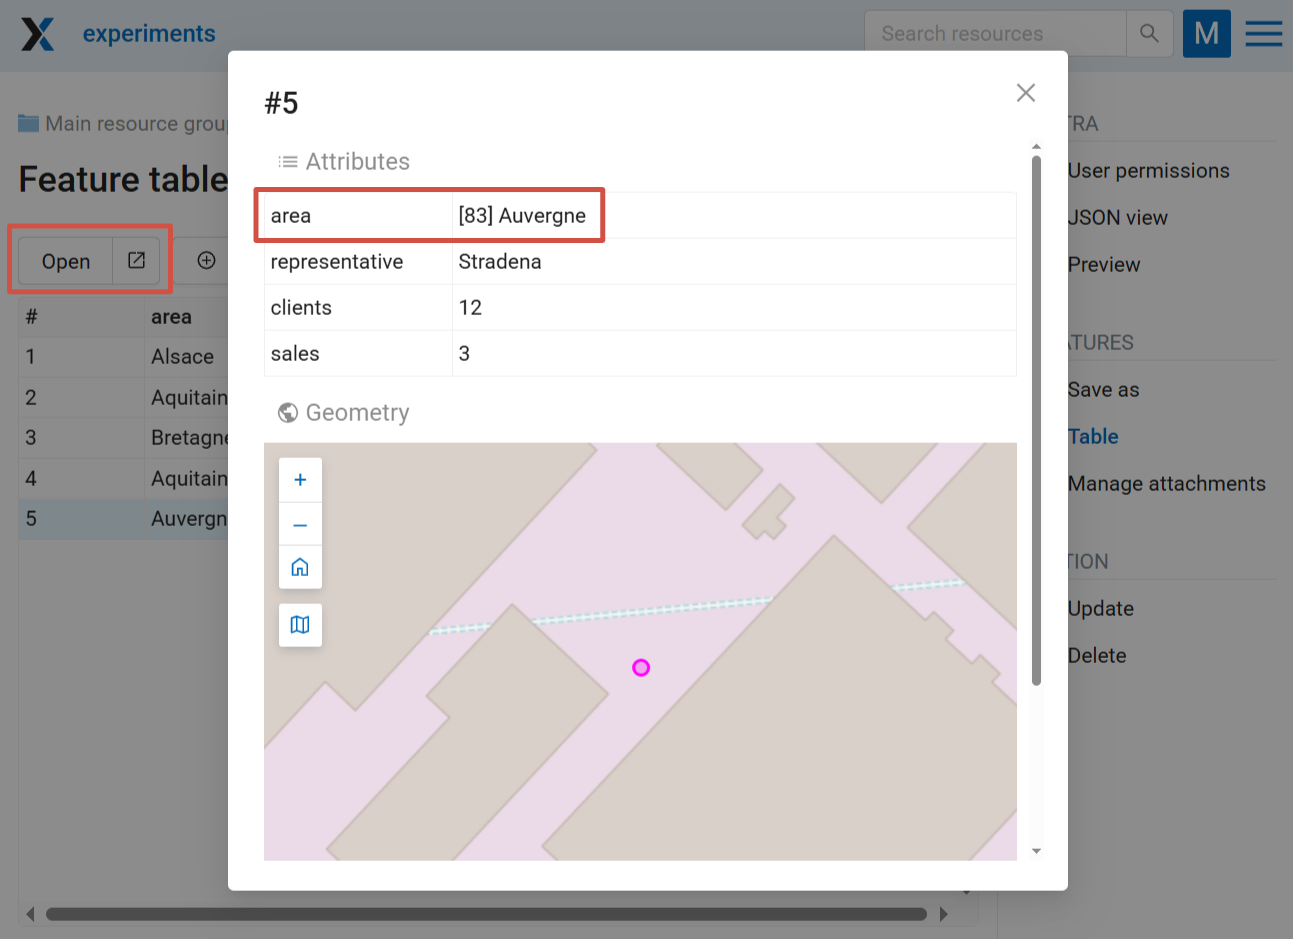
Fig. 438. Feature preview. Both the code and the name are displayed#
To use the same list of values while gathering data in the field, export the Lookup table as CSV and add it to the field of the data collection form.
Delete or replace all features#
NextGIS Web software allows to delete all features of a layer or replace them by uploading a new file.
Click on the pencil icon next to the layer.
In the “Vector layer” tab select the action from the dropdown menu.
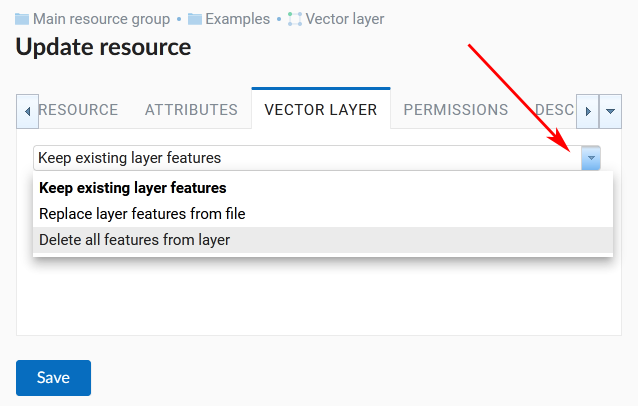
Fig. 439. Options to edit the layer file#
You can delete all the features. This will result in an empty layer of the same structure that you can add new features to. To do so, select “Delete all features from layer”, tick to confirm and press Save.
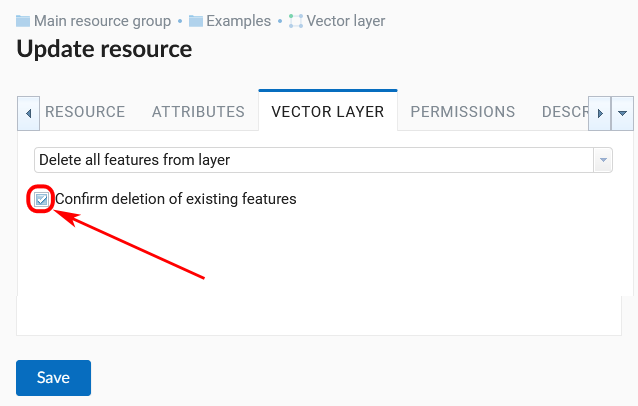
Fig. 440. Deleting all features from the layer#
You can replace all the features by uploading a previously prepared file. Select “Replace layer features from file”. Open the file or drag and drop it into the frame.
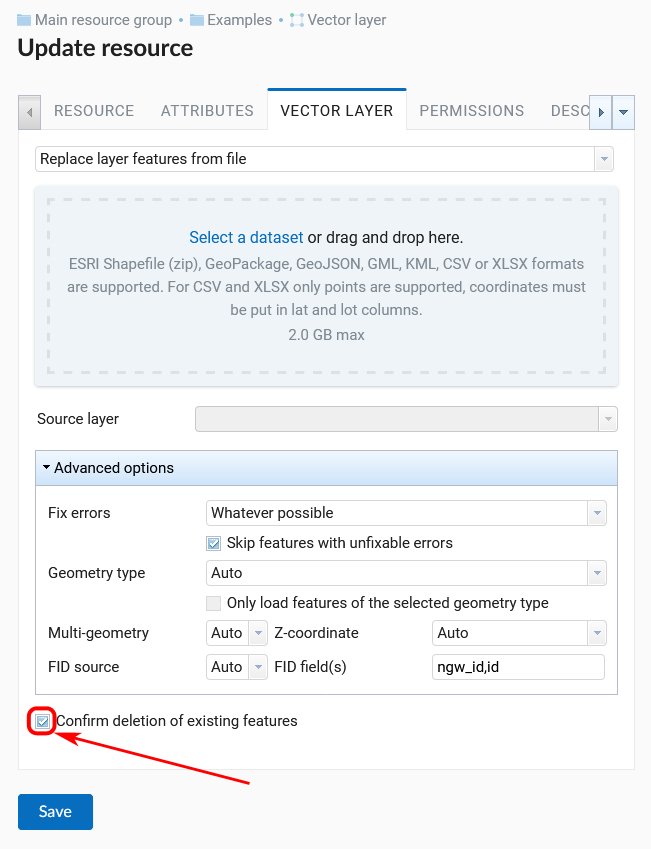
Fig. 441. Replacing layer file#
If the file has multiple layers, select the one you need in the “Source layer” field. You can also set up other properties, as while creating a new vector layer.
If you replace the file, not only the features, but the structure of the attributes and other properties will be changed to match the new file.
Note
You can use any type of geometry to replace the existing file. Keep in mind that if the geometry type changes, all styles connected with the layer may stop working, because they do not contain markers for other geometry types.