Spacial Reference Systems#
You can manage spacial reference systems using Control panel. It allows browsing the list of added SRS, importing SRS from the catalog and creating your own.
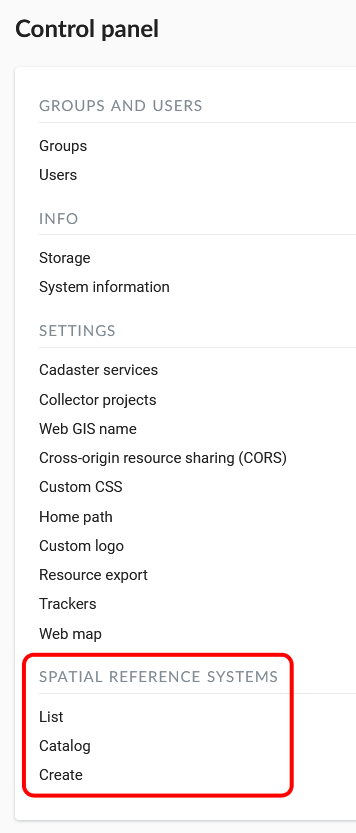
Fig. 575. Spacial reference systems in the Control panel#
To see which SRS are already added, select “List”. In this list there are two SRS by default: «WGS 84 / Lon-lat (EPSG:4326)» and «WGS 84 / Pseudo-Mercator (EPSG:3857)».
Custom Spacial Reference Systems#
Note
Only users with administrative permissions can add and modify SRS.
If needed, you can import additional SRS from the catalog or create your own.
Import SRS from catalog#
To add an SRS from the catalog, go to the Control panel and in the Spacial reference system section press Catalog (or, if you are viewing the SRS list, press Import from catalog). You will be redirected to the catalog page. Start typing the name of the SRS in the search bar. When you find the desired SRS in the search results, press the icon with the arrow next to it.
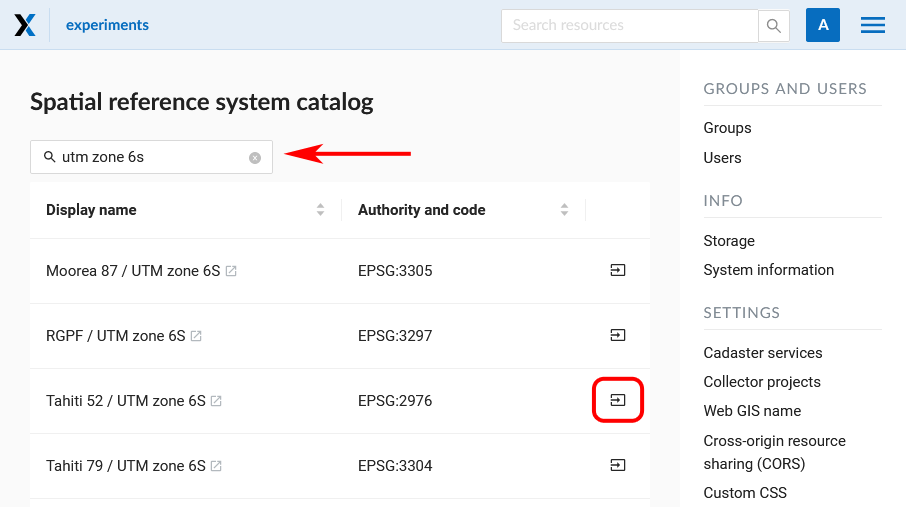
Fig. 576. Search results in the catalog#
You will be redirected to the import page. Here you can modify the name of SRS to be displayed in your WebGIS.
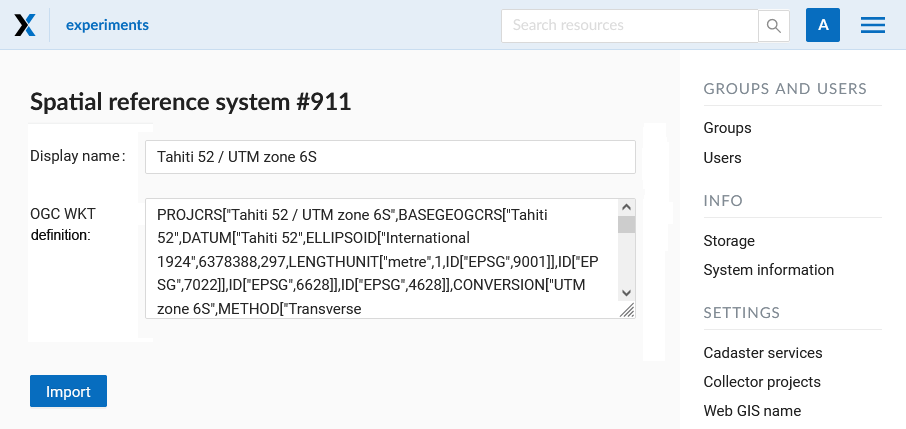
Fig. 577. Adding SRS from catalog#
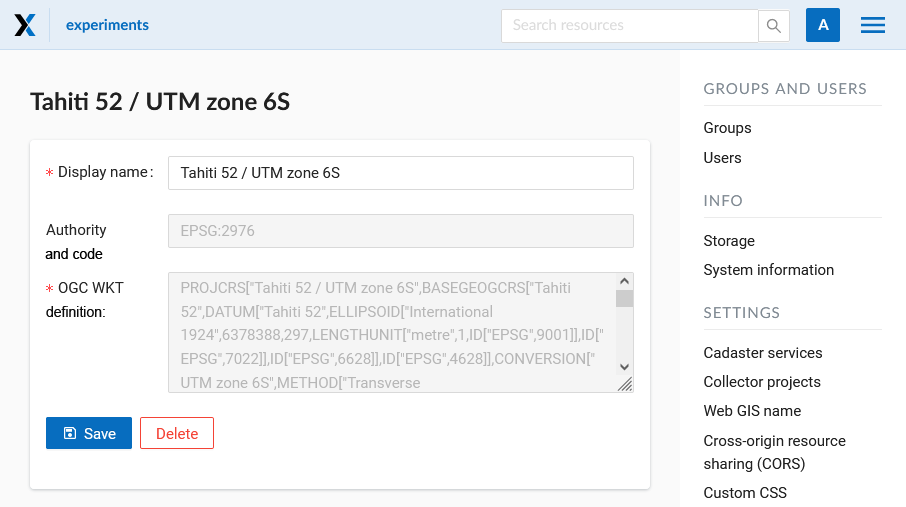
Fig. 578. Completing import#
On the next page, press Save to complete the import.
Creating new SRS#
To create a new SRS open “Control panel” in the main menu and press Create in “Spatial reference systems” (or press Create while on the SRS list page).
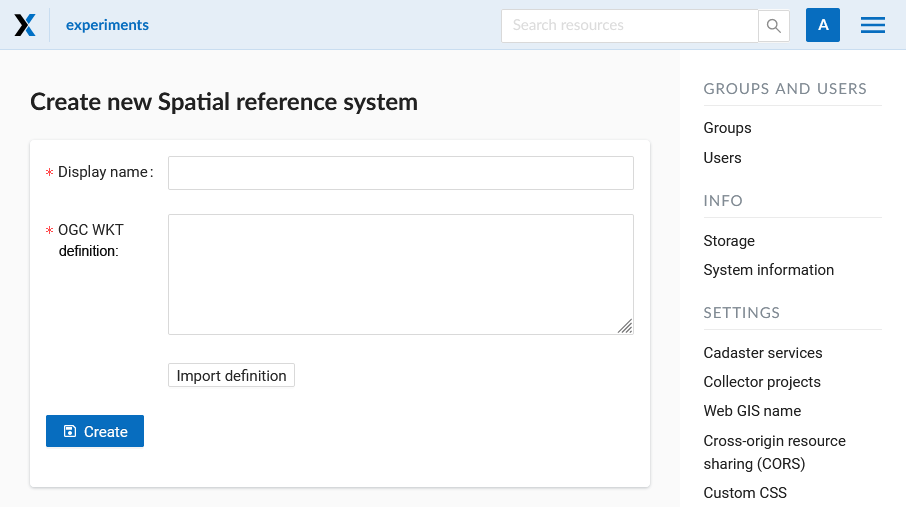
Fig. 579. Creation of a new SRS#
You can give an SRS display name and enter its definition in OGC WKT format. You can also import definitions from common formats as PROJ, MapInfo and EPSG, after the import they will get converted to OGC WKT format. Then press “Create” . The new SRS will appear in the list.
How to edit or delete SRS#
You can change the display name of any SRS by clicking the pencil icon in the corresponding row of the list. If you created an SRS yourself, you can also modify its OGC WKT definition.
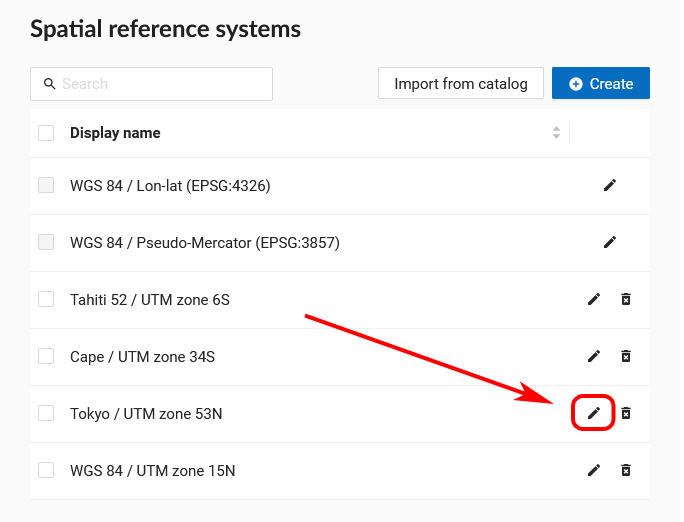
Fig. 580. Editing icon in the SRS list#
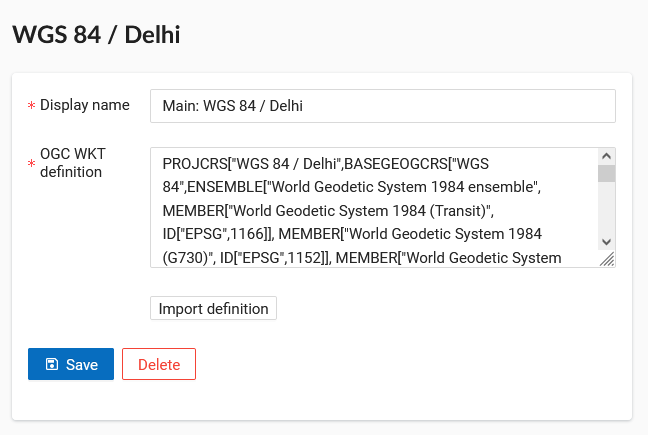
Fig. 581. Editing SRS#
To delete an SRS, press the trash can icon in the corresponding row of the list. A small dialog window will appear. Confirm that you want to delete the SRS by pressing OK.
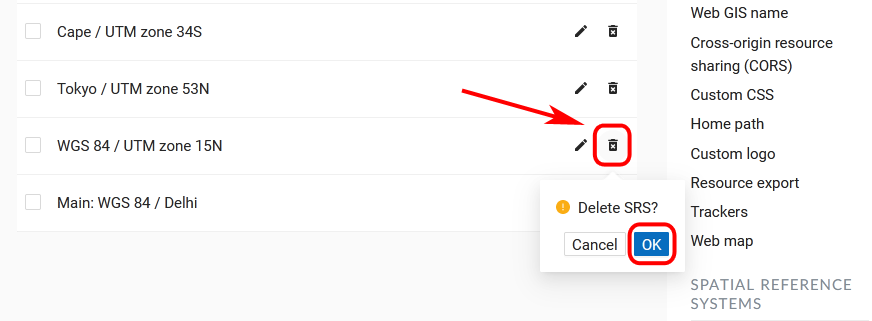
Fig. 582. Deleting custom SRS#
After the operation is completed, a message will appear announcing “SRS deleted”. The two default SRS, «WGS 84 / Lon-lat (EPSG:4326)» and «WGS 84 / Pseudo-Mercator (EPSG:3857)», can’t be removed.
Usage of additional SRS#
The added SRS can be used for various purposes:
To capture coordinates on Web maps. If you have set up additional SRS (one or several), you can now conveniently capture coordinates in this SRS from anywhere on the map:
To export vector layers. All custom SRS are also available for data export. See this section for details.
To extend API requests. Support for custom SRS is gradually added to NextGIS Web API too. For example, this request will return a feature in a required SRS (in example we use custom SRS identifier 990002)
/api/resource/{id}/feature/{fid}?srs=990002
SRS identifier#
For API or some Toolbox tools (e.g. Web Map to QGIS project) you need to know the identifier of the SRS.
If it’s a standard SRS that has EPSG code, just use the numbers of the code, e.g. 3857 for EPSG:3857.
If it’s a custom SRS added via definition that does not has EPSG code, it gets a unique code within a specific Web GIS. To view it, open the SRS in the edit mode, the identifier is at the end of the URL:
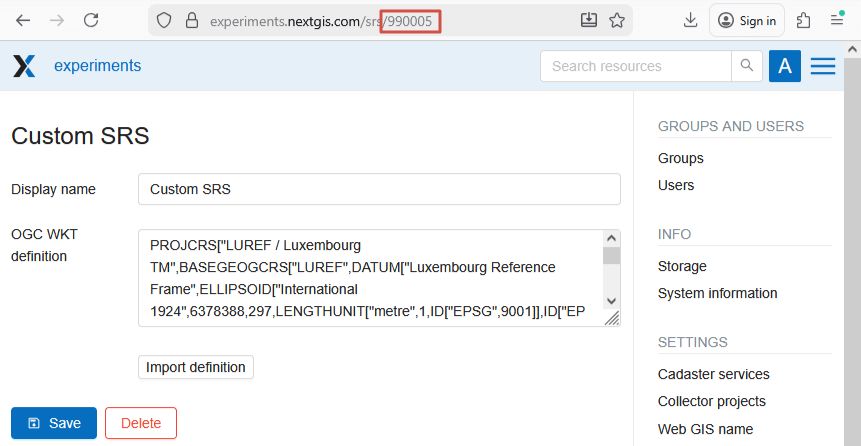
Fig. 583. Identifier of a custom SRS#
Custom SRS support for external PostGIS Databases#
A common case for Web GIS users is adding an external PostGIS/PostgreSQL database while creating a PosGIS layer. These layers often get incorrectly displayed in the Web GIS. It happens when the spacial reference system has incorrect definition in the external database. To make the Web GIS-DB complex work efficiently, here’s what you need:
External database must have a table of SRS descriptions spacial_ref_sys.
In the geometry column (usually called “geom”) a SRS must be assigned.
The ID of the assigned SRS must be included in spacial_ref_sys.
Data in the external DB must actually be in that coordinate system, a.i. the SRS definition must correspond to the data.
If all the above requirements are met, then whatever SRS you use in your database, layers created in Web GIS will be reprojected “on the fly” and displayed correctly along any other data you have in your Web GIS.
To check if everything works correctly use PostGIS diagnostics.