Managing Feature table#
In NextGIS Web you can manage your geodata directly, without needing to display it on a map. View, filter, create, edit and delete features using Feature table.
You can open the Feature table on a separate page or on a Web Map.
See also
Edit the layer fields used to form the feature table.
Feature table on a separate page#
Press the  “Table” icon opposite the resource name or select the Table action for the vector layer in the features pane on the right.
Feature table allows to perform the following operations with the selected entry (see Fig. 334.):
Create new entry (new feature)
Save as a file (choose between advanced and quick export)
Select displayed fields in the table settings
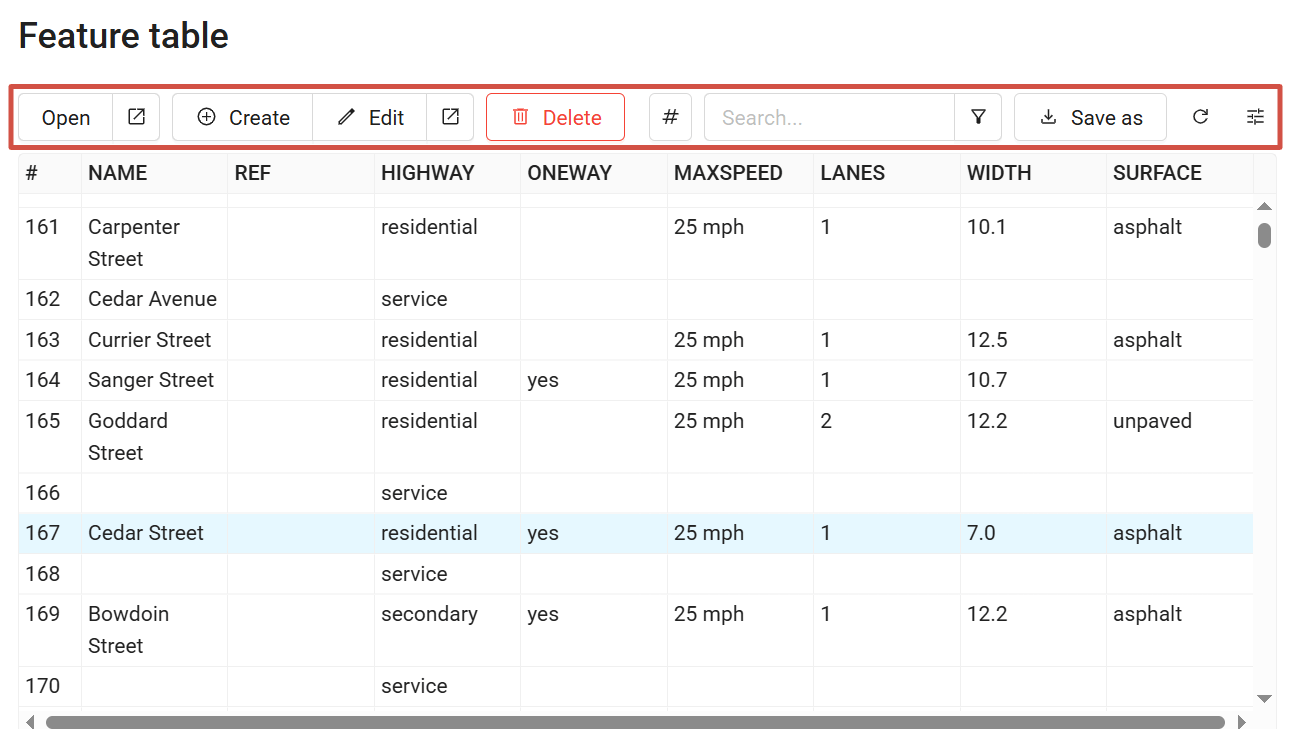
Fig. 334. Feature table tools#
Also you can open the Feature table on the Web Map. In this case there are some additional map-related tools.
Feature table on a Web Map#
There is another way to open Feature table.  open a Web Map that has the layer in question added to it.
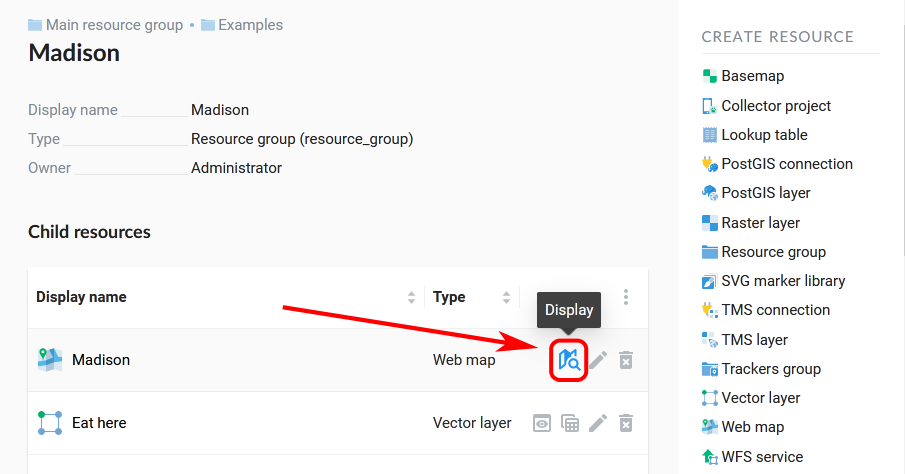
Fig. 335. Opening a Web Map from the list#
A Web Map will be opened with a layer tree (left) and a map (right). To view a feature table select the required layer in layer tree and then select “Feature table” command in the Layer drop down menu at the top of layer tree Fig. 336.:
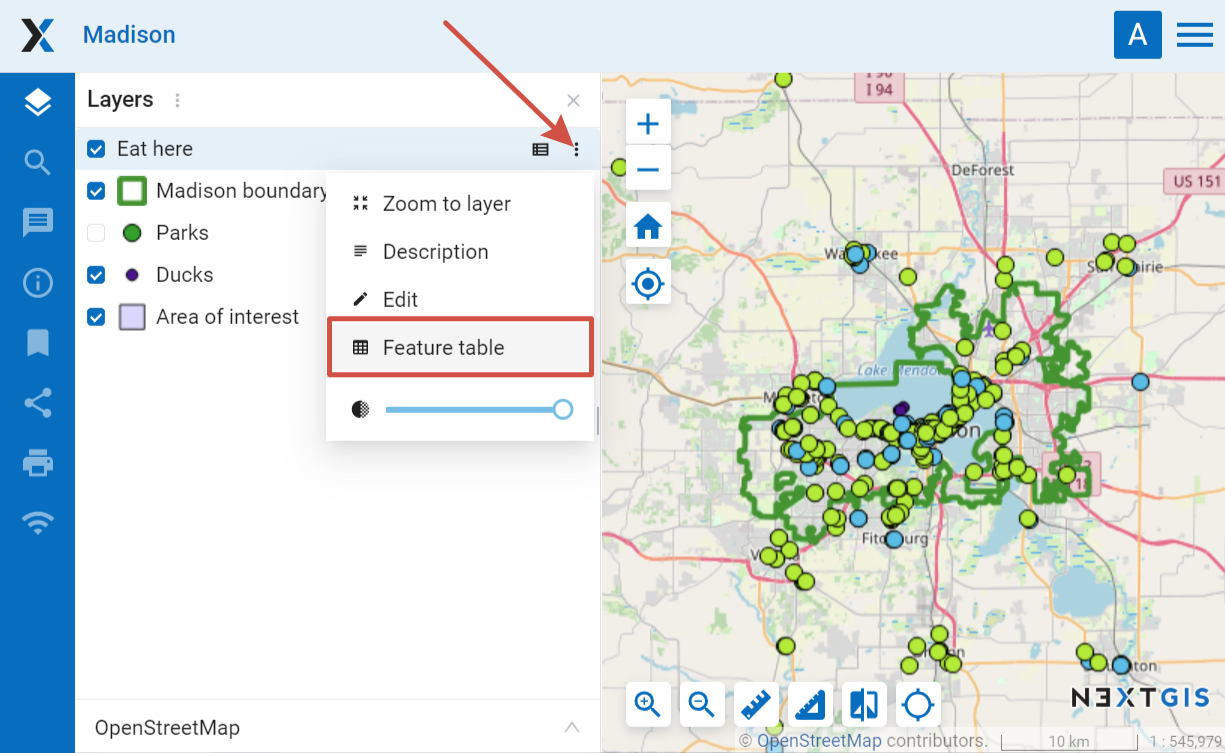
Fig. 336. Opening feature table from the map#
All tools of the Feature table are available, as well as some map navigation tools:
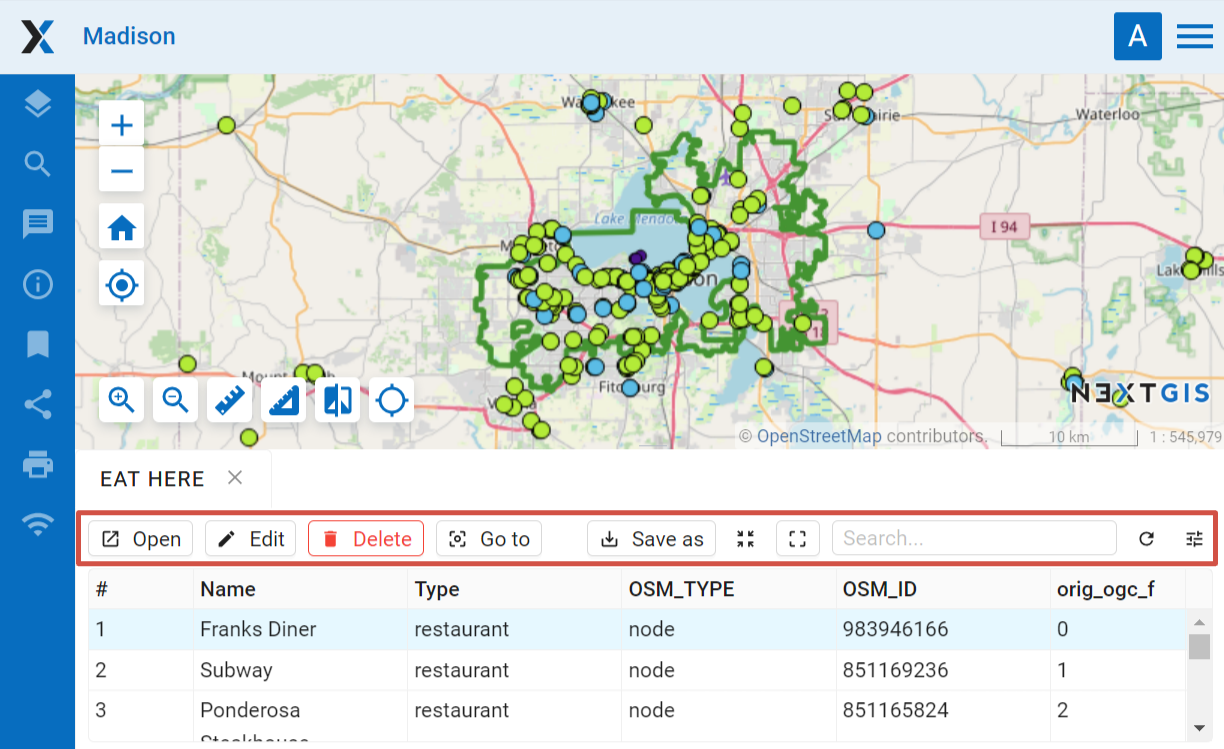
Fig. 337. Actions for the selected record in feature table#
 Go to (after a click the selected feature will be displayed on the map)
 Zoom to filtered features

Select a row in feature table to navigate to the feature on a map, it will be highlighted (see Fig. 338.). For the selected feature you can open a window with its properties, edit it or delete it.
In feature table tab you have an option to dynamically filter records. When user types a text the contents of the window are filtered leaving only the records that match the search text. Filter by area option is also available (more on how to use it).
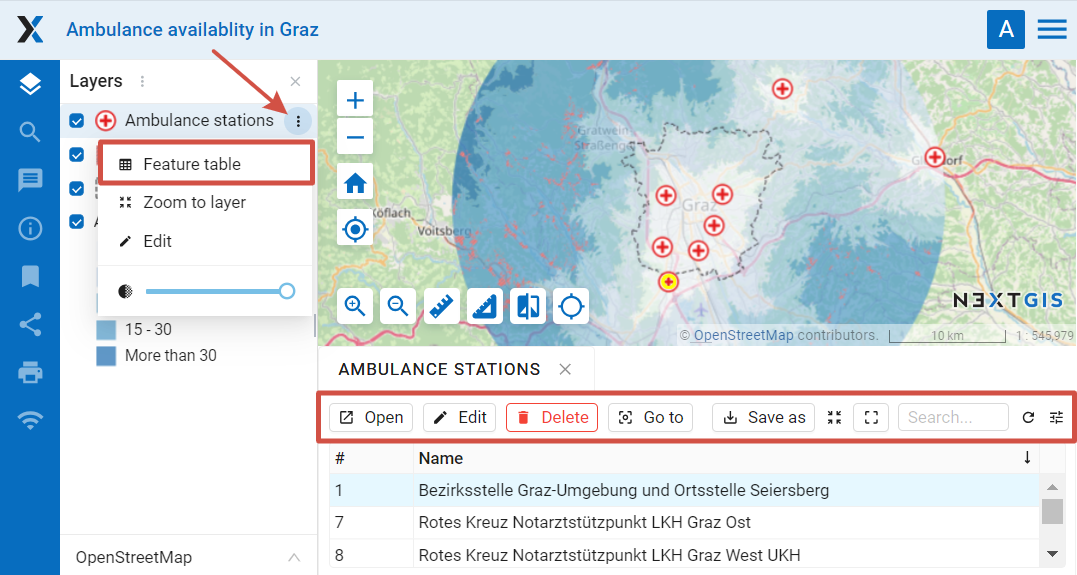
Fig. 338. Feature table of the selected layer on a Web Map#
Search and filter#
Click on the header of any column to sort the table by that attribute’s values.
In the top right corner you’ll find the search bar. Enter any text in it. The table contents are filtered, displaying only the features that have the search text in one of the attributes.
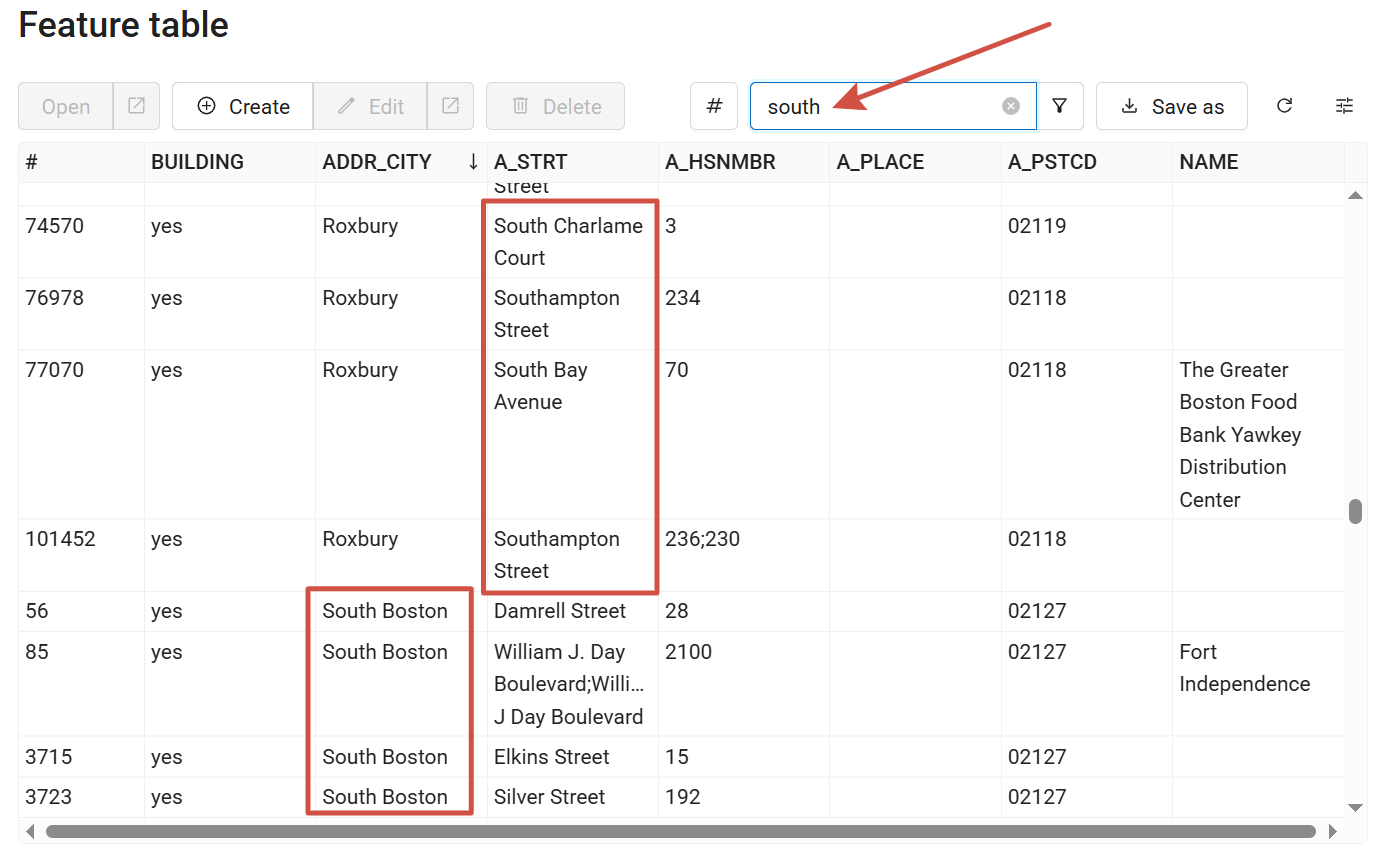
Fig. 339. Text search#
You can also create more complicated filters. Click on the funnel icon  next to the search bar and add filter conditions. You can use logical operators AND (select “ALL”) and OR (select “ANY”).
Available conditions:
Equal / Not equal
In list / Not in list
Is NULL / Is not NULL
Matches / Does not match (ILIKE operator, case insensitive)
For example, there are several roads named “Adams Street” in the Boston area, and we need to filter out the bigger ones (OSM tag “highway=tertiary” and “highway=tertiary_link”) and only inspect the smaller ones. Add two conditions: 1) NAME is Equal to “Adams Street”; 2) HIGHWAY is Not In List “tertiary”, “tertiary_link”. Select “ALL” in the top left corner, that means that both conditions should be satisfied.
You can select a value from the dropdown list or start typing to find the one you need.
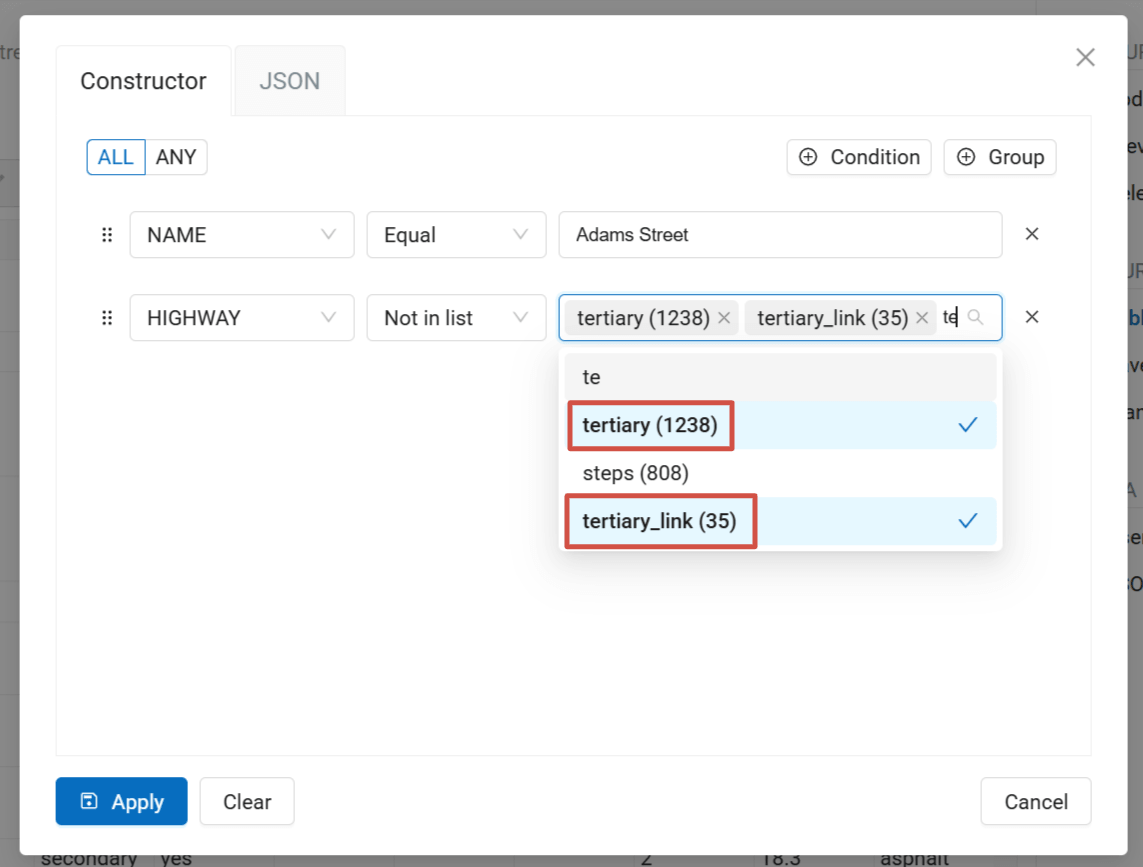
Fig. 340. Filter conditions that must both be satisfied#
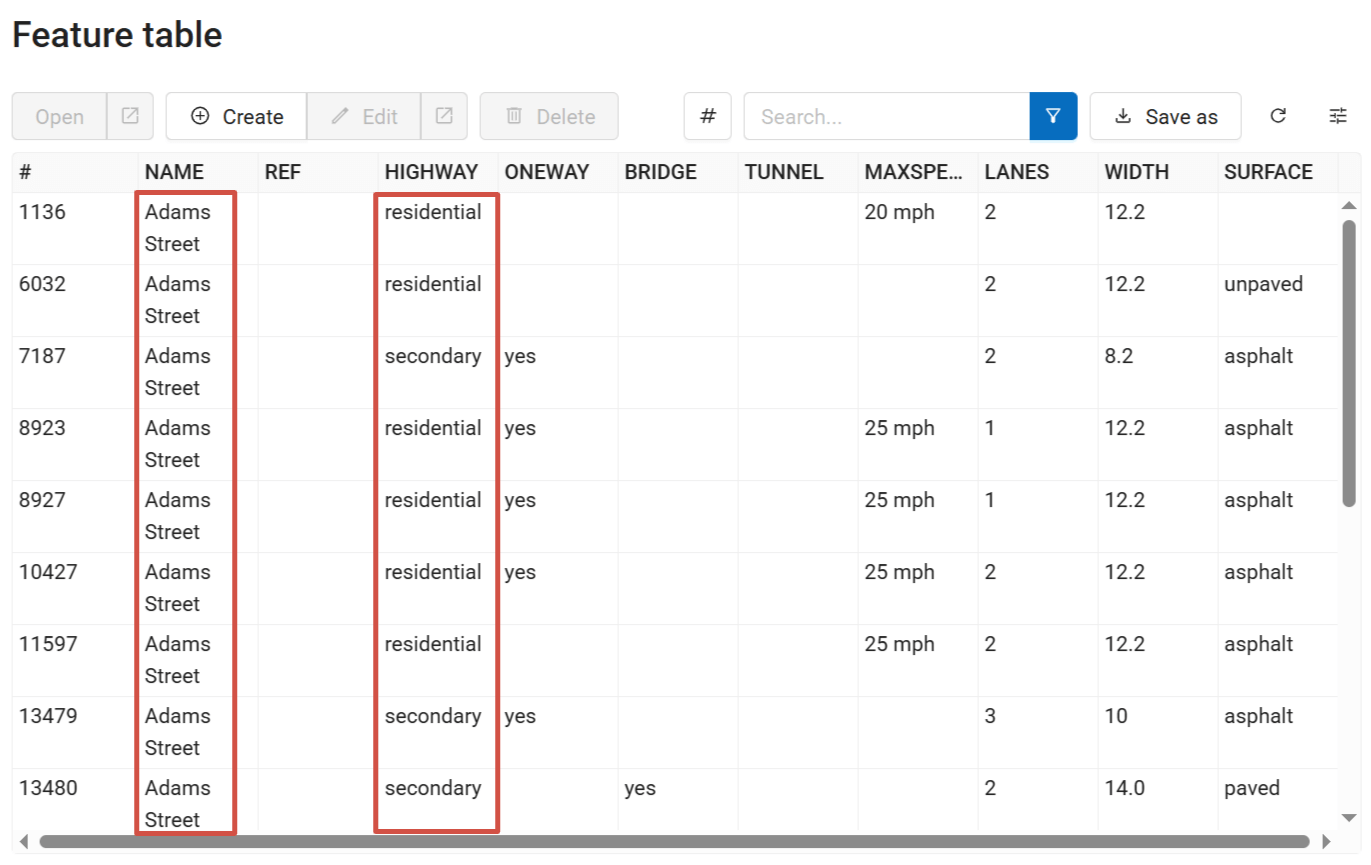
Fig. 341. Filtered entries#
Filter layer features on the Web Map by area#
NextGIS Web has a tool in the Feature table that filters all layer features within a selected area. To choose area limits just draw them on the Web Map.
Open the feature table and click on the button. In the dropdown menu select the geometry of the area:
circle (click twice on the map, to choose the center of the circle and its size, the radius length is shown in meters)
line (features intersected by the line will be filtered)
rectangle (click on diagonally opposite apexes)
free-hand drawn polygon (each click creates an apex, the area covered by the polygon is highlighted; to finish the shape, double-click on an apex, the polygon will be completed automatically)
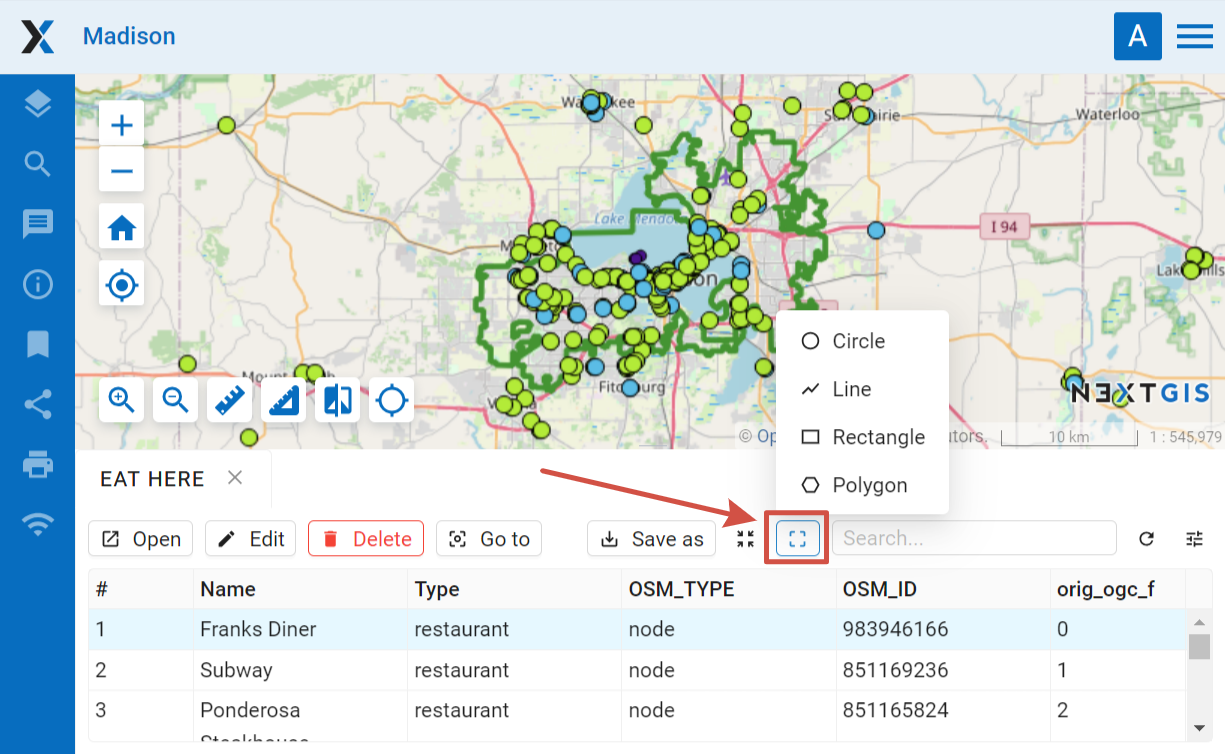
Fig. 342. Selecting filter geometry#
Now the feature table only contains the features within the selected area. The tool button will have the current area shape on it. In the dropdown menu you can use one of the following options:
Show/Hide the outline and fill of the selected area
Zoom to the filtering area
Clear filtering geometry
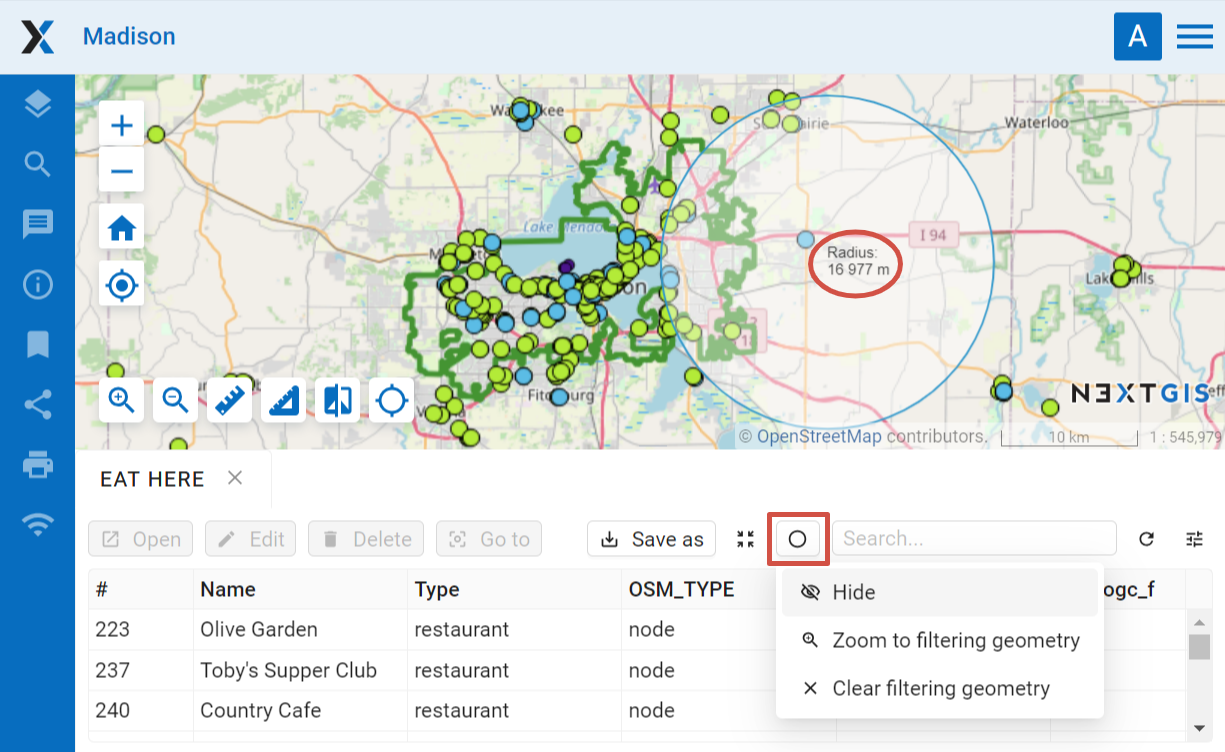
Fig. 343. Filter actions#
To set the map extent displaying all the filtered features, click .
You can use quick export to save the filtered features in a variety of common geodata formats. Click Save as and in the dropdown menu select either quick export with default settings or advanced export to modify the settings.
See feature filtering in action:
Watch on youtube.
View feature entry#
You can view any entry of the feature table in a pop-up or on a separate page. Select the entry and click Open.
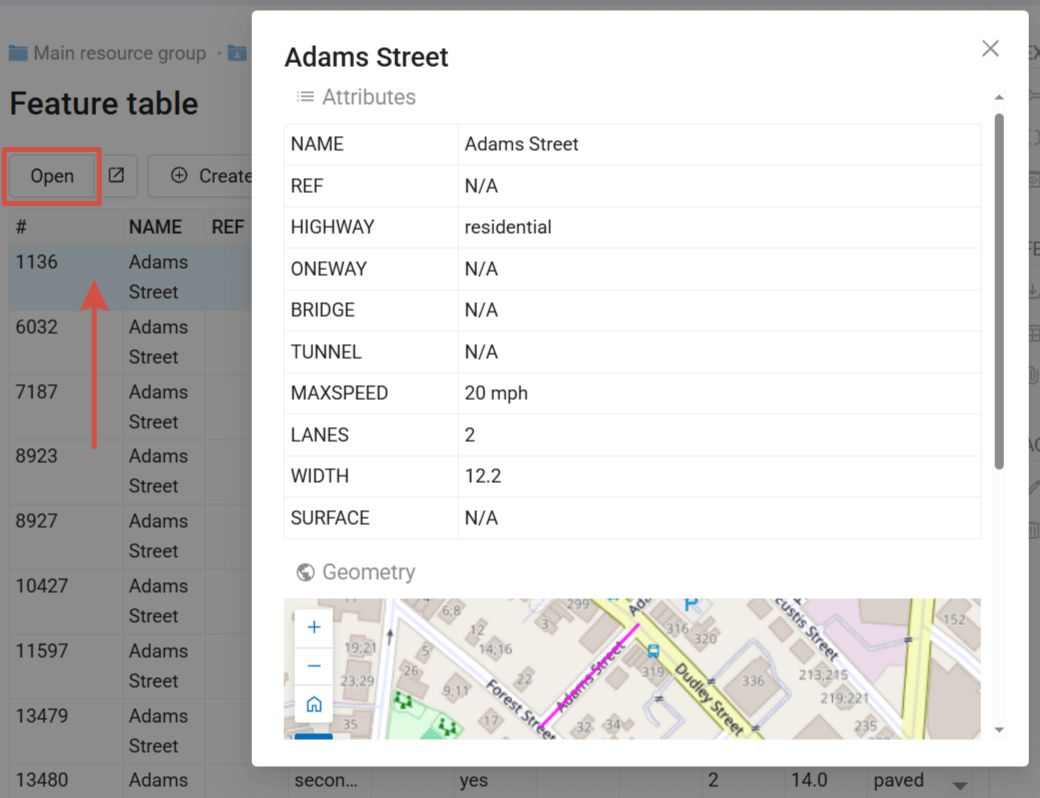
Fig. 344. Viewing feature entry#
Click the  icon next to the Open button to view the entry on a new page.
Create new feature#
You can use the Feature table to add a new feature to the layer. Click  Create.
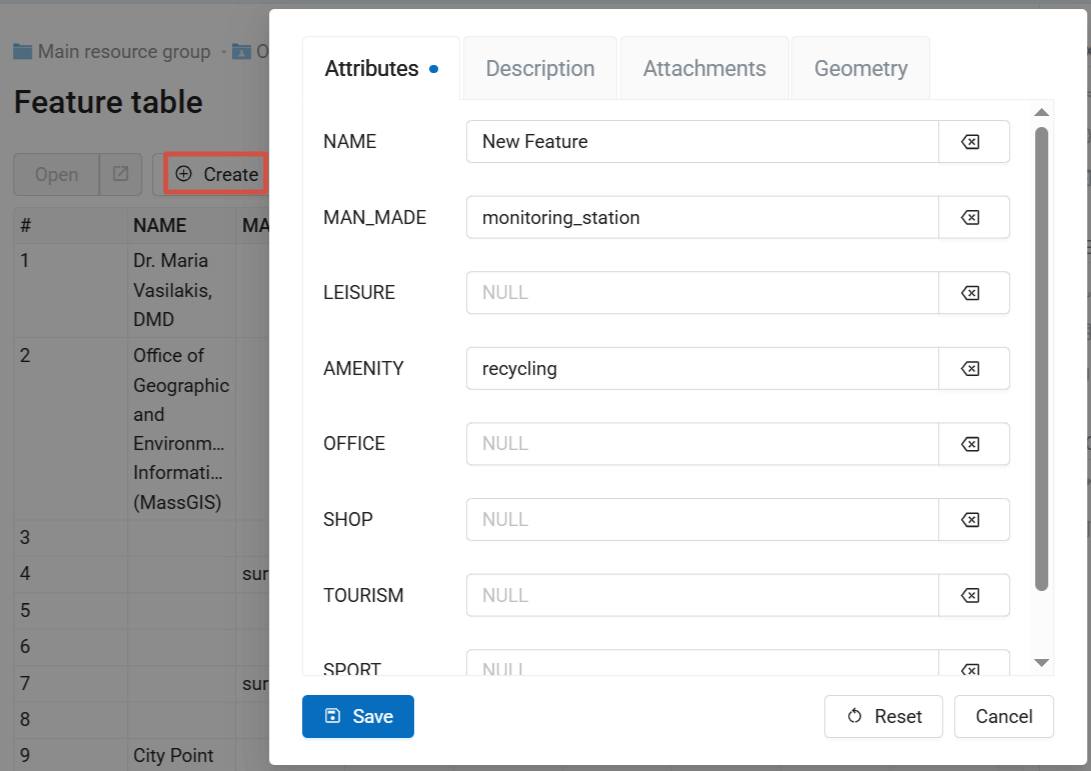
Fig. 345. Creating new feature: enter attribute values#
You can add a custom Description and Attachments on the corresponding tabs. The number of attachments is not limited. For each attached file you can add an indivisual description.
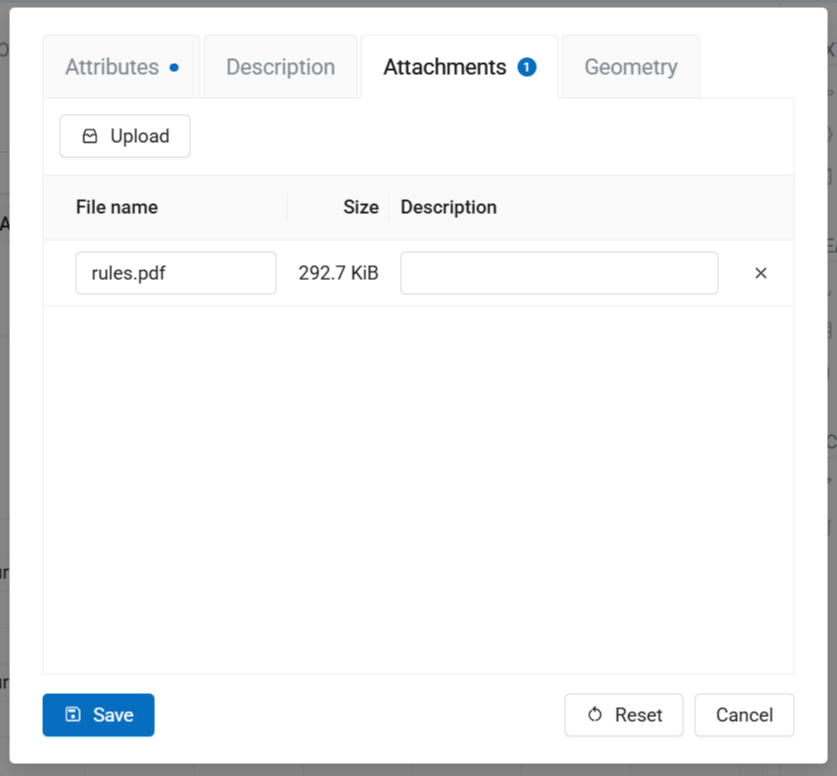
Fig. 346. Attachments tab#
On the Geometry tab you can draw the feature’s geometry:
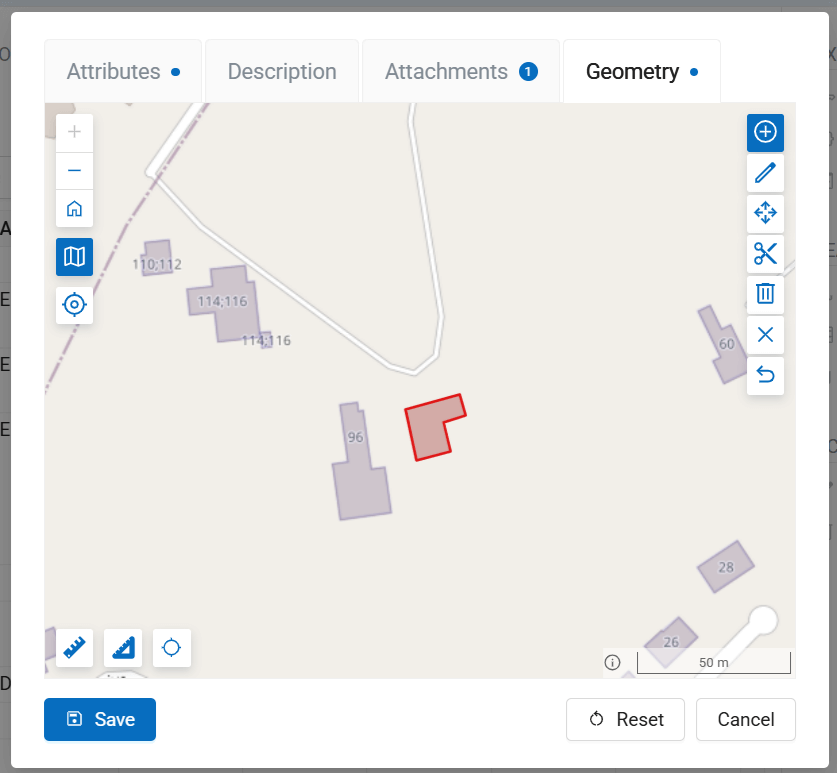
Fig. 347. Creating geometry for the new feature#
Click Save to finish creating new feature. An entry will be added to the Feature table.
Edit features#
Select an entry and click  Edit. In the pop-up dialog you can modify the attribute values, description and geometry and manage attachments.
Tabs that have unsaved changes are marked by a blue dot.

Fig. 348. Editing feature description#
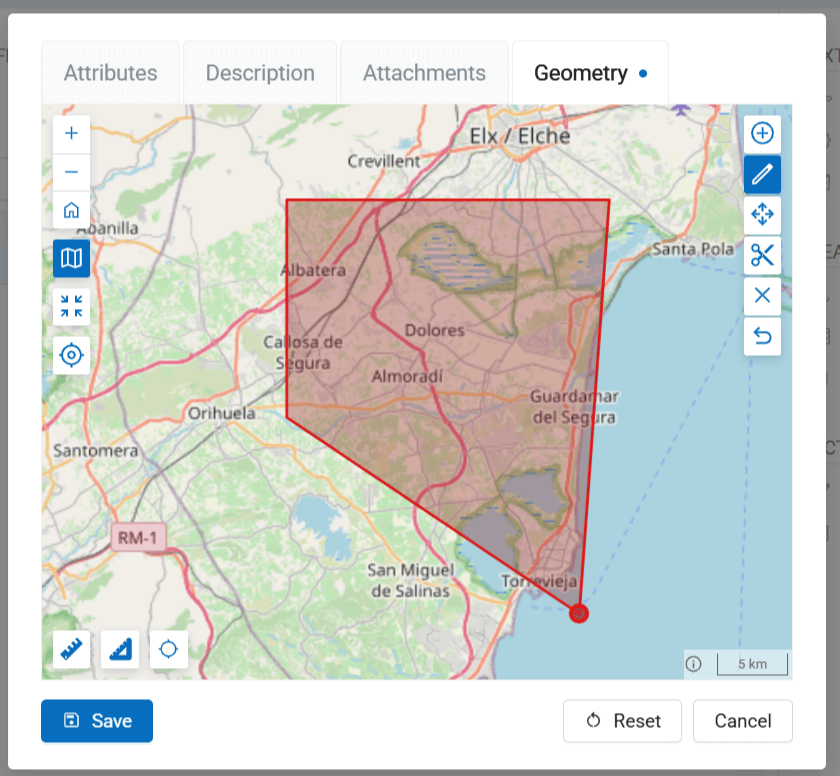
Fig. 349. Editing geometry#
Click Save to finish editing. All the edits are saved to the layer.
You can also edit features on a Web Map or in the desktop app QGIS via NextGIS Connect plugin.
Delete feature#
You can use Feature table to delete features from the layer. Select the entry and click  Delete.
Confirm deletion in the pop-up dialog.
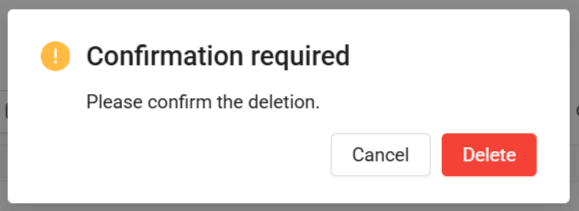
Fig. 350. Deleting feature#
Export to file#
To quickly save the filtered entries to a file, click Save as, then in the dropdown menu select Quick export and choose the file format.
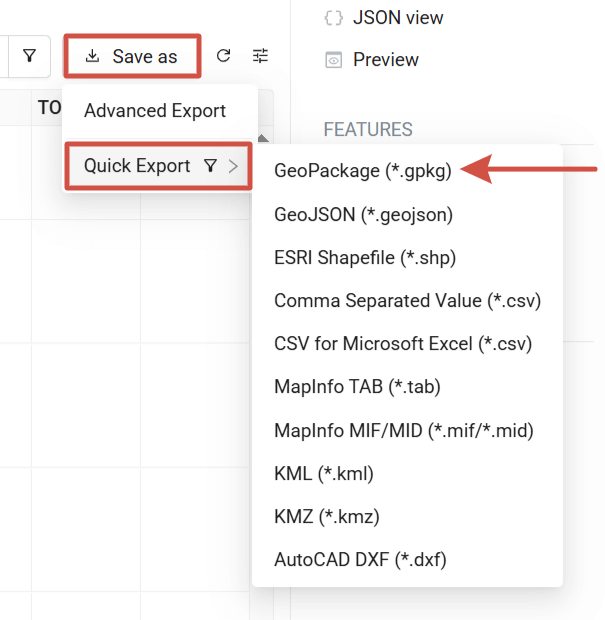
Fig. 351. Quick export#
Also you can select Advanced export and customize the settings (more on export settings).
Displaying selected fields and feature edit information#
You can select which fields of the feature table to display. Press “Open table settings” button in the right corner and untick the fields you want to hide.
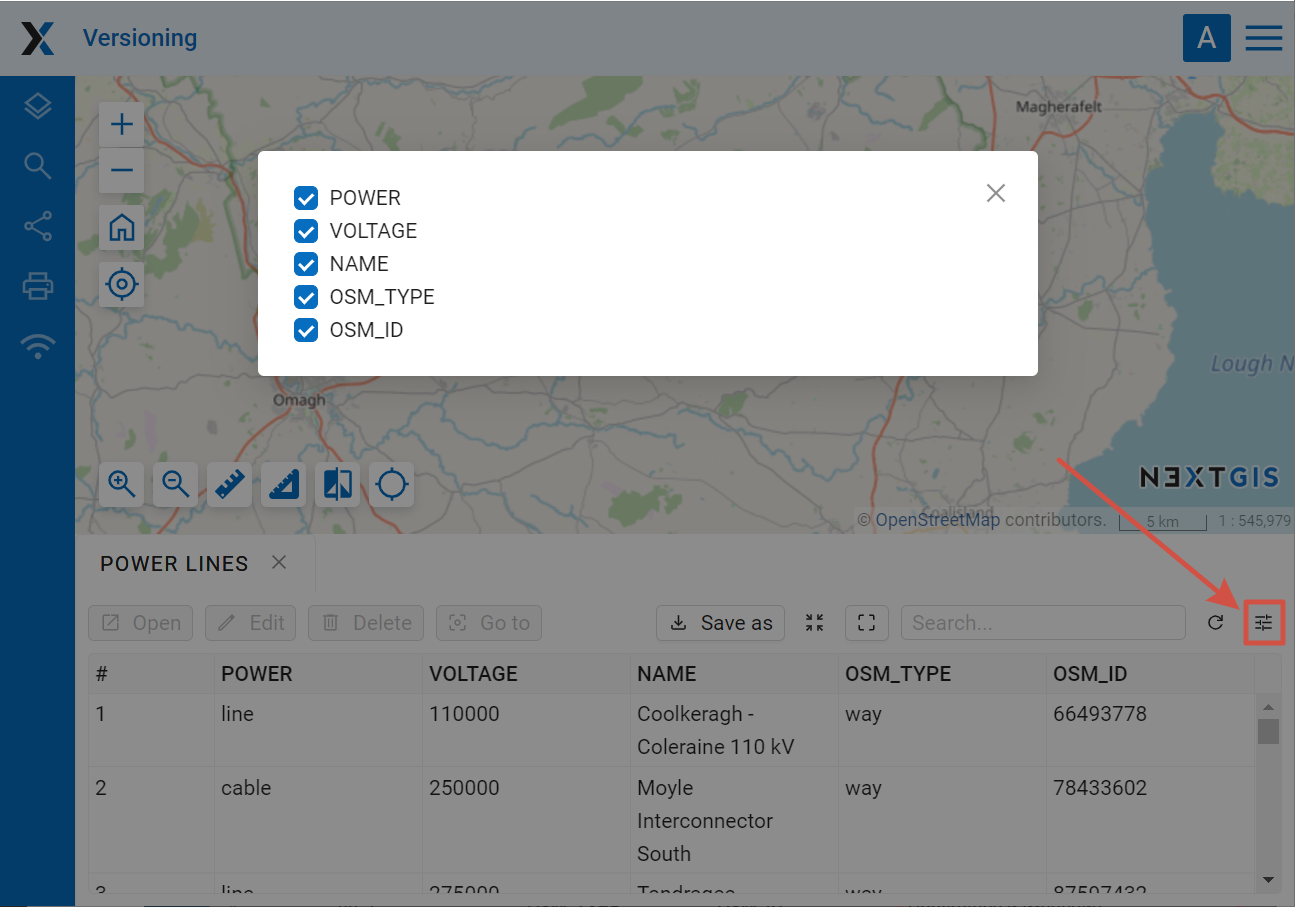
Fig. 352. Selecting fields for display#
If feature versioning is enabled, at the bottom of the list you’ll find an additional unticked field. It is a virtual “Last changed” field. It contains date and time of the most recent edit made to the feature as well as the username.
The first change logged is the time the versioning is enabled.
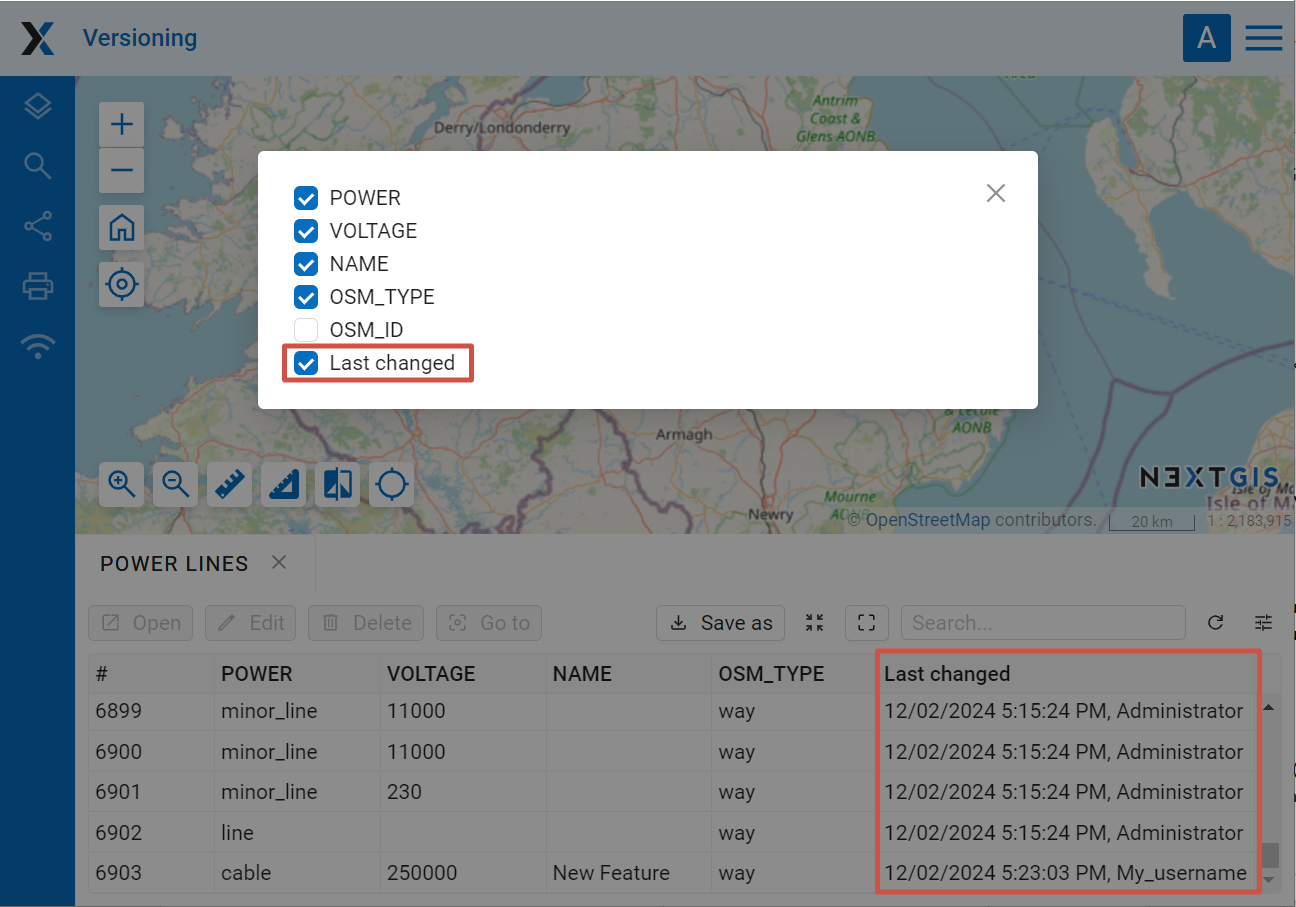
Fig. 353. Displaying changes in the feature table#
Other tools#
Click on the # hashtag button to see the current feature count.
Click  to refresh the table so that it includes the latest changes made elsewhere.