Edit vector features#
You can modify geometries and attributes of vector features via Web interface:
or on a Web Map (see below),
as well as in QGIS desktop app.
If you enable feature versioning, all the edits are recorded in the layer history.
Editing is available for users who have permissions to read and modify data. The “Modify data” permission can be set for the entire resource group where the data is stored or for individual layers.
How to check user permissions.
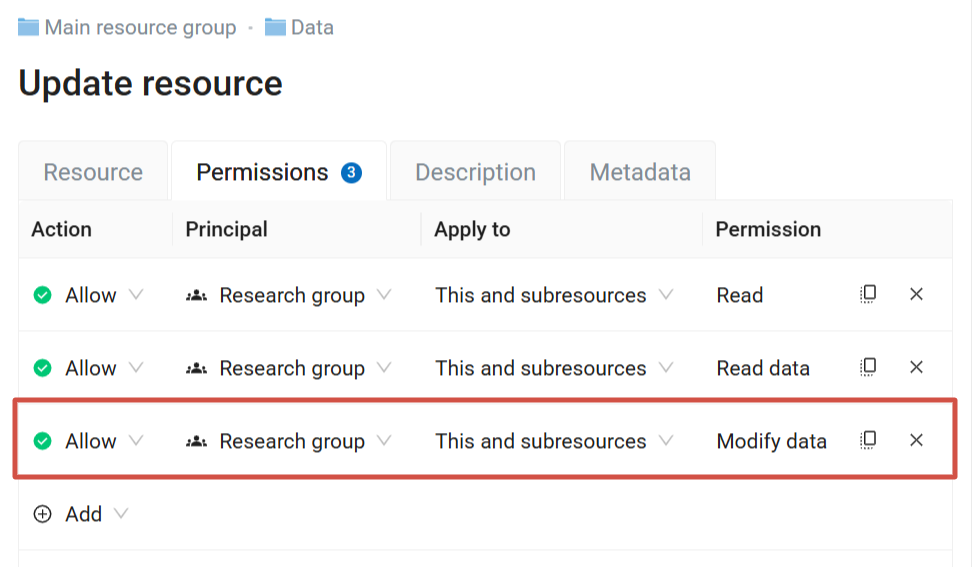
Fig. 354. Permissions set for the Data resource group to allow editing#
By default, when a new Web Map is created, users can edit features directly on it. You can disable feature editing on the map in Web Map settings.
Edit mode on a Web Map#
Open Web Map and select the layer with the feature you need to edit.
Open dropdown menu by pressing the three dots to the right of the layer name (see Fig. 355.), then select “Edit”.
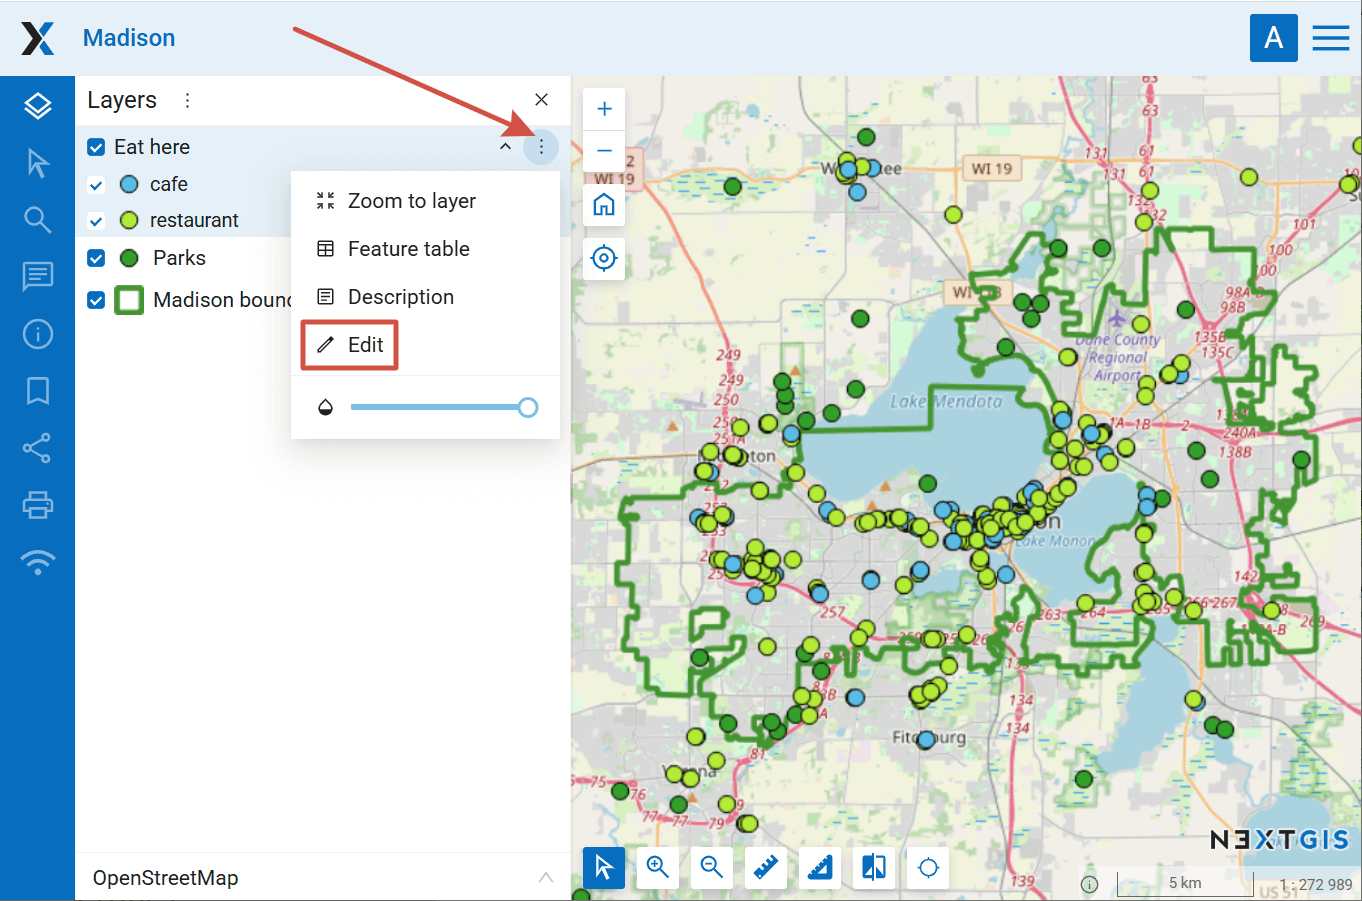
Fig. 355. Entering the editing mode#
Editing toolbar will appear on the Web Map (see Fig. 356.):
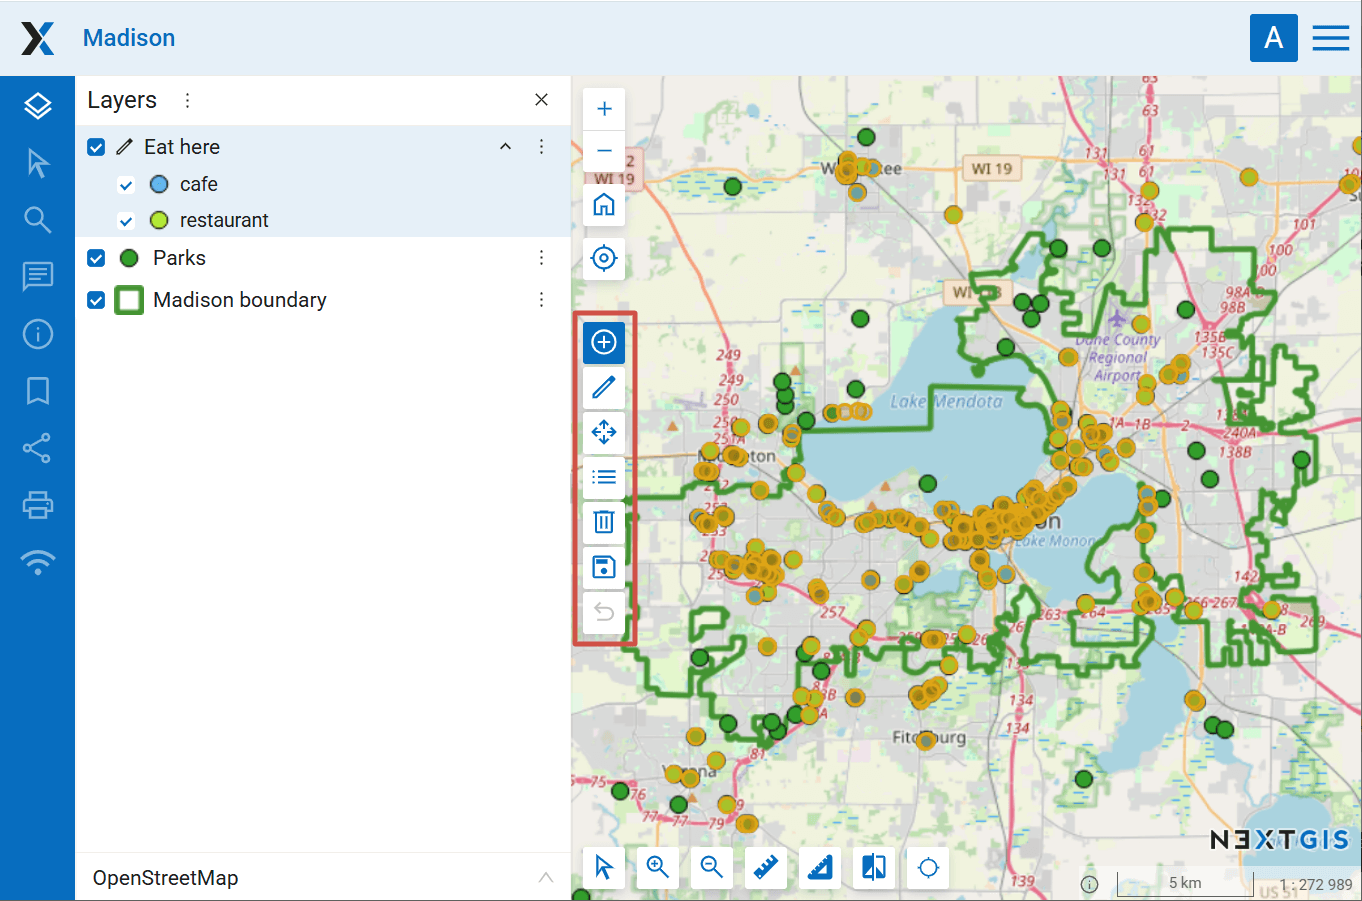
Fig. 356. Editing toolbar#
 Create feature - this tool is active when you first enter the edit mode;
 Edit;
Edit; Move an entire feature;
 Snapping: blue = enabled, white = disabled;
 Stop editing and leave Edit mode;
 Undo the last action.
Also, for polygons one more tool is available:
Below you can find detailed description of these operations.
Features available for editing are highlighed. You can edit multiple layers at once, each is highlighted with a different color.
Create a new feature (point, line, polygon)#
Enter Edit mode. The
“Create” tool is active by default (the button is blue). If you used some other tool before that, click on the button to activate feature creation.

Fig. 357. “Create feature” button on the toolbar and the mark by the mouse pointer#
A colored circle will appear nearby a mouse pointer, with it you can add new features. Click on the map to create a new feature.
A dialog opens where you can add attribute values.
Click OK to finish creating a feature. To clear the attribute form, click Reset.

Fig. 358. Entering attribute values for the new feature#
You can enter multiple features one after the other.
When creating a line, click on the map to indicate its start and end points. While creating a polygon each new click on the map adds a new vertex.
To finish creating geometry, press Enter, click twice on the last vertex or click  . To finish a polygon you can also click on its starting point.
If you accidentally click on a wrong place, press Backspace to delete the last vertex and place it elsewhere.
Snapping is enabled by default for lines and polygons. To disable it, click .
Note
If you need to create a polygon with a hole, first draw the outer ring and complete feature creation, then use  tool to cut the hole.
4. To save created features to the layer, click “Stop editing”.
In the opened dialog select “Save” to save changes, “Don’t save” to discard them, or “Cancel” to stay in the edit mode:
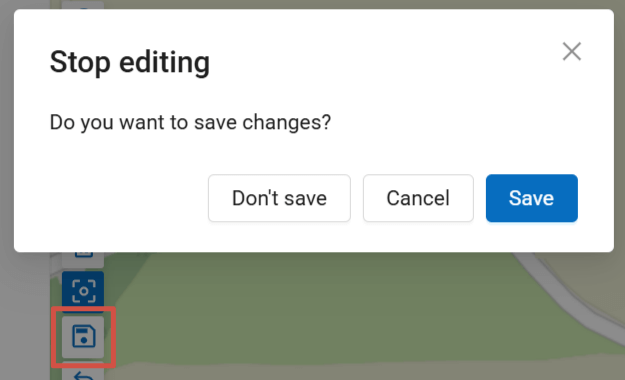
Fig. 359. Dialog for finishing the edits#
Delete feature#
Enter the edit mode. On the editing toolbar click on the
 “Delete” button.
Click on the features you want to delete. The highlighted contour of the editable features disappears.
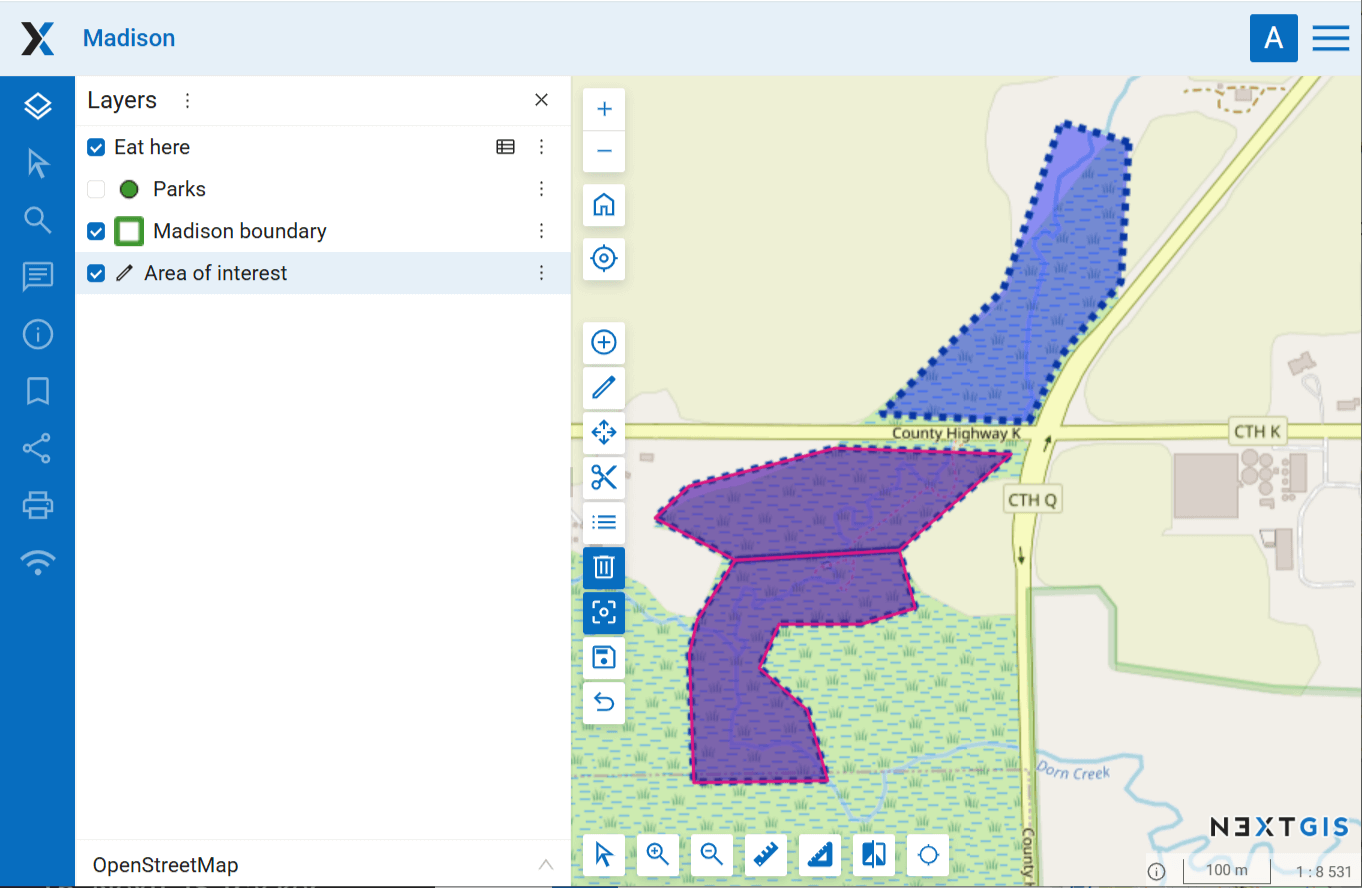
Fig. 360. Editing polygon layer. Polygons highlighted in red, remain in the layer, polygon without the red contour is deleted.#
4. To finish deleting features, click “Stop editing”.
In the opened dialog select “Save” to save changes, “Don’t save” to discard them, or “Cancel” to stay in the edit mode (see Fig. 359.).
Move feature#
To move en etire feature, enter the Edit mode and activate
“Move” tool.Click on the feature to select it, then drag to a new location.
Both the old position (style colors) and the new position (selection color) are shown.
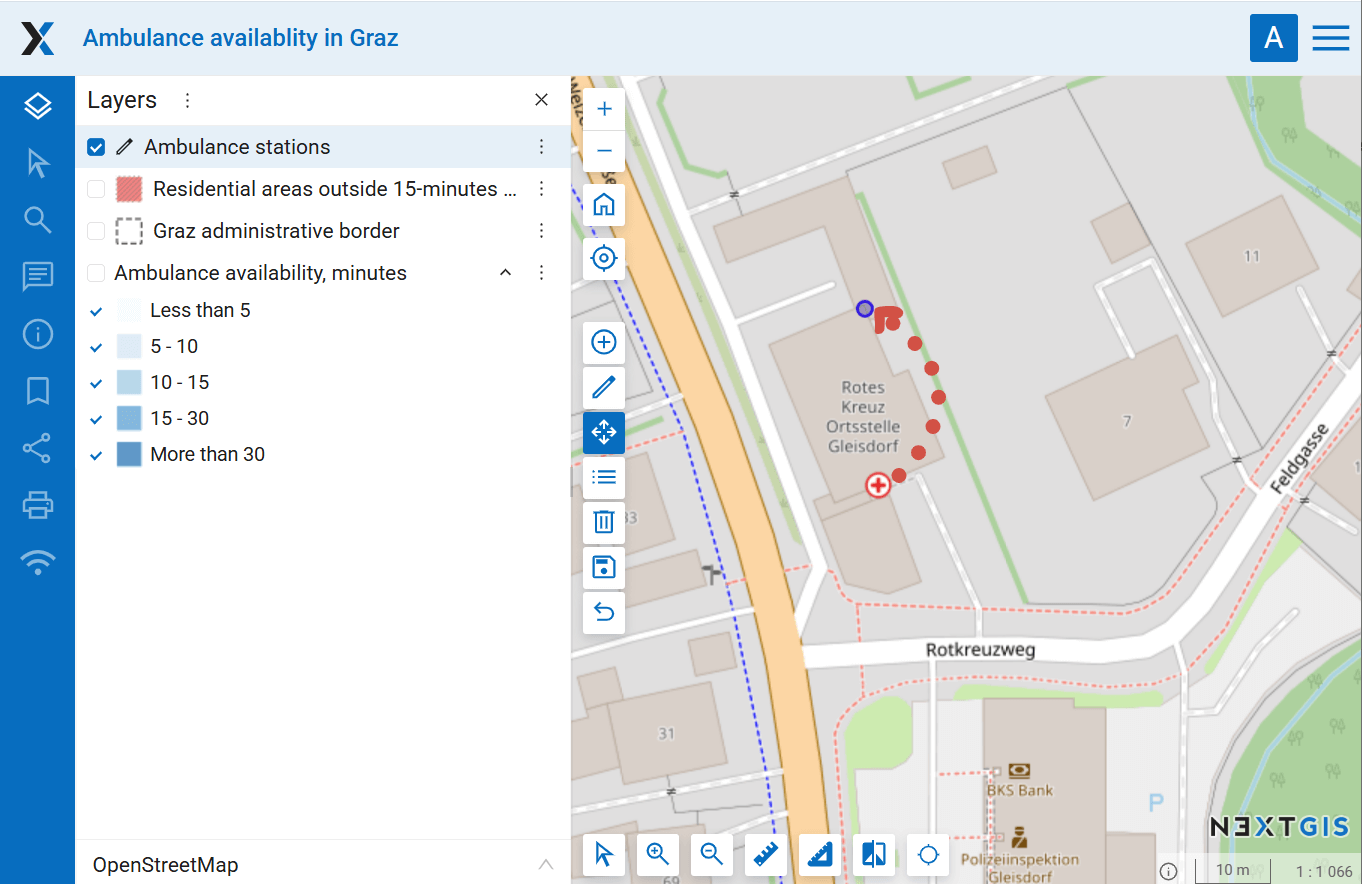
Fig. 361. Moving a point. The new position is marked in blue#
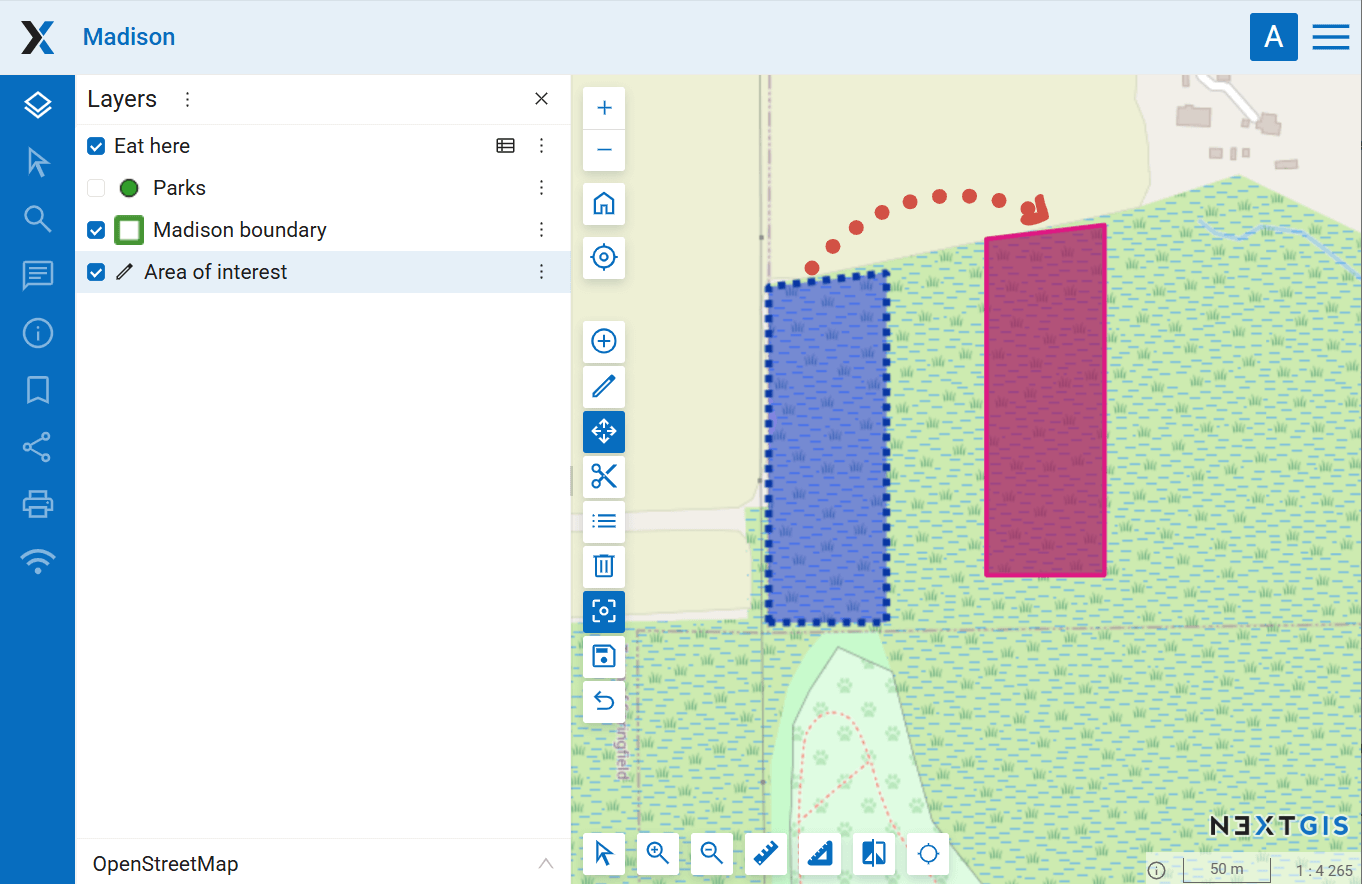
Fig. 362. Moving a polygon feature. The new position is marked in red#
Click
“Stop editing” and save the changes.
Also you can move individual vertices of lines and polygons.
Edit vertices#
On the toolbar click on the
“Edit” button.
Editable features are highlighted.
Click on a vertex and drag it to a new position by holding the left mouse button. Snapping is active by default. To disable it, click
.
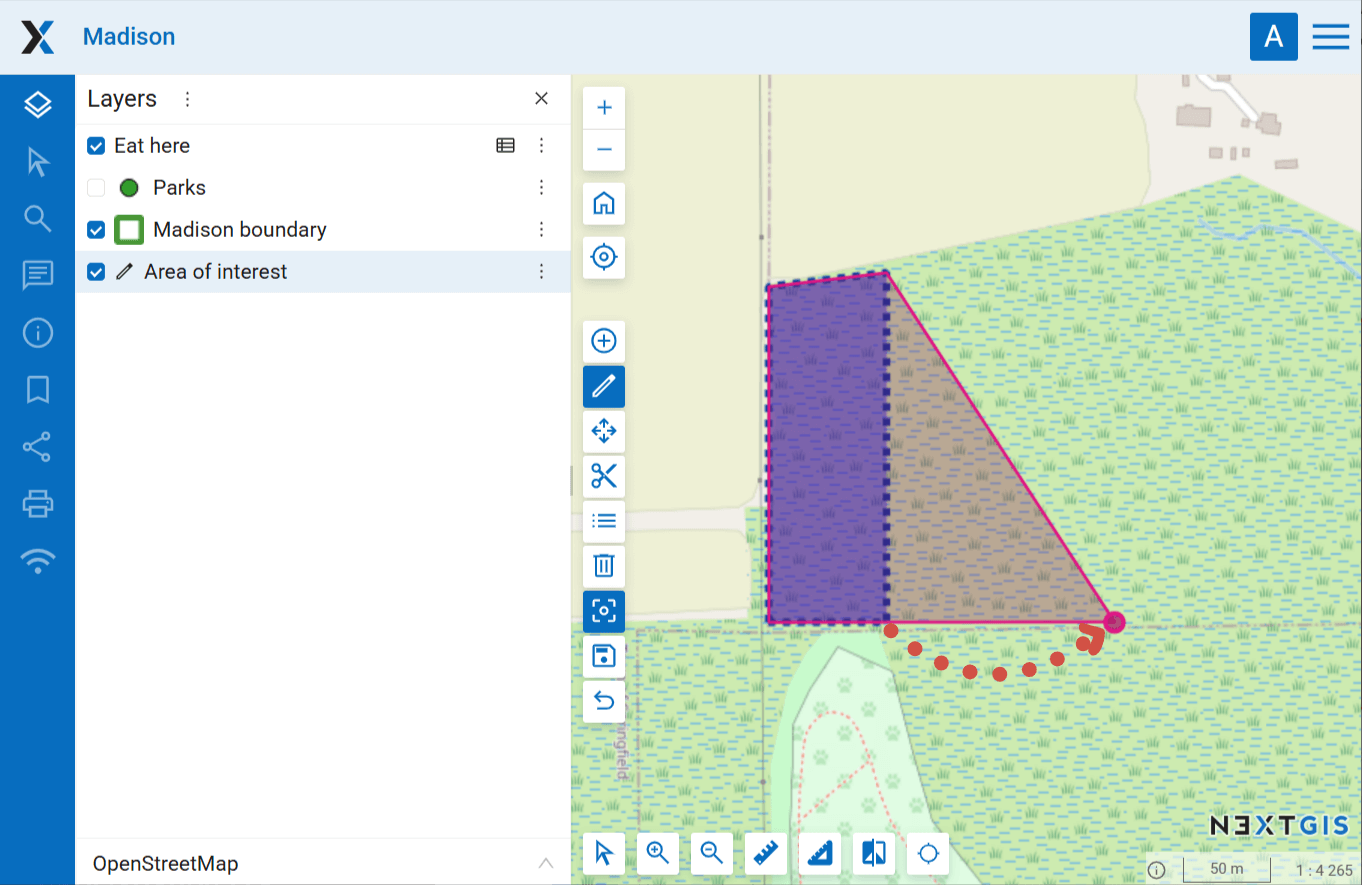
Fig. 363. Editing polygon vertices. The changed geometry is shown in red#
To finish editing click
“Stop editing” and save the changes (see Fig. 359.).
Note
You can edit several layers simultaneously. To do it enter the edit mode in every layer you want to edit. Snapping works for features of all these layers.
Add and delete vertices#
To delete a vertice enter the Edit mode, then activate the “Edit” tool, hold Shift and click on the vertex.
To add a vertex, click on the line between two existing vertices and drag it to the desired location.
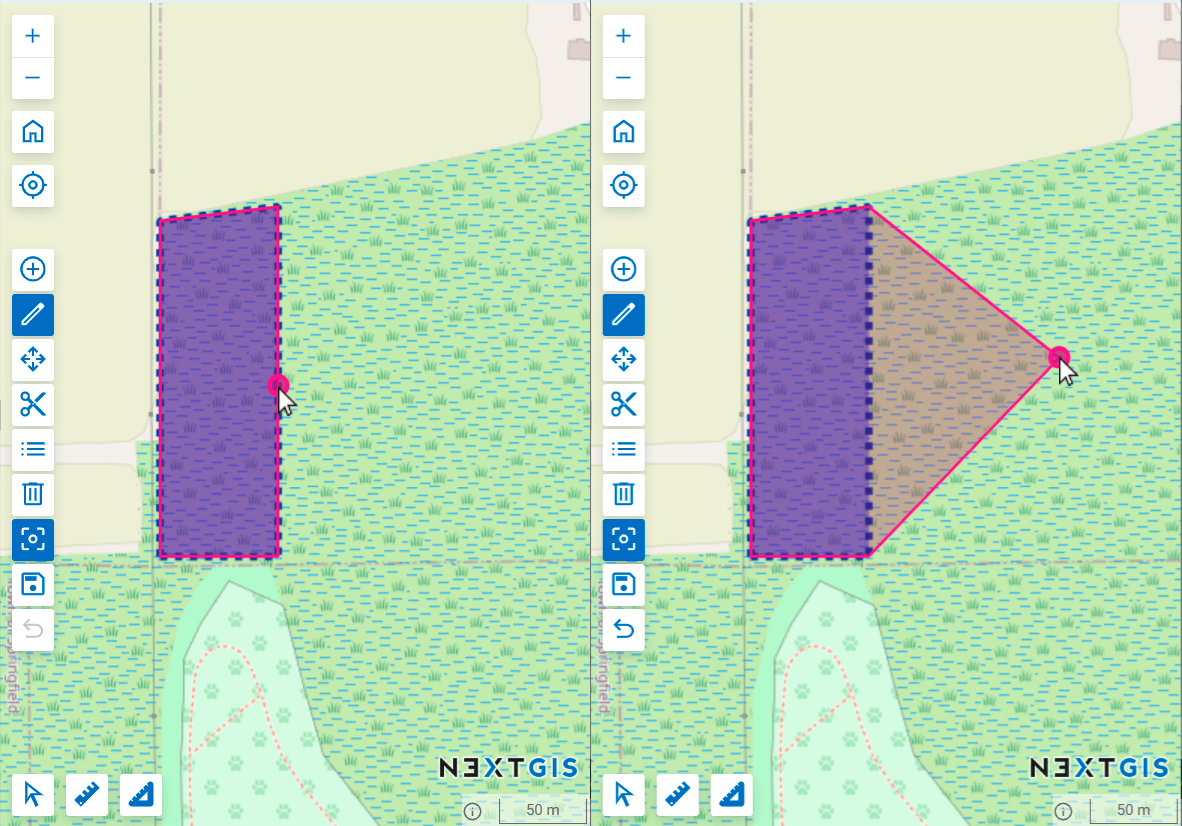
Fig. 364. Creating a new vertex#
Create holes#
If you need to create a polygon that has one or seleral areas cut from it:
First add the outer contour using the
Create tool.Activate the
Cut hole tool and draw a closed boundary of the hole.
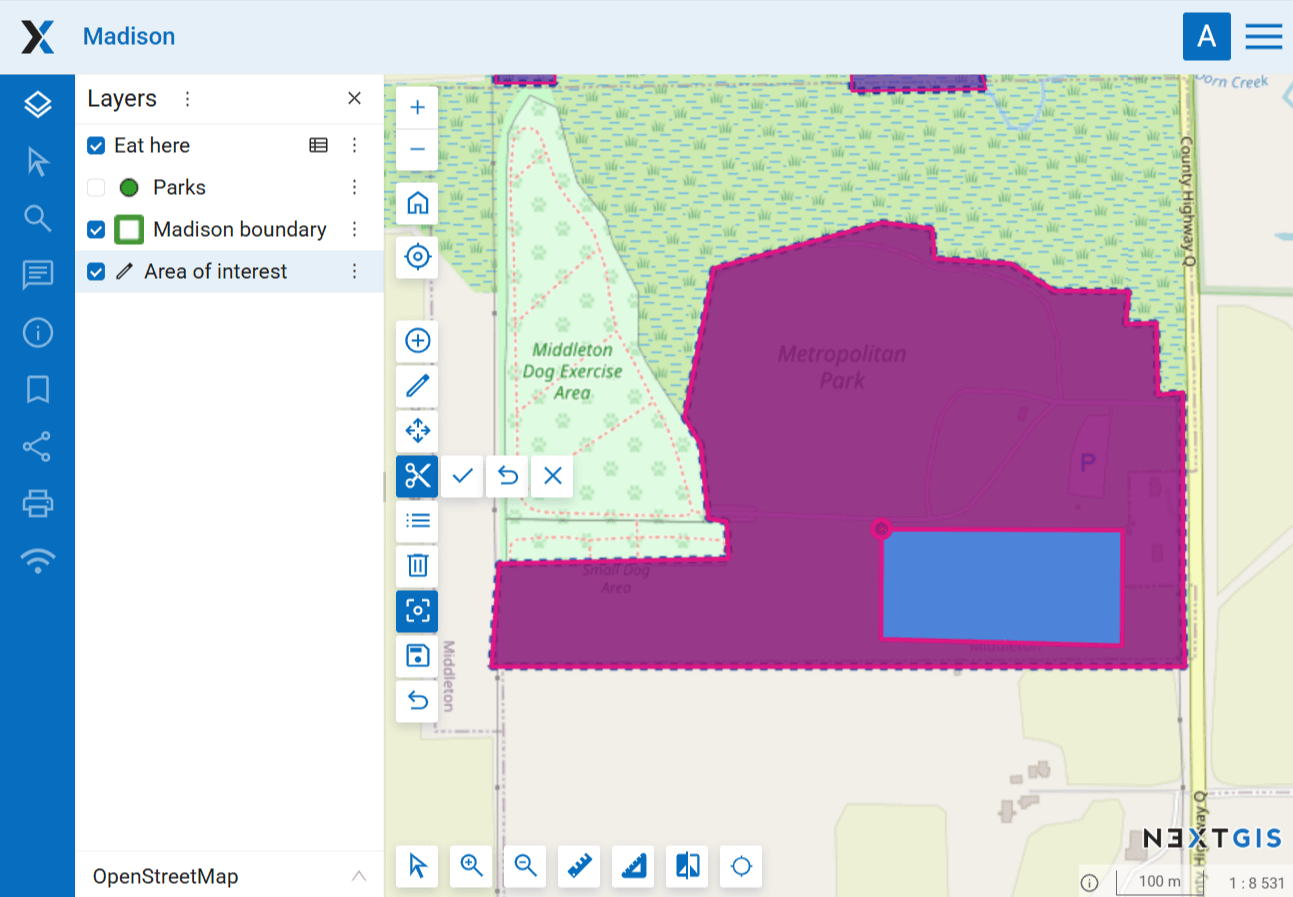
Fig. 365. Polygon with a hole#
To finish editing click
“Stop editing” and save the changes (see Fig. 359.).
Edit feature’s attributes#
NextGIS Web software allows users to edit attributes of geographical features. There are several ways to open the dialog:
From the resource list:
Click on the
 table symbol by the vector layer (or open the layer resource page and select “Feature table” in the actions pane).
Feature table opens. Click on the entry in the table to select it.
Click on the Edit button in the table toolbar.
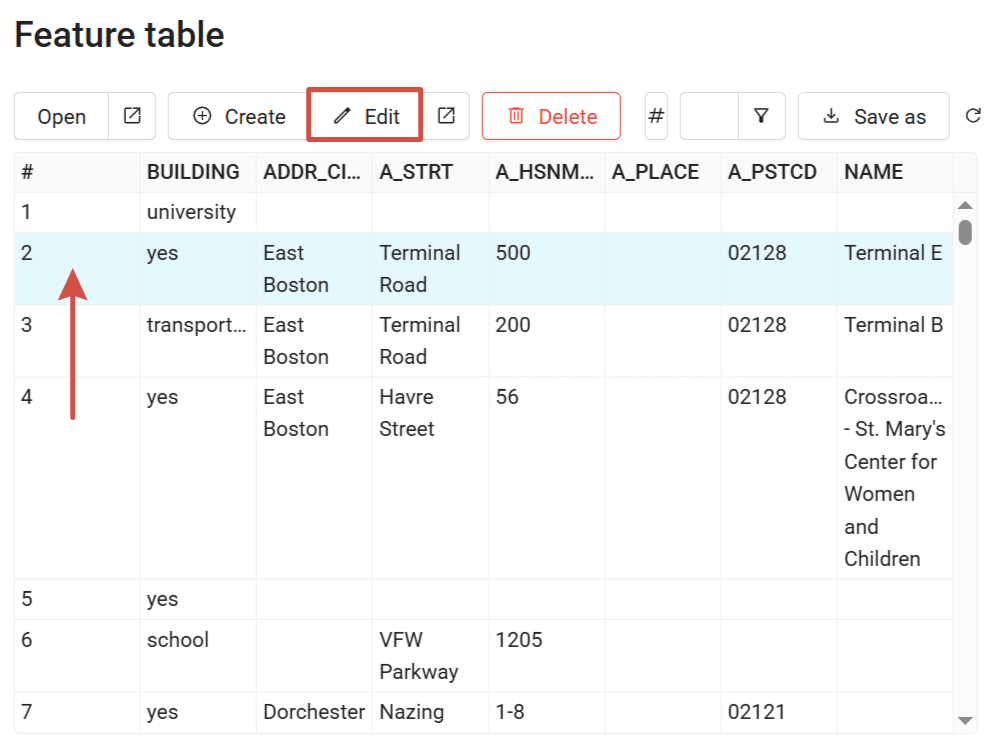
Fig. 366. Editing attributes using Feature table#
If you are in the Web Map  display mode.
From the Feature table:
In the layer’s context menu select “Feature table” and then follow the steps described above.
In the Edit mode:
In the layer’s context menu select “Edit”.
In the toolbar on the map select
 .
.Click on the feature on the map.
From the Identify panel:
Click on the feature on the map.
In the Identify panel click on the “Edit” symbol (see Fig. 367.).

Fig. 367. Editing attribute values from the Identify panel#
Editing dialog has the following tabs:
“Attributes” tab:
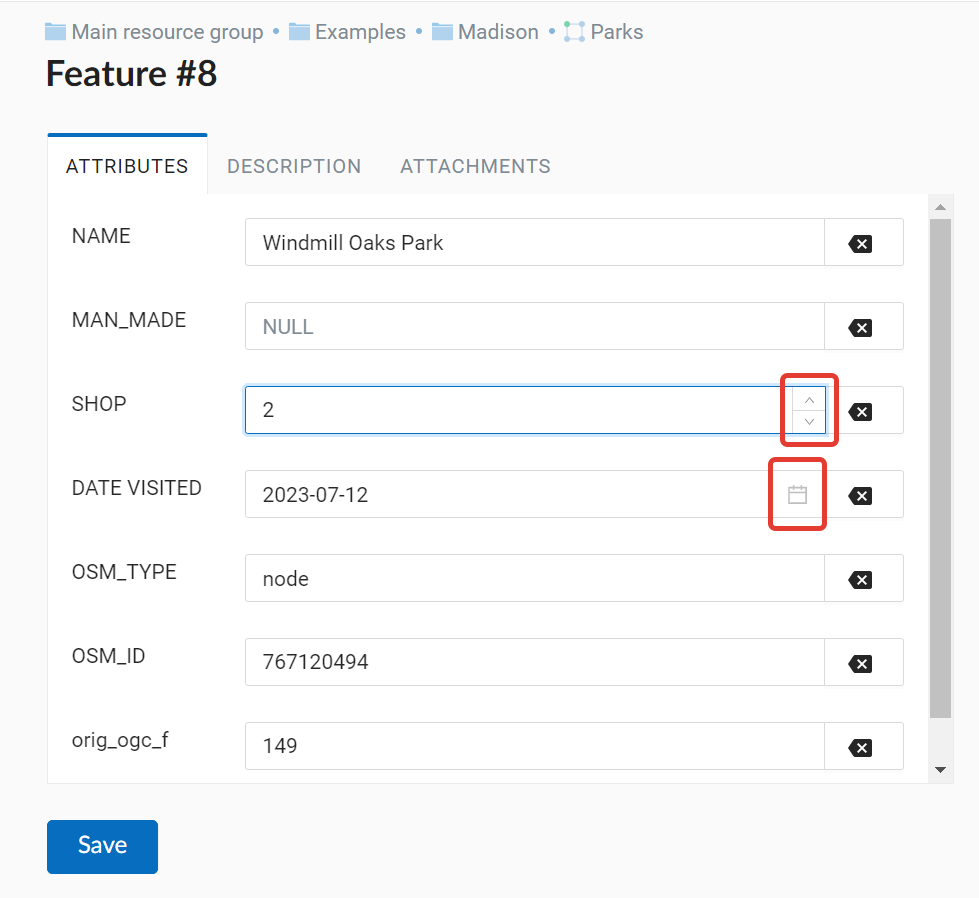
Fig. 368. Attributes tab#
To edit an attribute click on the field.
Numbers can be typed in or modified with arrows that appear on the right end of the field.
Dates also can be typed in or selected in the calender. To open the calender click the icon on the right end of the field.
Add a Lookup table to a field to be able to pick a value from a dropdown list.
“Attachments” tab (more on managing attachments);
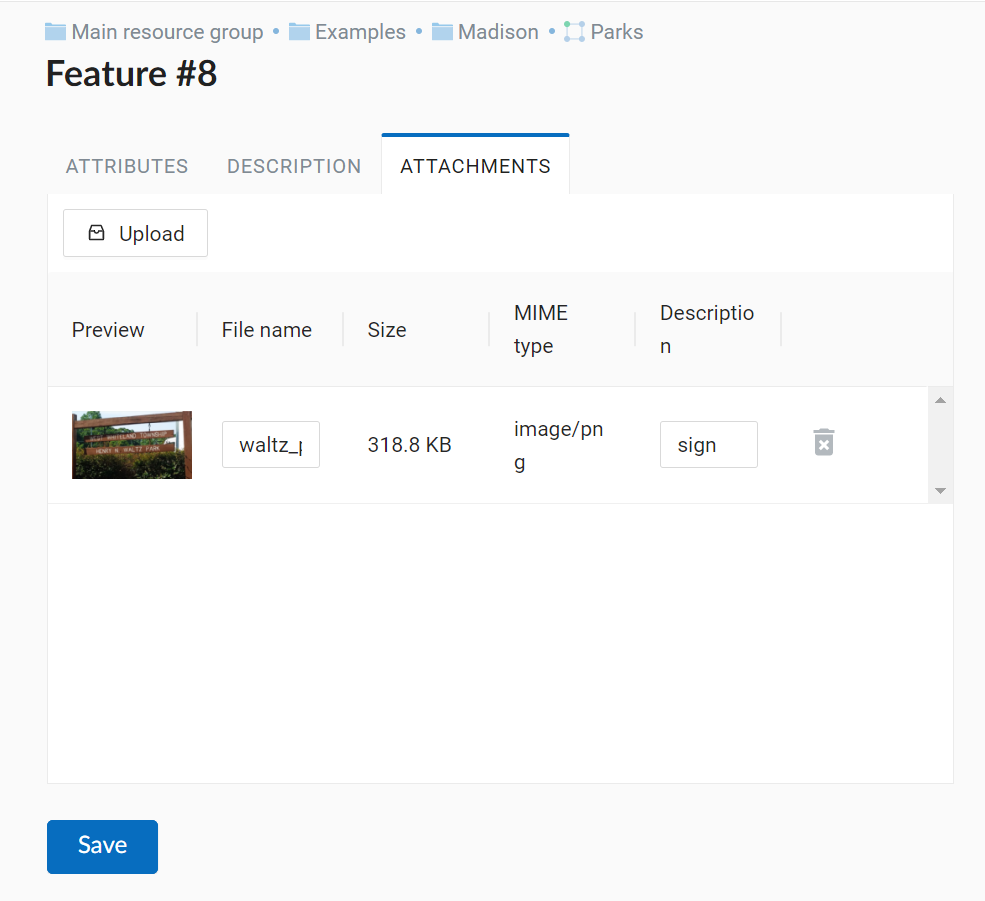
Fig. 369. Attachments tab#
“Description” tab - the description is displayed in the Identify panel when you click on a featre.
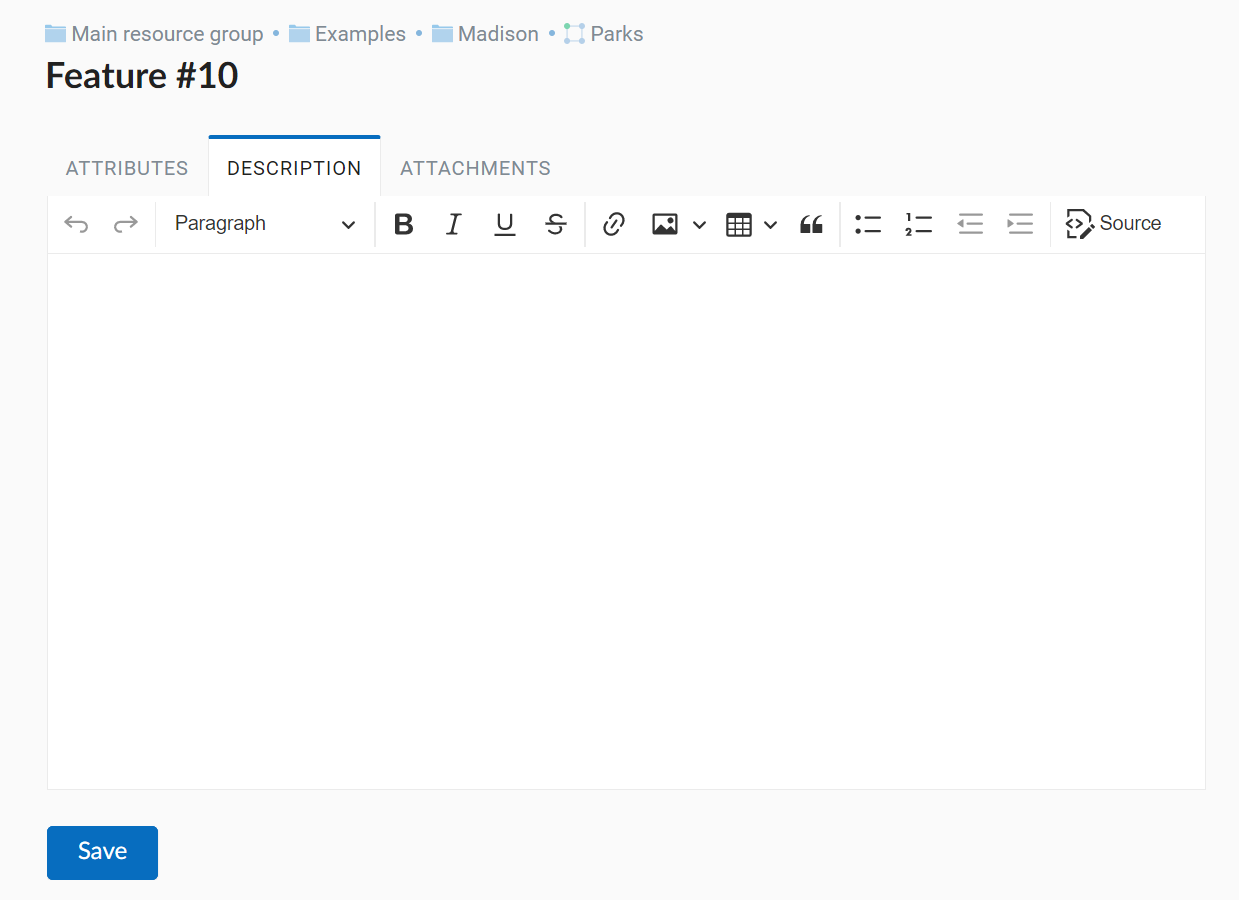
Fig. 370. Description tab#
Note
If you opened the feature attributes dialog from the Feature table on a separate page, you can edit the feature’s geometry in the fourth tab. If you opened the edit dialog from a Web Map, to edit the geometry activate Edit mode.
Attachments#
NextGIS Web software supports adding photos, panoramas and other files to the features. If a feature has attachments, they will be shown along with description and attributes in the identify window (see Fig. 371.).
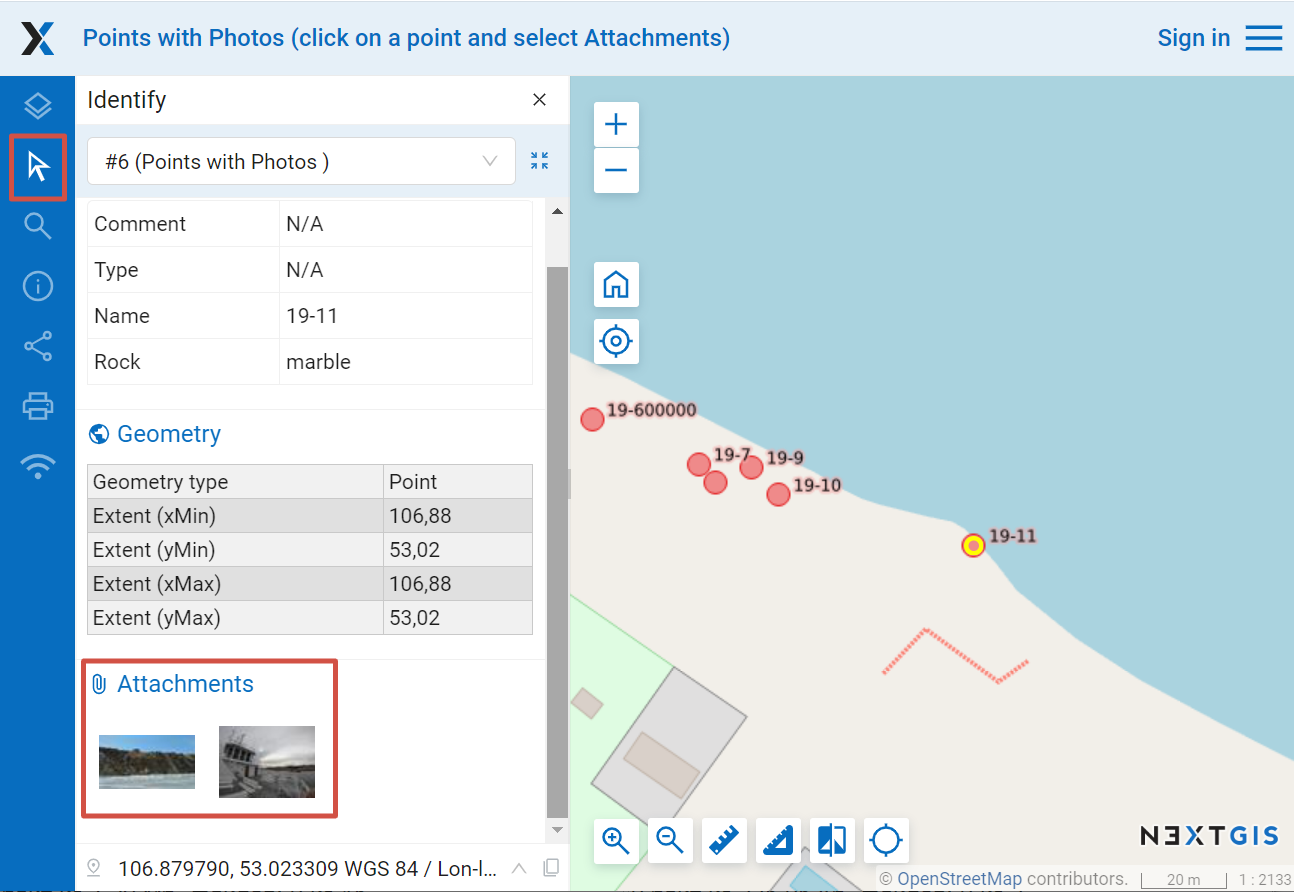
Fig. 371. Identify window for a feature with attached photos#
Files in the following formats can be viewed directly in the web client:
JPEG, PNG images. GIF format not supported.
Panoramas complying with the specification.
Other types of files can be added as attachments, but won’t be viewed in the interface.
After a click on a photo preview a lightbox window is open (a javascript powered window in browser). Photo size is adjusted to fit the window. Photos have descriptions and user can navigate through them using left and right arrow keys on the keyboard (see Fig. 372.).
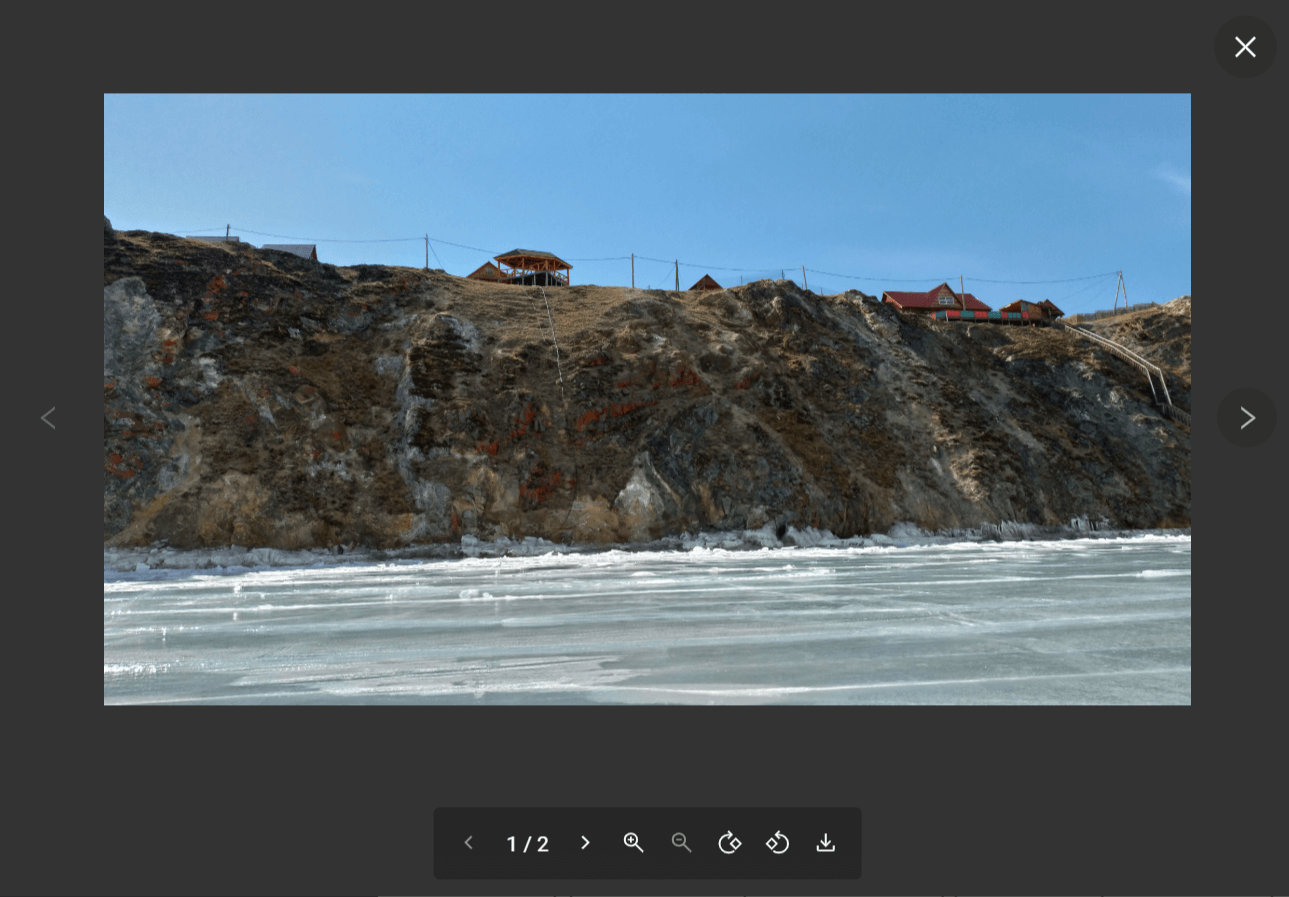
Fig. 372. A lightbox with uploaded photo for the identified feature#
You can zoom in and out, turn the image or save it to your device.
To navigate within the panorama, use the mouse. Hold down the left mouse button to rotate the camera. Use the wheel to zoom in and out. Panorama mode can be disabled by clicking on the blue round button in the upper right corner.
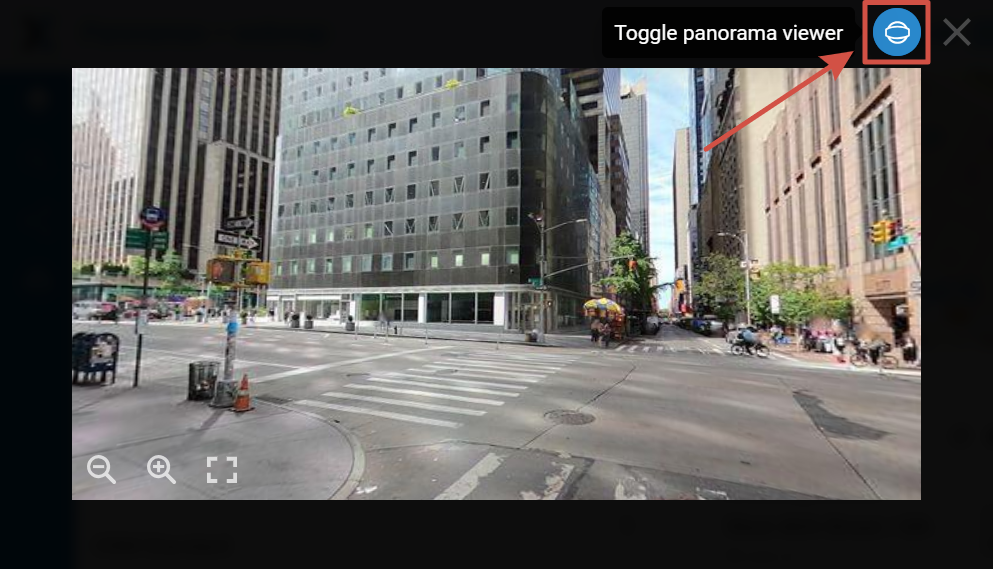
Fig. 373. Panorama opened from Web Map#
Add attachments to a feature#
To add an attachment to a feature, go to the edit window. There are several ways to open it:
Click on the feature on the Web Map, then in the pop-up window press the Edit button.
Open the feature table on the Web Map, select the feature and click Edit in the toolbar.
Open the feature table from the resource page, select the feature and click Edit in the toolbar.
On the Edit page open the Attachments tab and upload the files.
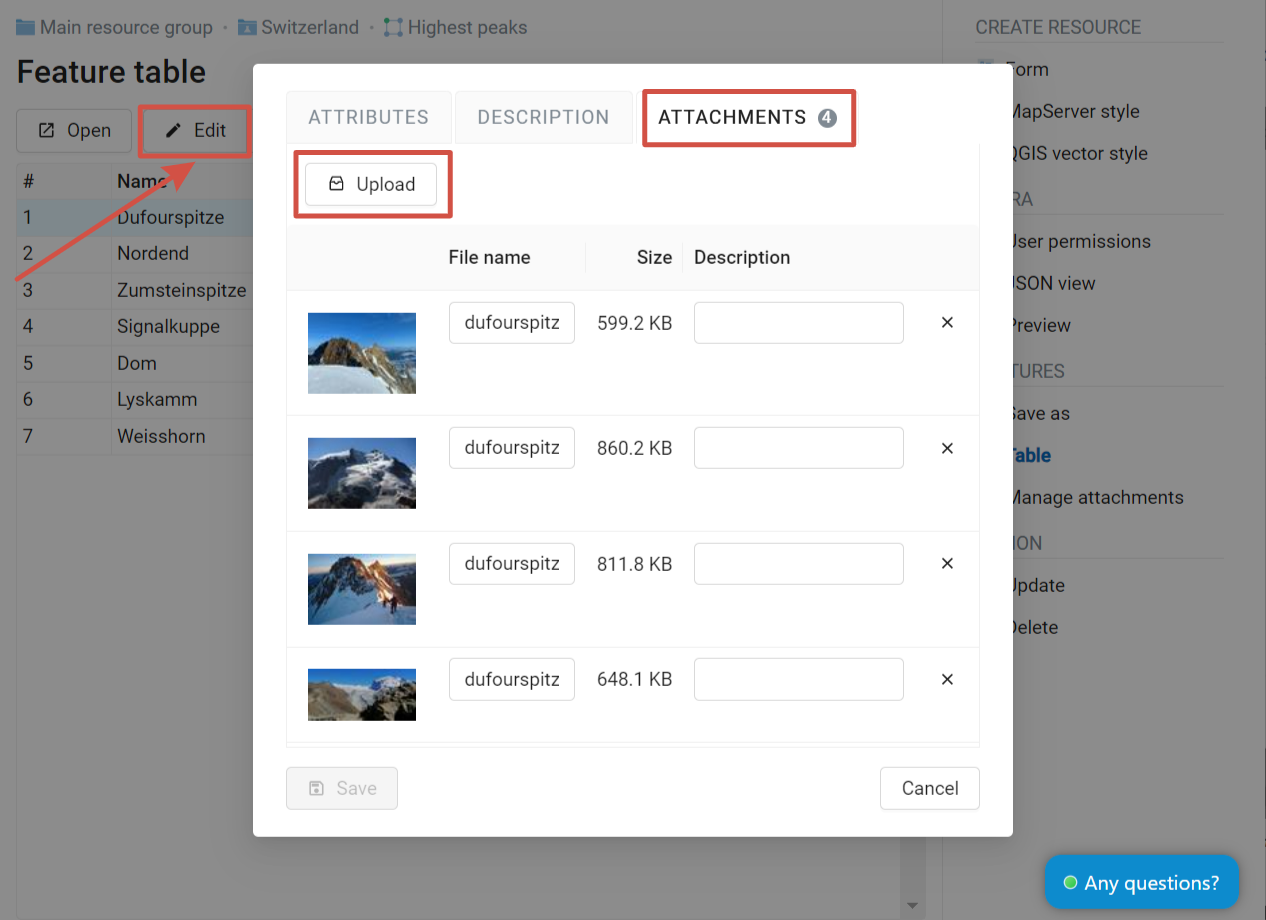
Fig. 374. Adding file as attachment#
Enter titles for the attachments and press Save.
After uploading you can see previews of photos and panoramas on the “Attachments” tab of the identify window (see attach_tab_pic).
Note
By default attachments could be added by any user but there is an option to limit number of users who can upload photos (see Managing access rights).
You can edit file names and descriptions of the added attachments. To delete an attachment, press the cross icon to its right. If you’ve made an error during editing, press Reset, all modifications will be cancelled.
To delete an attachment select it on the “Attachments” tab of the edit window, click Delete, and then click Save button.
See the process of adding attachments in our video:
Watch on youtube.
How to use panoramas#
Not only photos, but also panoramas can be added as attachments. They allow to immerse explore new locations or find new details in familiar places.

Fig. 375. Panorama preview in the identify panel#
Uploaded panoramic images must comply with the Google XMP Photo Sphere specification.
See how to work with panoramas in our video:
Watch on youtube.
Export and import attachments#
To copy feature attachments between different layers or to create a backup you can save them to your device as an archive (Standard layer saving does not include attachments).
Navigate to the layer resource page and select Manage attachments.
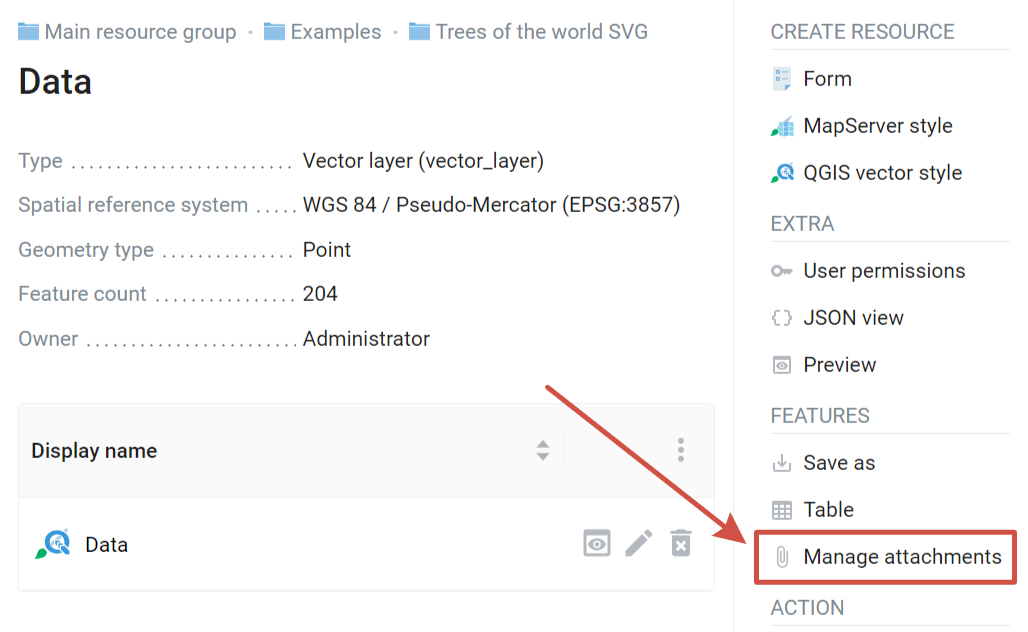
Fig. 376. Managing attachments#
To save the attachments, go to the Export tab and press Export attachments to ZIP archive. The resulting ZIP archive will contain all of the attachments put in directories named after feature IDs. Attachment metadata are put into a separate JSON file.
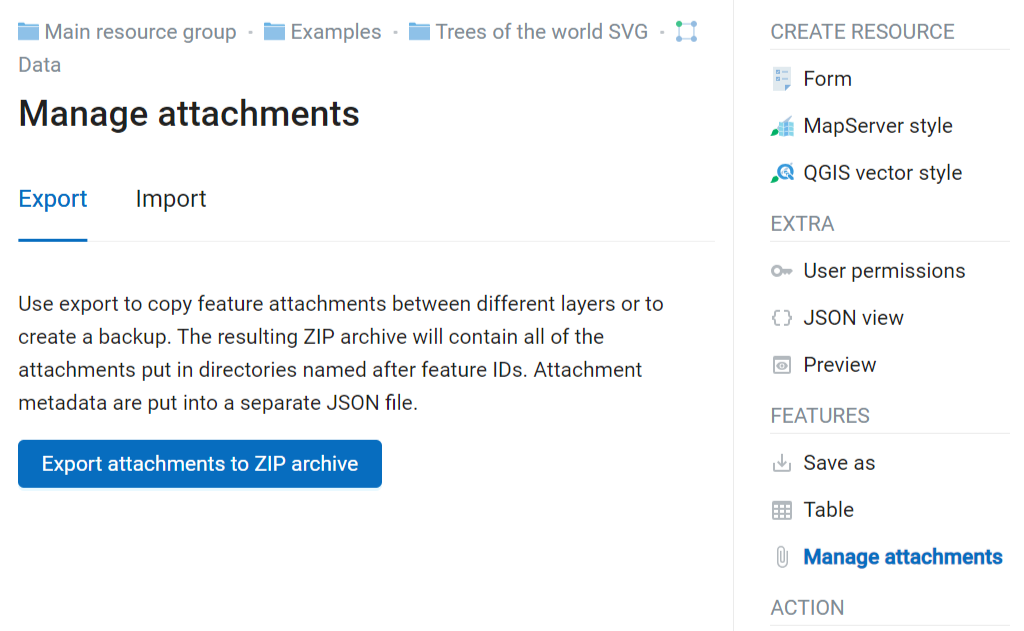
Fig. 377. Exporting attachments as ZIP archive#
The resulting archive can be imported to add the attachments to the layer features. Open the Import tab, click Import attachments from ZIP archive and select the archive on your device. An archive must contain directories named after feature IDs. Each folder can contain one or many attachments. Duplicates will be ignored. If you need to replace the current attachments, tick “Delete existing attachments”.
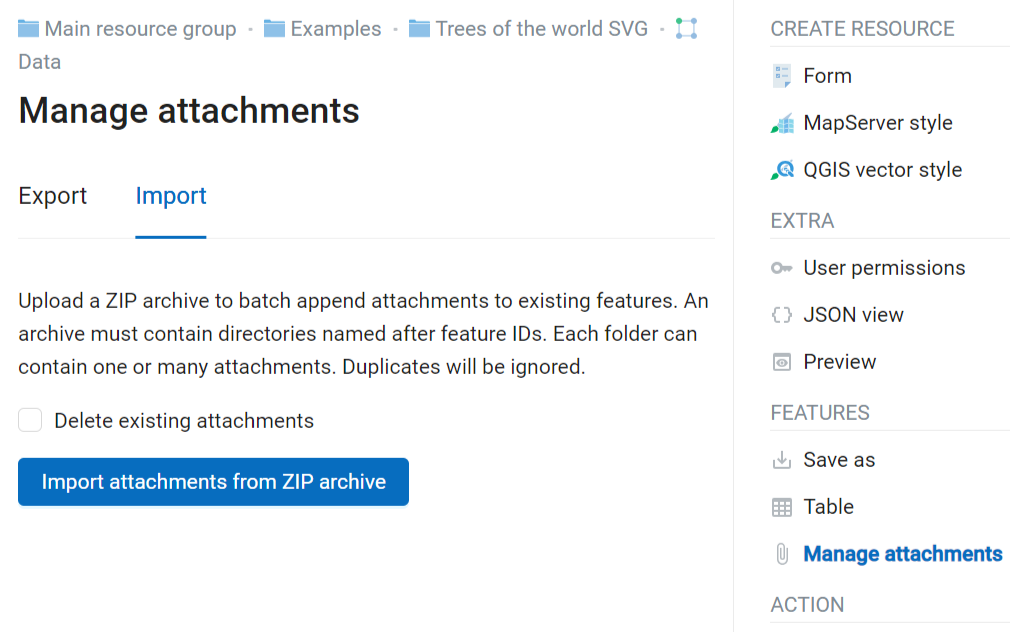
Fig. 378. Importing attachments from ZIP archive#
Disable editing on the map#
By default editing of features on a Web Map is enabled. You can disable editing in the Web Map settings on the “Settings” tab.
Note
There are other way to edit vector layers. If you don’t want users to modify your data, configure permissions for the resources.
Click  next to the Web Map name to enter Update resource dialog.
On the Settings tab in the Layers editing field select Disable in the dropdown menu.
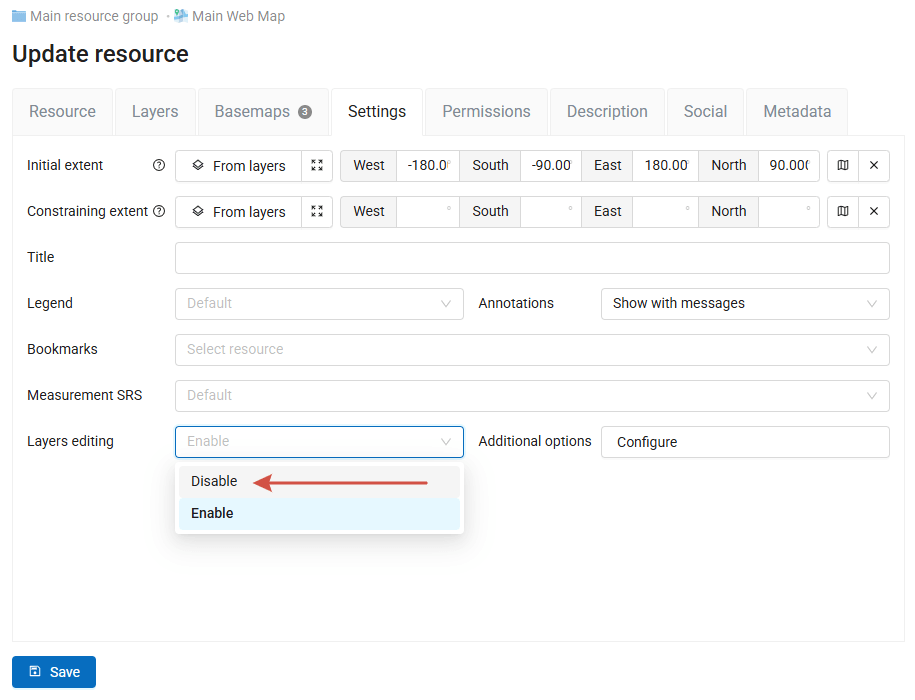
Fig. 379. Disabling editing on a Web Map#