Basic operations#
This section contains a list of the main functions available to the data collector in the NextGIS Collector mobile application. At this stage, the user has already passed auth in the application and selected a project configured by administrator for data collection.
Add a point#
There are two ways to add a point in the application:
Mark it on the map (using a basemap, raster image, etc.)
Using the device’s GPS coordinates
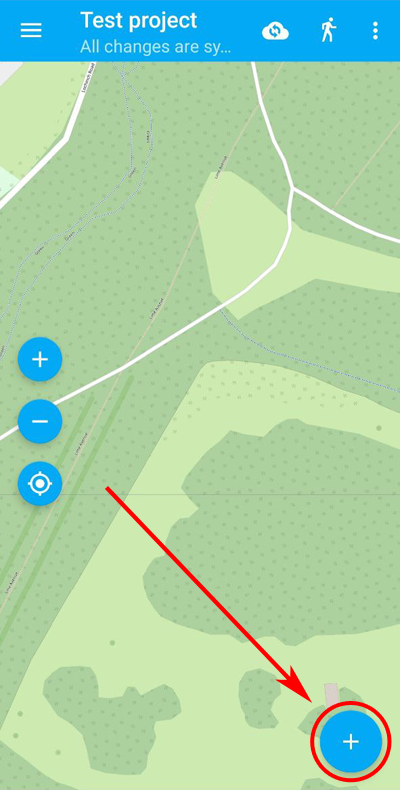
Fig. 1040. “Add feature” icon#
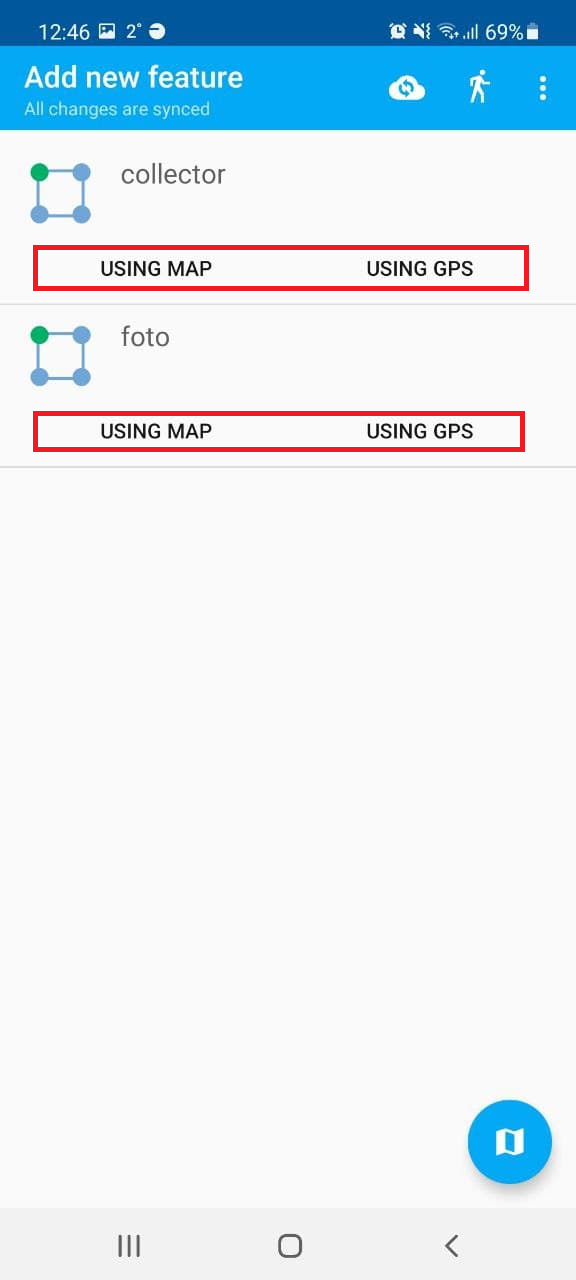
Fig. 1041. Ways to add a point#
To add a point using the map you need to indicate its location with the cursor. You can move the cursor automatically to the center of the screen (red cross) or your current location (blue circle) using the buttons in the bottom panel. After marking the point press the floppy disk icon in the top right corner to save.
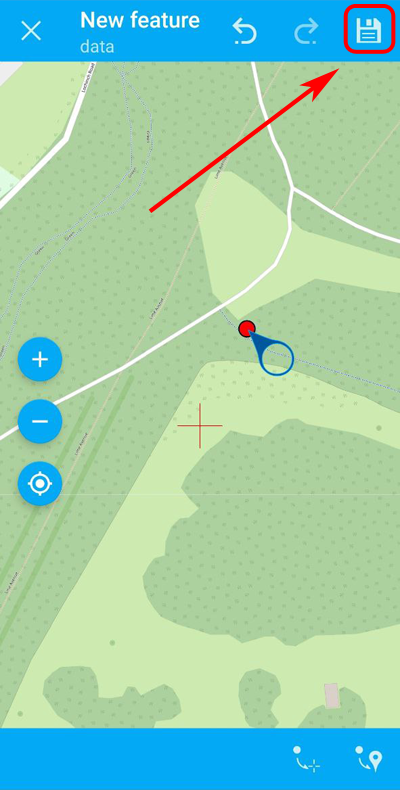
Fig. 1042. Floppy disk icon - save the location of the point#
On the next screen you need to set attributive info and, if necessary, attach photos. Then confirm adding a point by clicking on the checkmark on the top panel.
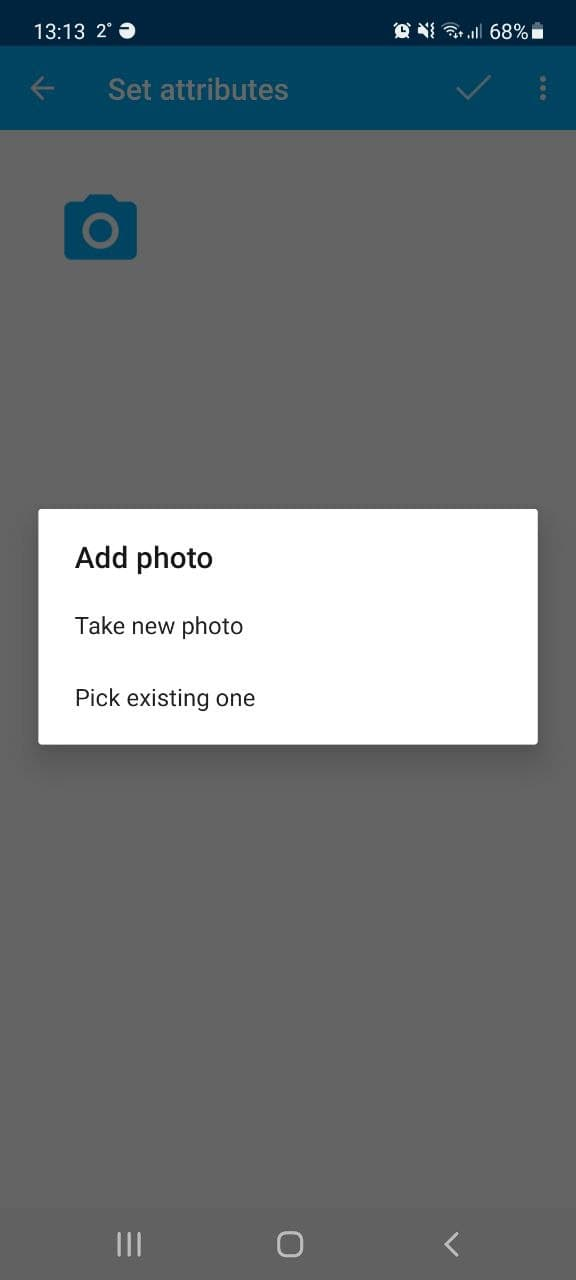
Fig. 1043. Attaching a photo. You can select from the device memory or make a new one in the application#
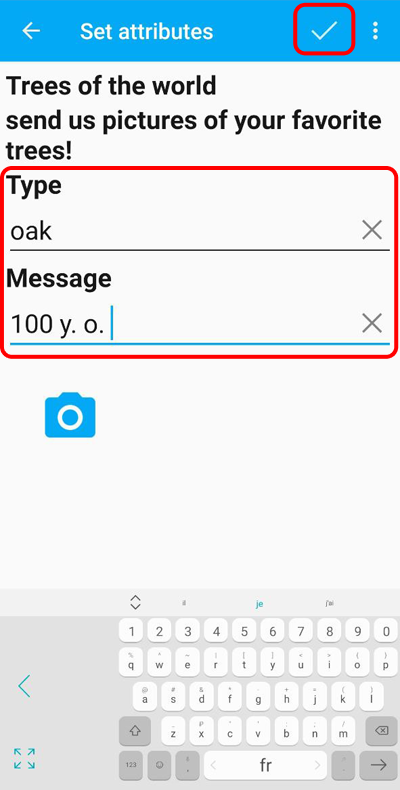
Fig. 1044. Entering attributes and completing the creation#
If you choose to add a point by GPS, you will be redirected straight to the attribute screen. Add attribute information and tap the tick in the top panel to save the new point.
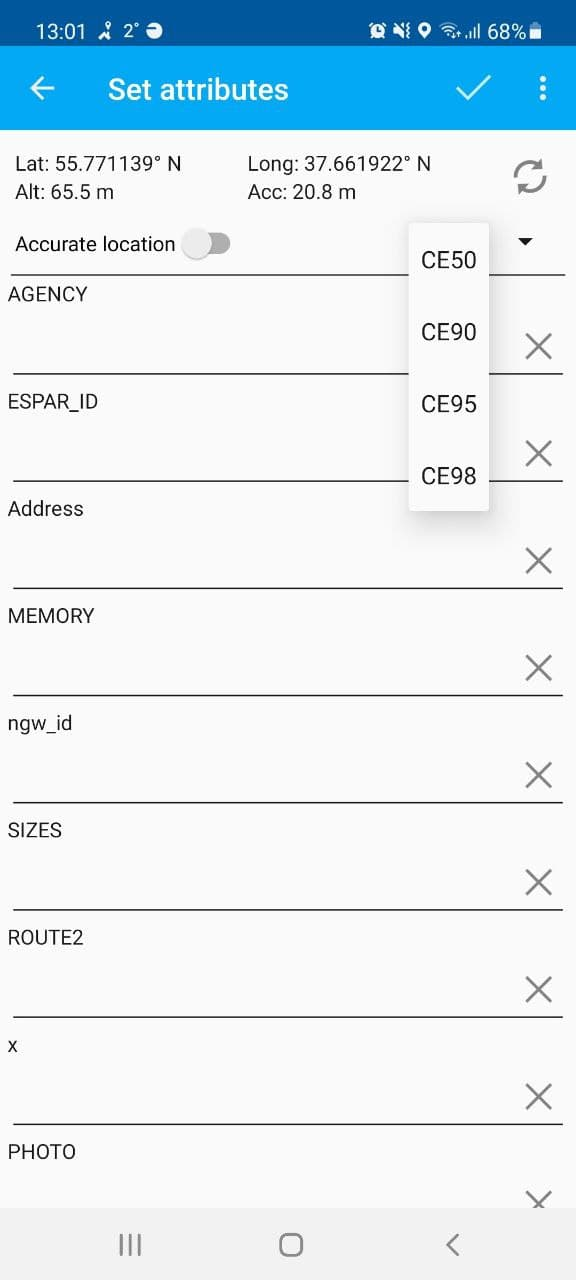
Fig. 1045. Adding a point by GPS#
A data collection project may have an extent set up. In this case, if the point falls outside the project boundary (due to geolocation error), a warning will appear.
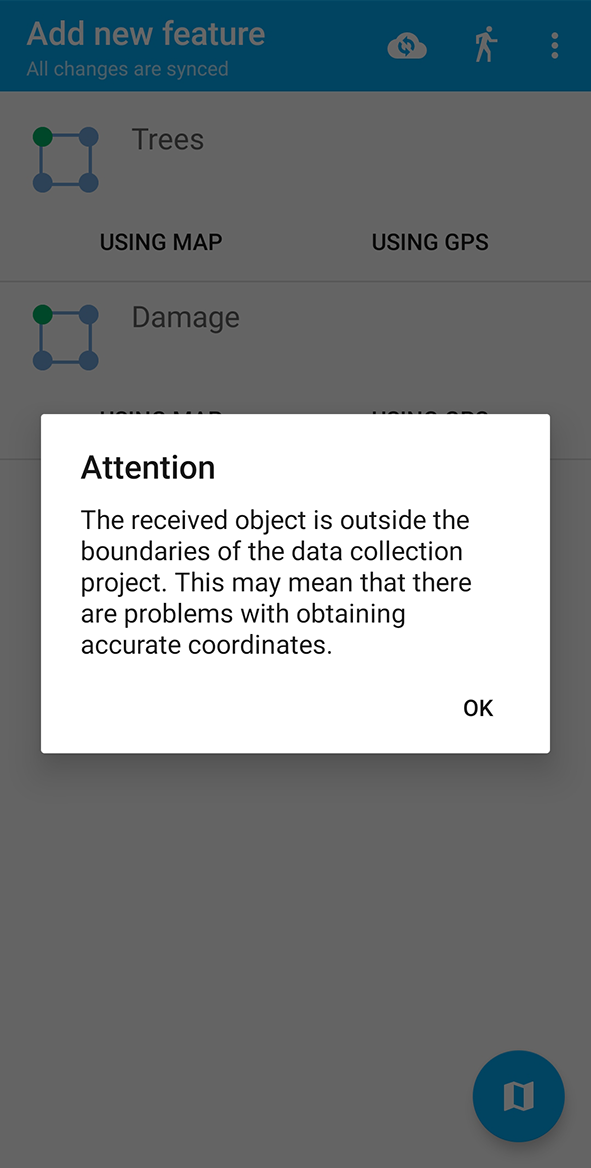
Fig. 1046. Warning about a point outside project extent#
The point will still be added to the layer.
Edit a point on the map#
The app allows changing:
Point locations
Point’s attributes / attachments
To edit a point:
Select a point by clicking on the map. The toolbar will open on the right side of the screen.
Upper - change location,
lower - change attributes.
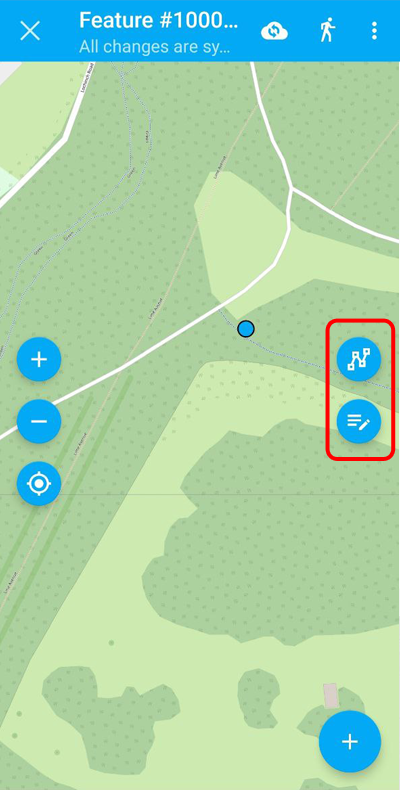
Fig. 1047. Point location and Attribute editing tools#
Change the location of the point as needed. There are 3 ways to do this:
Move the cursor on the map;
Use the panel at the bottom of the screen - automatically position the cursor either in the center of the map, or your current location.
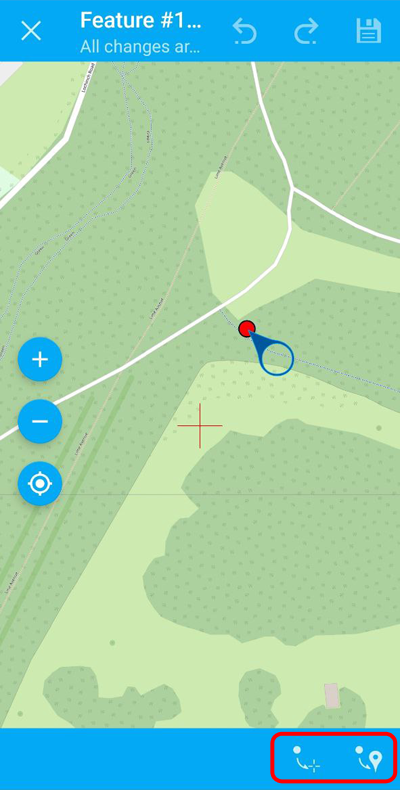
Fig. 1048. Center map and current location tools#
Edit attribute information and attachments as needed.
Press floppy disc icon to save changes.
Add a line#
To add a line to one of the layers, first open the map and tap the plus icon. Then select a layer containing lines.
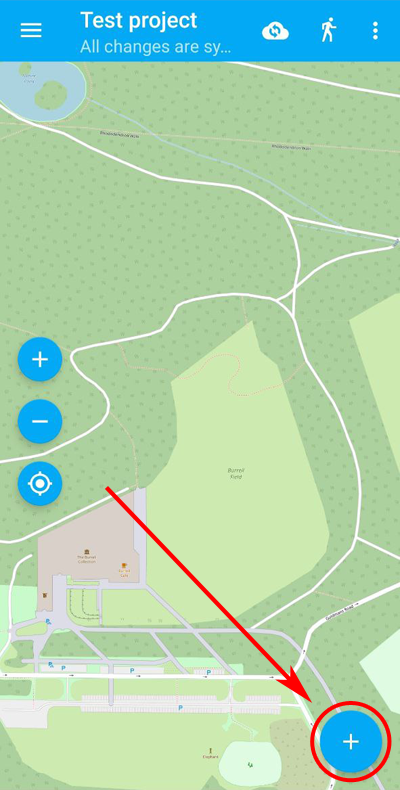
Fig. 1049. “Add feature” icon#
Select the layer to add a line to and the way to use for its creation - using map or GPS.

Fig. 1050. Selecting layer and way of adding a line#
You will be redirected to the map again. A line will appear with a cursor at its top left corner.
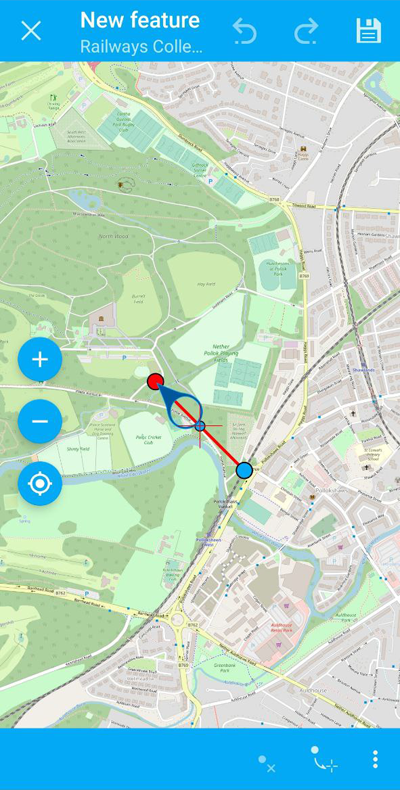
Fig. 1051. Line template#
To modify the shape of the line use the cursor to select its anchor points one at a time and drag them to the desired location.
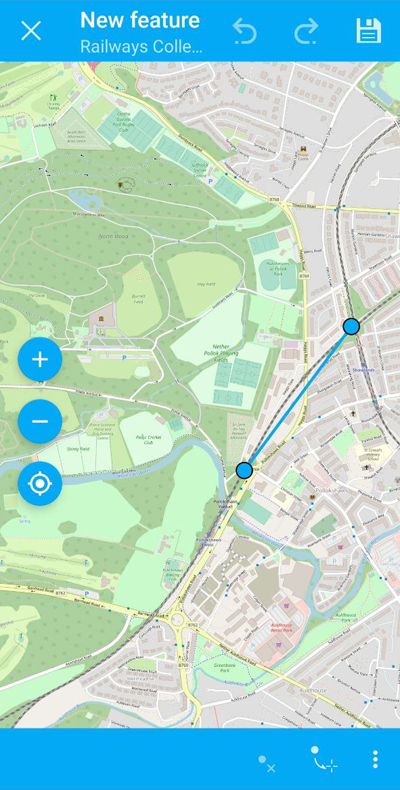
Fig. 1052. Modifying the shape of the line#
To safe the new line, press the floppy disk icon in the top right corner.
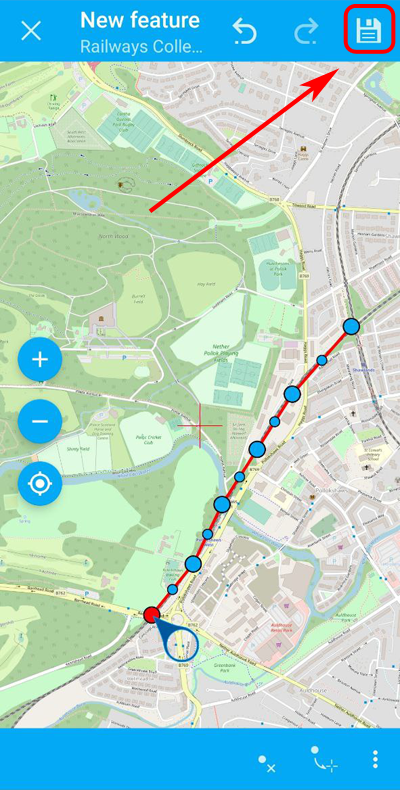
Fig. 1053. “Save” icon#
In the next screen enter the necessary attributes and tap the tick in the top panel to complete creating the line.
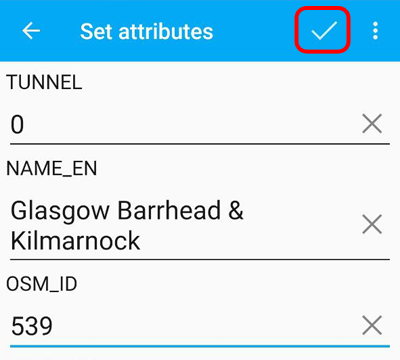
Fig. 1054. Completing the creation#
Newly created line will be visible in the app and on a Web Map in the Web GIS that has this layer added.
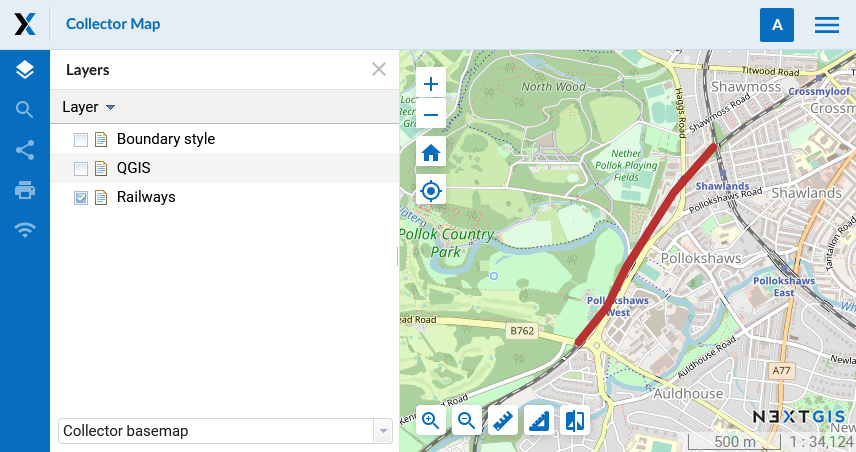
Fig. 1055. Newly created line on a map in Web GIS#
Note
Make sure the basemap is below the line layer and does not obscure it.
Editing lines#
To modify a line, tap it. It will be outlined in blue and two icons will appear to the right.
Top one - editing the shape of the line (select an apex with the cursor and drag it).
Bottom one - editing the attributes.
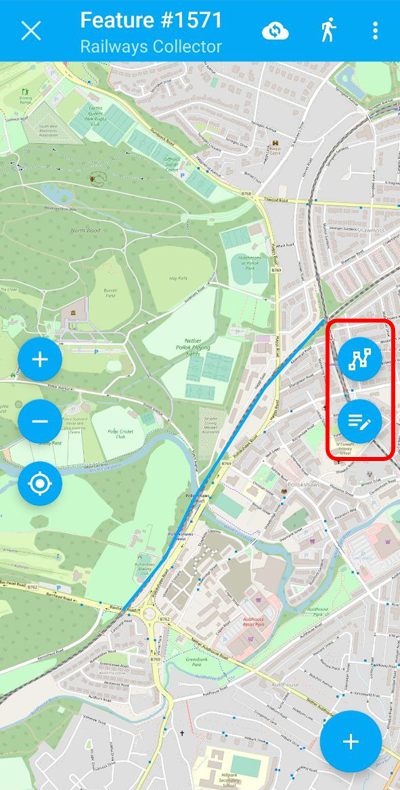
Fig. 1056. Editing a line#
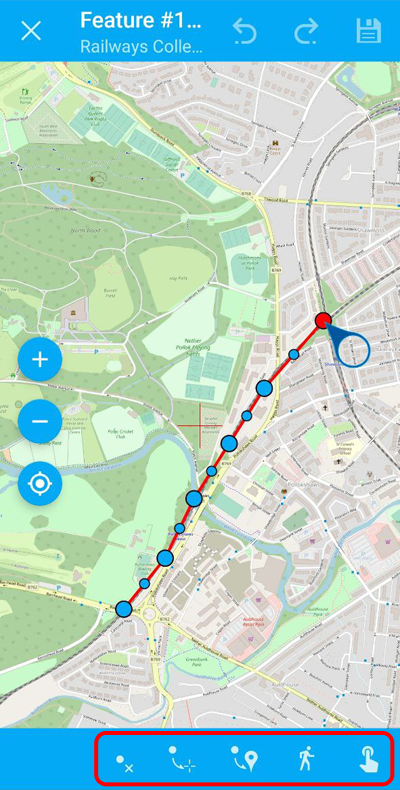
Fig. 1057. Line editing tools#
Add a polygon#
To add a polygon to one of the layers, first open the map and tap the plus icon. Then select a layer containing polygons.
Fig. 1058. “Add item” icon#
Select the layer to add a polygon to and the way to use for its creation - using map or GPS.
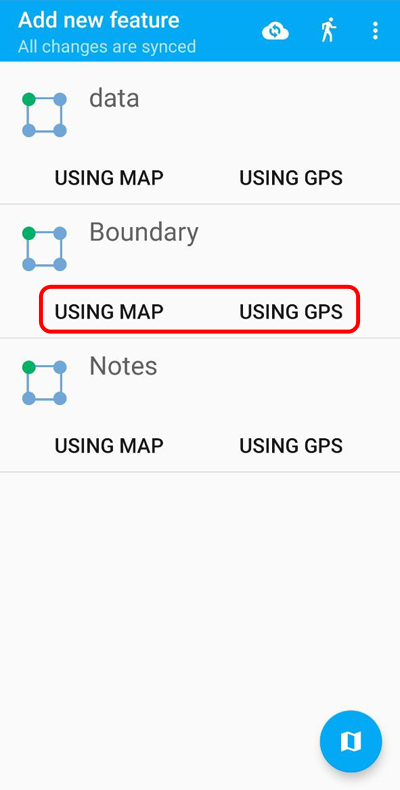
Fig. 1059. Selecting layer and way of adding a polygon#
You will be redirected to the map again. A triangle will appear with a cursor at its top left corner.
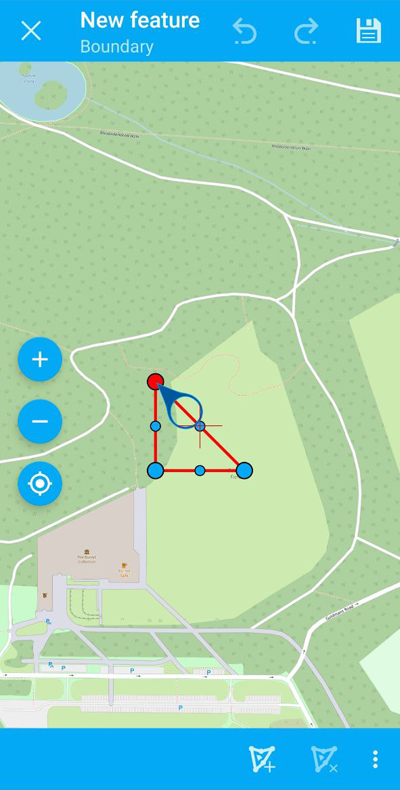
Fig. 1060. Polygon template#
To modify the shape of the polygon select one apex at a time with the cursor and drag it to the desired location.
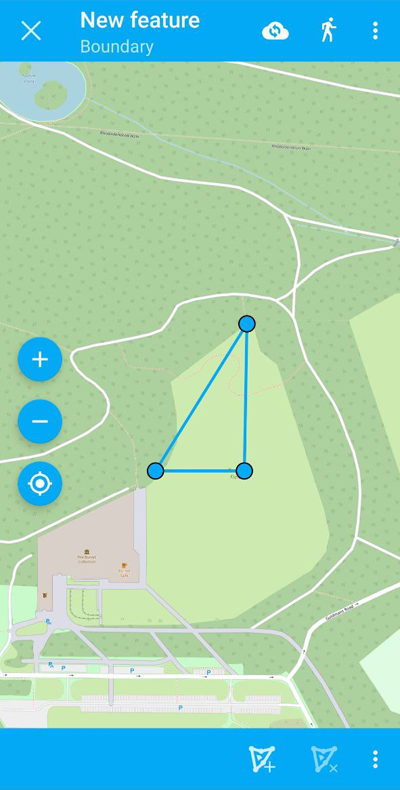
Fig. 1061. Modifying the shape of the polygon#
To safe the new polygon, press the floppy disk icon in the top right corner.
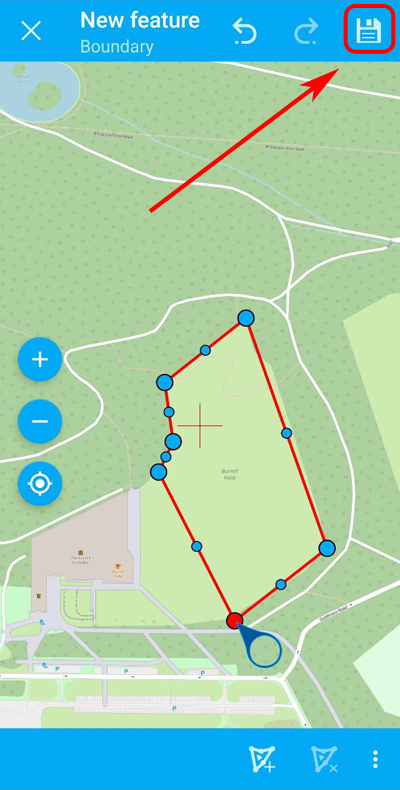
Fig. 1062. “Save” icon#
In the next screen enter the necessary attributes and tap the tick in the top panel to complete creating the polygon.
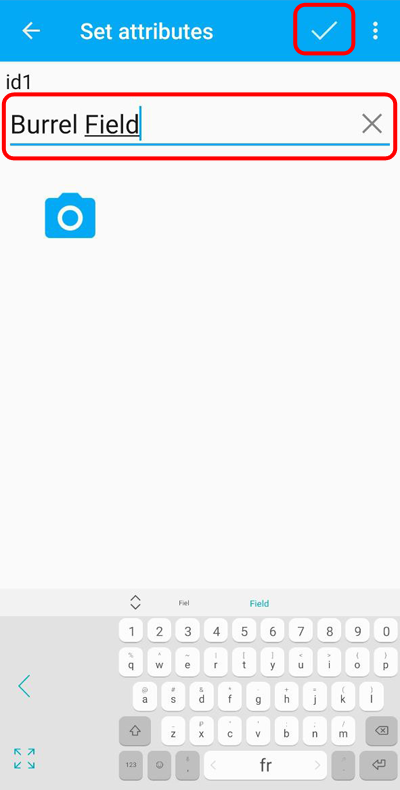
Fig. 1063. Completing the creation#
Newly created polygon will be visible in the app and on a Web Map in the Web GIS that has this layer added.

Fig. 1064. Newly created polygon on the map in the NextGIS Collector app#
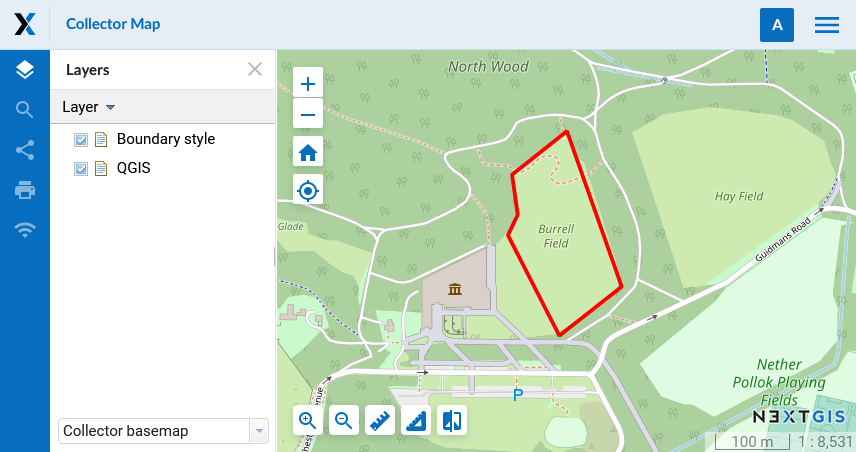
Fig. 1065. Newly created polygon on a map in Web GIS#
Note
Make sure the basemap is below the polygon layer and does not obscure it.
Editing polygons#
To modify a polygon, tap it. It will be outlined in blue and two icons will appear to the right.
Upper one - editing the shape of the polygon (select an apex with the cursor and drag it).
Lower one - editing the attributes.

Fig. 1066. Editing a polygon#
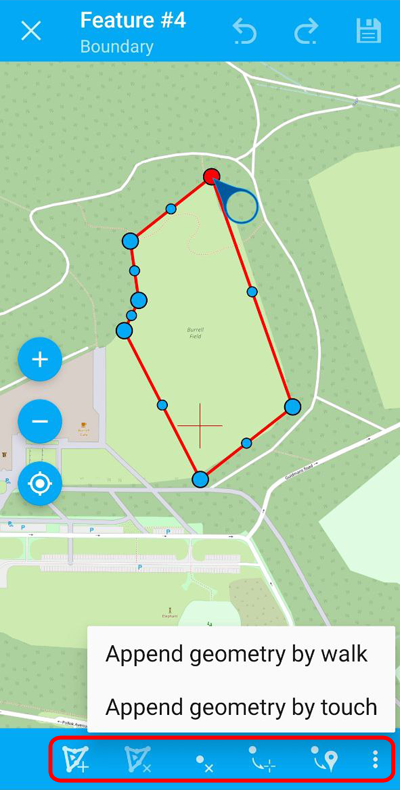
Fig. 1067. Polygon editing tools#
Zoom and current location#
The data collector has the ability to control the current scale of the map. To do this, on the left side of the map there are items for zooming in and out (+/-). In the same block, you can set the map extent by the current location of the device.
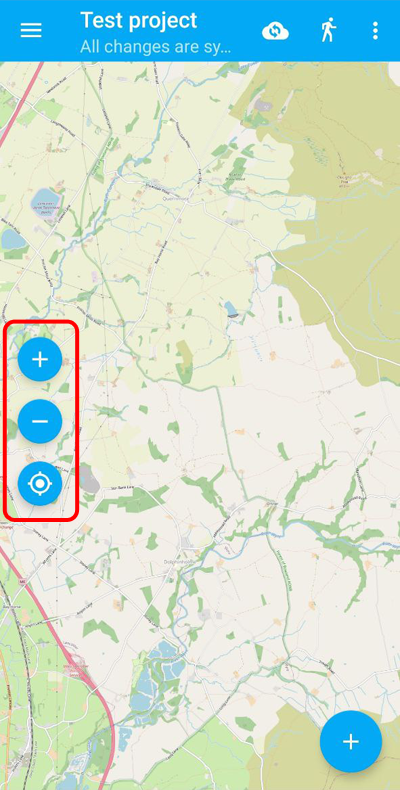
Fig. 1068. Zoom and current location controls#
Tracks#
NextGIS Collector allows you to record tracks. For each point of the track, the following information is recorded: date, time, speed (km/h), height (m), course (bearing i.e. the horizontal direction of travel of this device in the range between 0 and 360 counting clockwise from the North), number of satellites and HDOP.
The track control icon  is on the top panel.
Fig. 1069. Tracks icon#
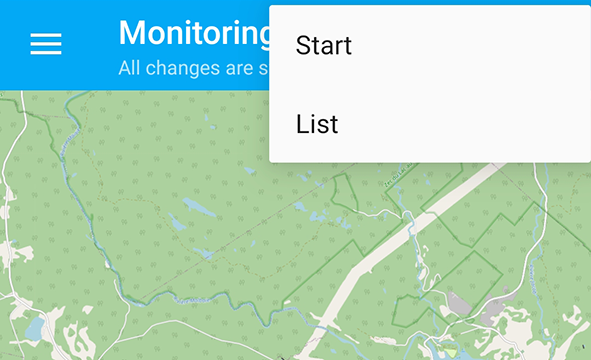
Fig. 1070. Starting track recording/track list#
To do this, the app must be given permission to write data in the background in the device settings.

Fig. 1071. Background geolocation request#
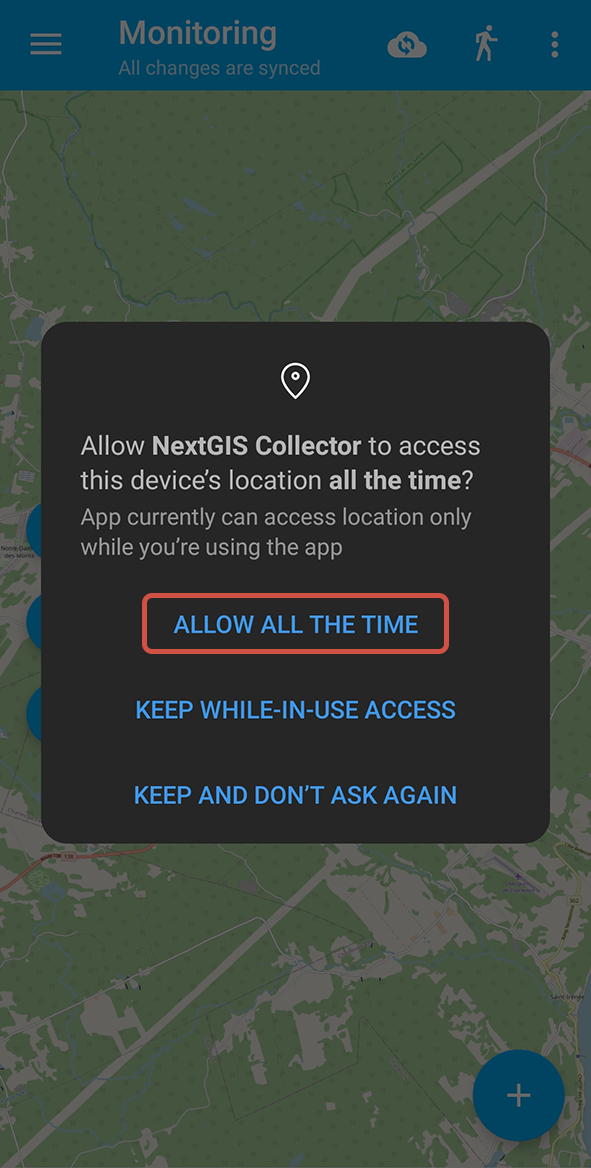
Fig. 1072. Allow location to be used in any (including background) mode#
User-recorded tracks can be shown / hidden, changed digital palette, exported or deleted.
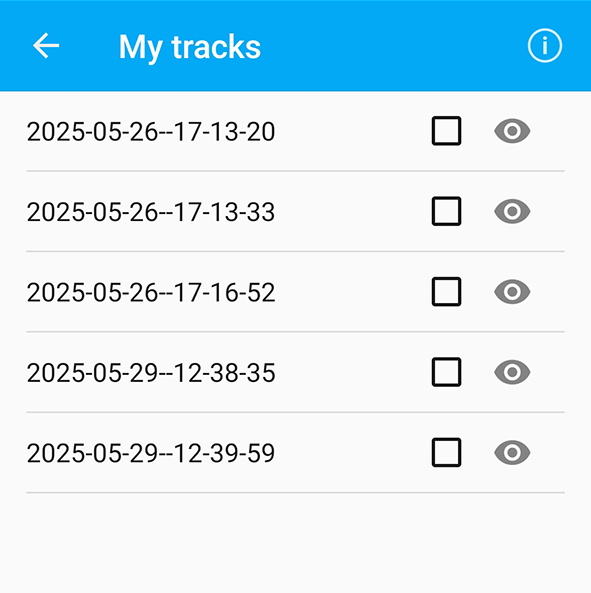
Fig. 1073. Recorded track list#
Tracks can also be viewed on a Web Map.
Synchronization#
To force synchronization of data with Web GIS, you can use the  icon on the top panel.
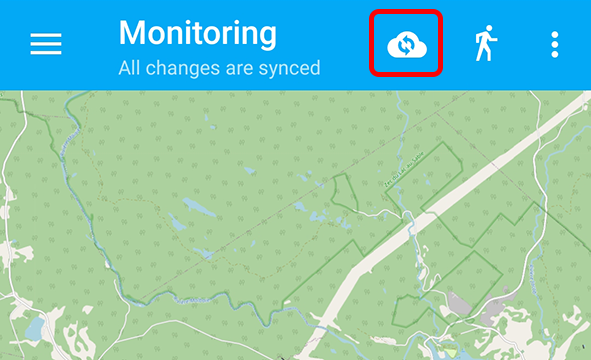
Fig. 1074. Synchronization#