1.6. Demo projects
These projects showcase the capabilities of NextGIS Web, allowing you to get acquainted with its features. If you’ve set up a Web GIS and wish to test the platform but don’t know where to begin, try out the demo projects.
To access demo projects go to the main page of your Web GIS and log in as the administrator. You can open the demo projects page in one of two ways:
From the actions pane on the right
Using the button below the list of Web GIS resources
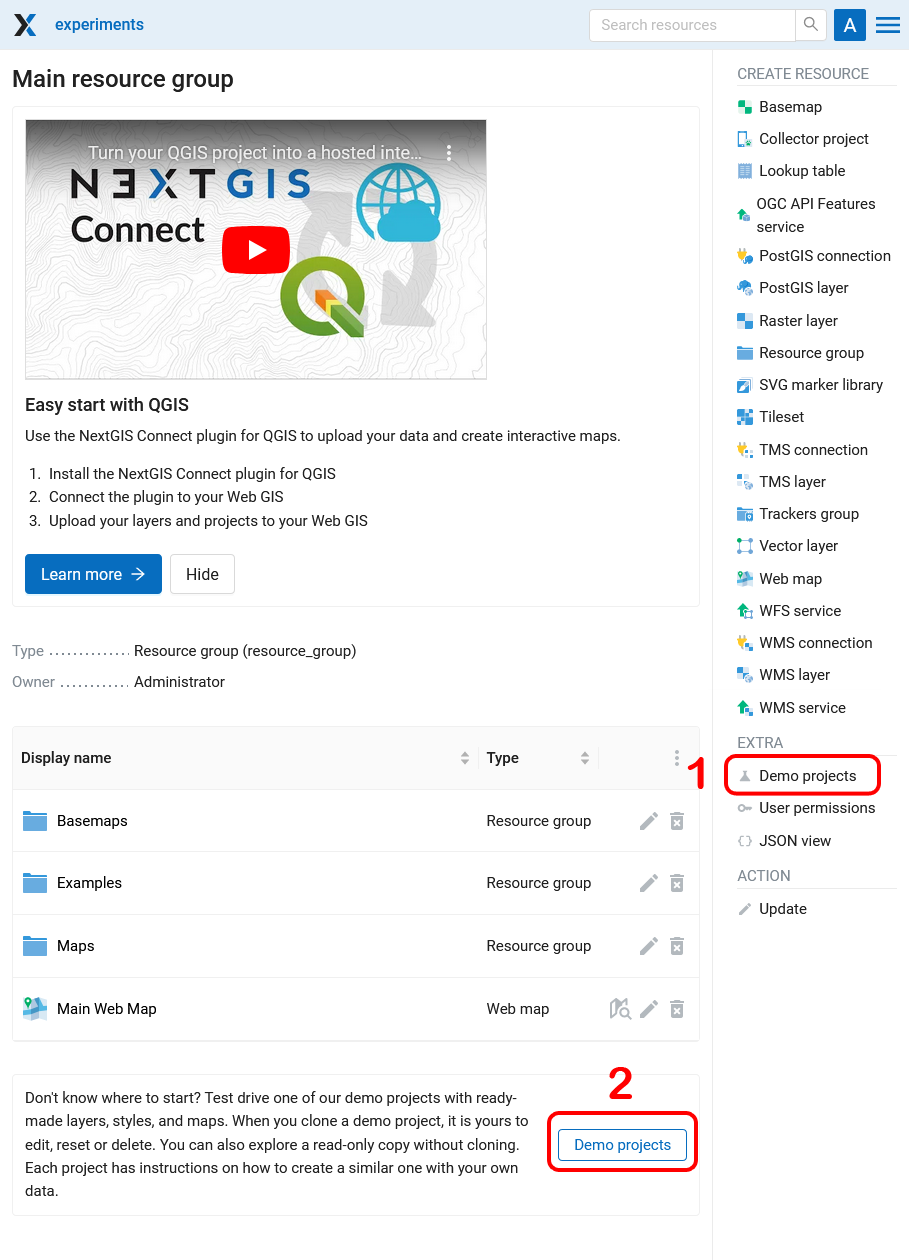
Pic. 1.22. Two ways to open demo projects
1.6.1. What you can do with demo projects
Every project has two buttons (see Pic. 1.23.):
Open as read-only
Clone for me
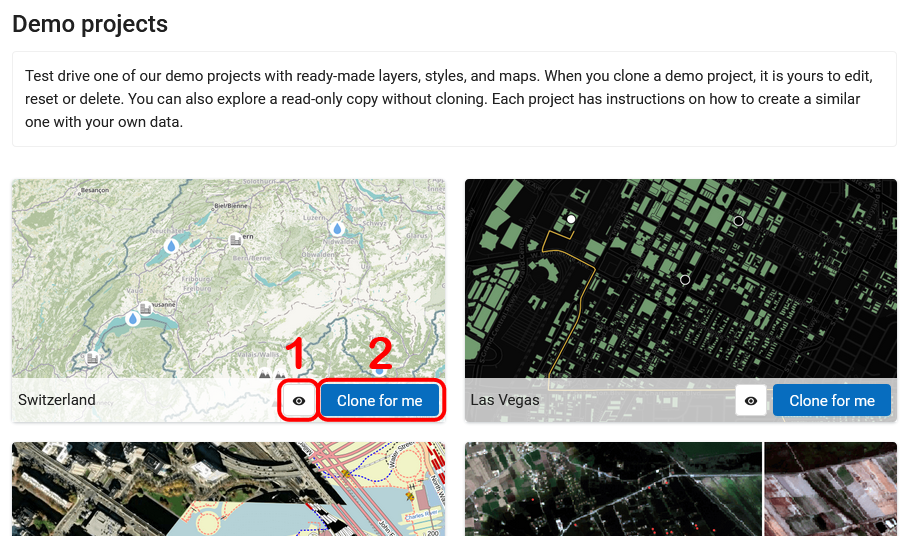
Pic. 1.23. Main page of the demo projects and action buttons
The projects include ready-made layers, styles, and maps. It demonstrates how various types of data are displayed in a Web GIS.
Click Clone for me to create a copy of the selected project in the main resource group of your Web GIS.
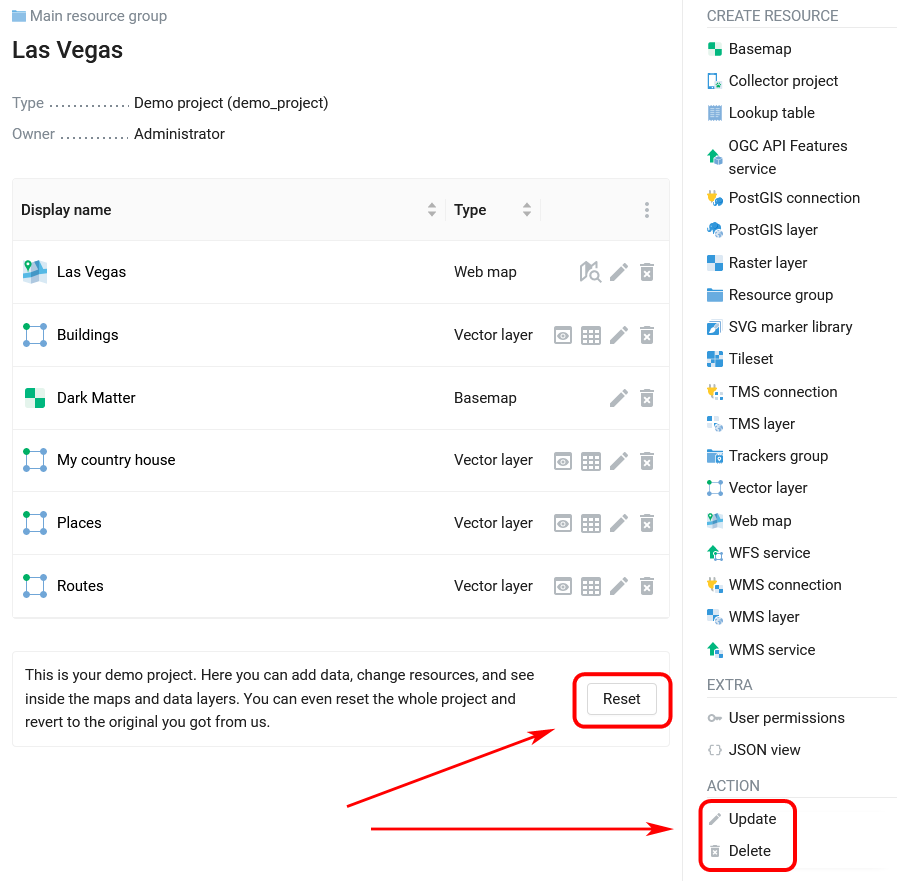
Pic. 1.24. Demo project cloned to Web GIS
When you clone a demo project, it is yours to edit, reset or delete (see Pic. 1.24.).
In the list of your Web GIS resources the folder of the cloned demo project is marked with a lab flask icon.
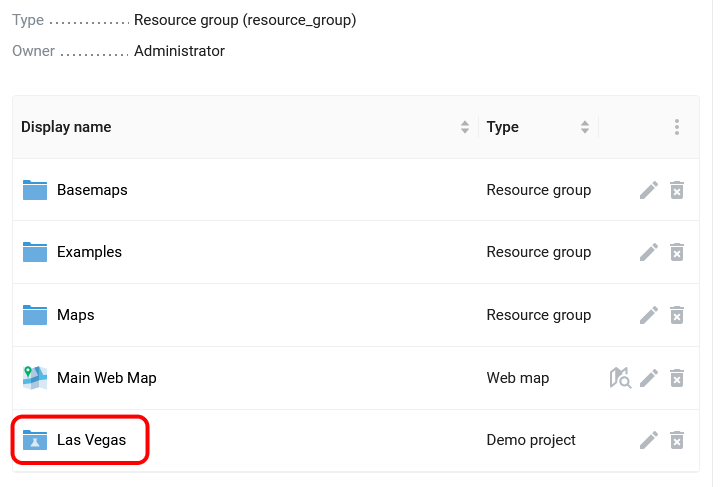
Pic. 1.25. Demo project in the list of resources