9.8. Exporting data
9.8.1. Exporting data in GeoJSON
To export data from NextGIS Mobile vector layer open Layers tree panel (item 1 in Pic. 9.3.). Then tap on the contextual menu icon next to the layer name (item 5 in Pic. 9.4.). This will open the contextual menu items as shown in item 6 in Pic. 9.4. There you need to select “Share”.
Android standard Share dialogue window with a list of available Share options will open as shown in Pic. 9.73..

Pic. 9.73. Share dialogue window.
After you select a share option, data in the selected layer will be recorded in GeoJSON format (coordinate system Web Mercator, EPSG:3857) and exported via the selected application. The name of GeoJSON file will be the same as the name of the exported layer.
Some of the share options (availability is dependent on the apps installed on your device):
You can send the file as an attachment via Gmail or different Email app.
You can upload the file to Google Drive/Dropbox/other cloud service and then share it with your colleagues.
You can send the file to another device via Bluetooth or SHAREit.
You can save the file on a memory card.
Warning
In many Android versions to save a file on the device memory card you need a file manager app (for example, ES Explorer or similar).
9.8.2. Exporting attachments
Each feature in vector layer can have one or more photos attached to it. Photos are stored separately as image files and added to archive file with layer data during the export. For each feature a separate attachments folder is generated in the archive, the name of the folder corresponds to feature ID.
Example:
(4:10000002.jpg,10000000.jpg,10000001.jpg,10000003.jpg)
Explanation:
4 photos are attached to a feature. These 4 photos are stored in the folder which name is similar to the feature ID.
9.8.3. Exporting tracks in GPX
To start exporting tracks first find “My Tracks” group in Layers tree panel. Then tap on contextual menu button as shown in Pic. 9.69. and select “List”.
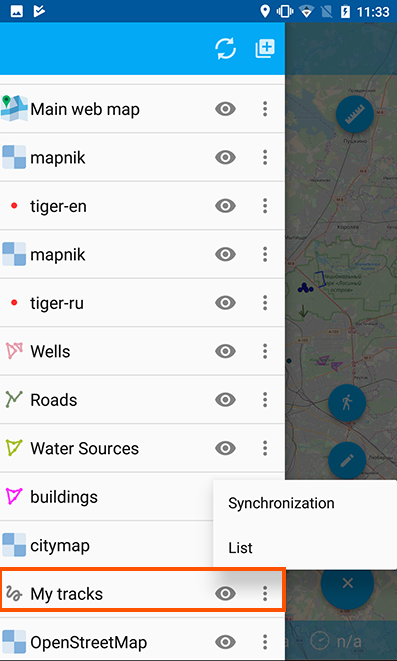
Pic. 9.74. “My tracks” in Layers tree panel.
This will open a list of recorded tracks as shown in Pic. 9.70.. If there are few tracks recorded in a day, tracks will be divided into sessions. If a track was recorded during few days, this track will be divided into parts corresonding to recording days.
Select a track you want to export by ticking the corresponding checkbox, and buttons in Top toolbar will become active as shown in Pic. 9.71.
To export the track, tap on Share button (see item 4 in Pic. 9.71.). It will open the same Share dialogue window as shown in Pic. 9.73. above.
After you select a share option, data in the selected track will be recorded in GPX format and exported via the selected application.